Desiccant Holder for Modular Cereal Box Drybox

Description
PDFDescription
Now version 1.1
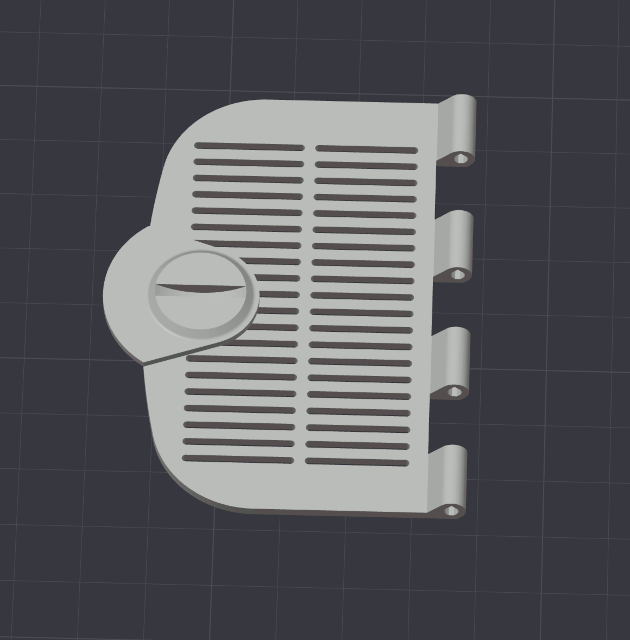
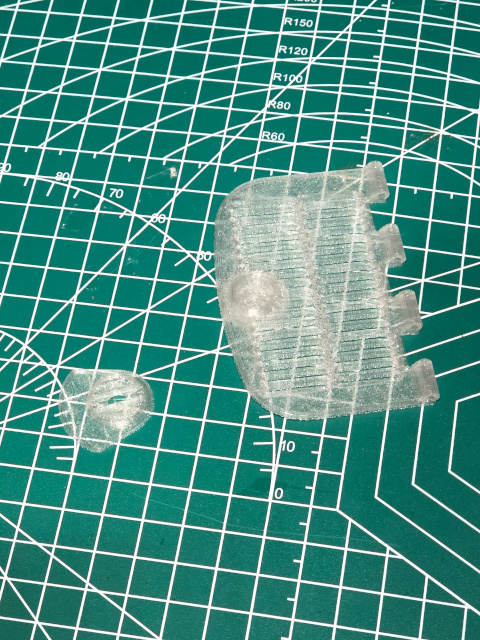
Here is a desiccant holder for my cereal box drybox. Slots in for refilling or replacement. The lid can be opened while in place, so no need to remove completely to empty and refill.
Since I might use my drybox sideways and/or upside down, I needed something that would contain the desiccant no matter how things are turned.
Updates
Update Jan 28, 2025
(took a little while, due to COVID… bleah!)
Created an update with a better latch. My cats have a bad habit of knocking things down (and also jumping from a loft bed over to the top of my enclosure) and the original latching is not the best when dropping the drybox a few feet.
Also took a little longer since my fairly new transparent filament started getting harder to work with, and instead of just dropping it in the filament dryer right away I decided to tune this to be more forgiving with the quality of filament.
- larger rotating latch to keep it secure
- split the print into two parts to use a piece of filament in the hinge instead of print-in-place hinge
- Added an inset to allow for easier closing of the door
- changed the curve of the body as it approaches the hinge to allow for cleaner printing
- tuned to minimize supports and thus print faster
- ensured the larger section prints well at 0.28mm layers
Printing
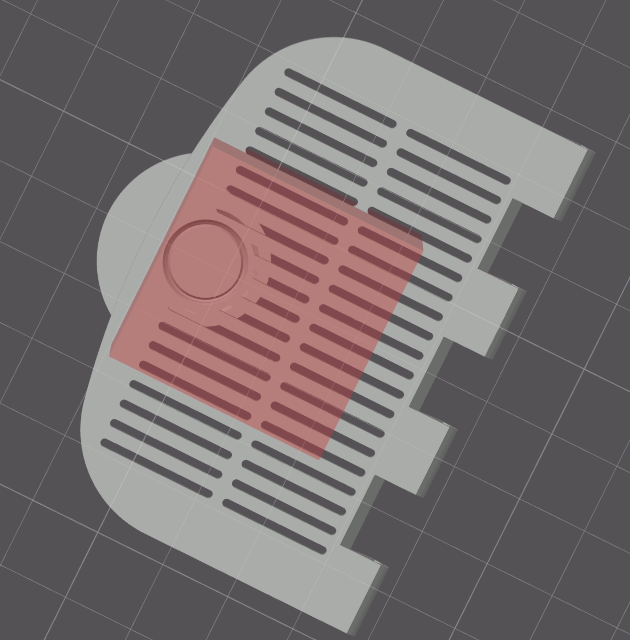
Should be printed with the opening and lid face down on the print bed, which will allow printing with minimal supports for the taller part. Printing with some sort of translucent filament is helpful, as it allows the current color of the desiccant to be easily visible.
I print the lid at 0.2mm layer height (for the best results with the print-in-place latch) and then the body separately at 0.28mm layer height to save a fair bit of time.
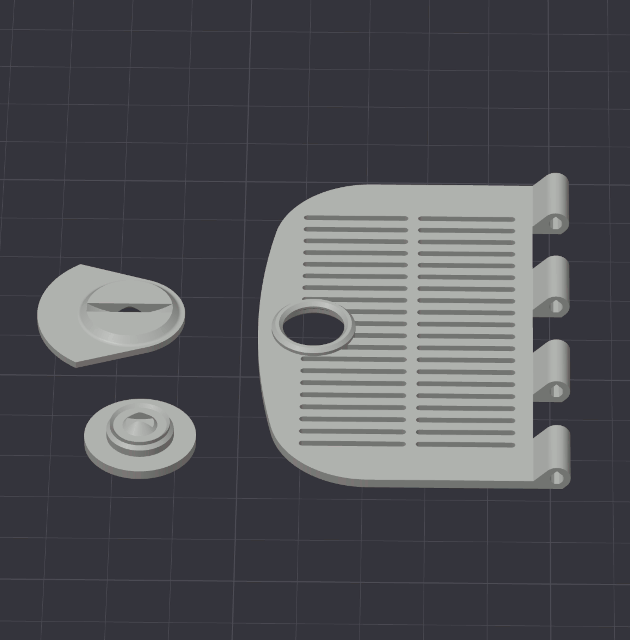
Chose either the lid with the print-in-place latch or the separated bare lid and latch in two pieces.
Print-in-place Lid
When printing the print-in-place (default) lid, it helps to add a support blocker to avoid a lot of tricky cleanup and/or failures. Unless your printer is really good at overhangs, you will want to allow the part of the latch that is sticking out away from the lid to have supports.
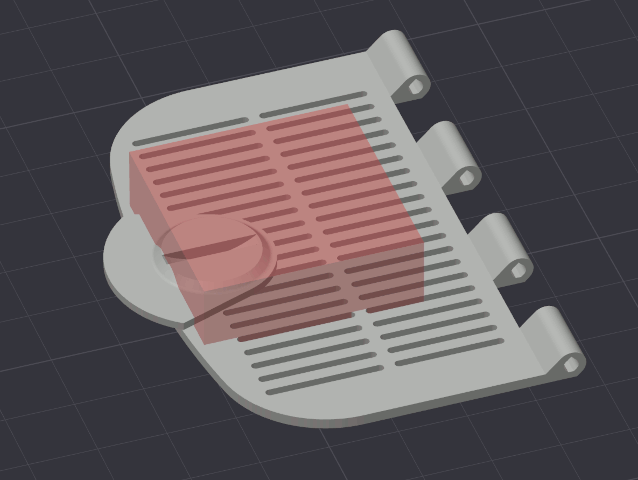
Ensure that the support blocking covers all of the circular separation between lid and latch that can be seen at the bottom.
Separated lid
The separated lid and bottom and top pieces for the latch can be printed together. Make sure that you have supports turned off otherwise you will end up with some tricky cleanup on the underside of the latch top.
Post-Print
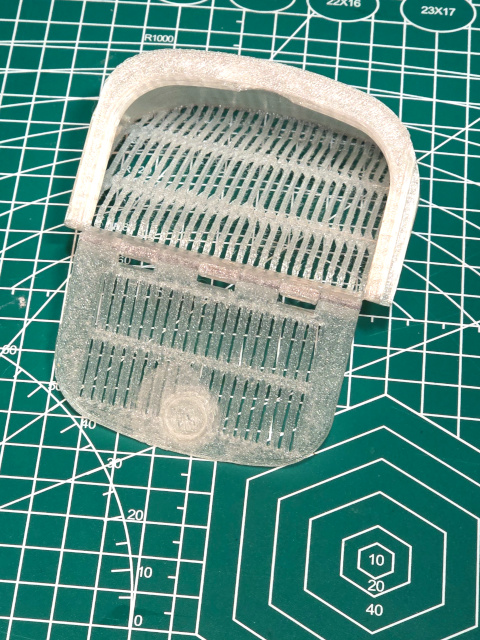
Separated Lid Assembly
With the lid oriented as it was during printing (with the hinge rising up and the rest flat down) insert the latch bottom from underneath and check that it rotates without too much friction. Smooth things if needed.
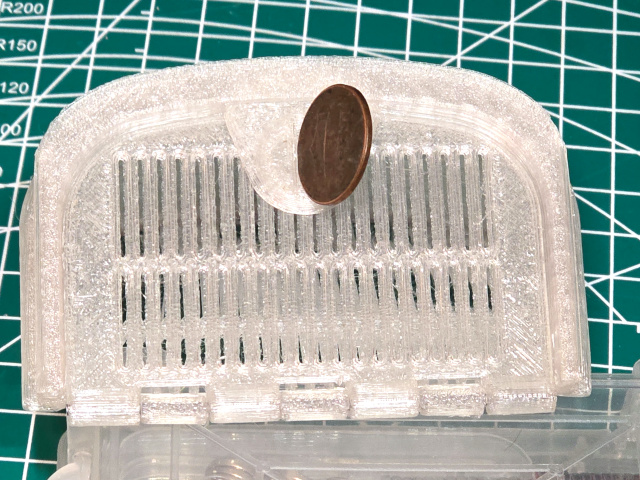
Then carefully put some superglue on the inner part of the exposed part of the latch bottom, being sure to avoid getting glue on the lid itself. Press down the top of the latch onto the glue. If needed, use a coin in the slot to get both pieces aligned.
Hold the top and bottom of the latch while the glue sets, rotating the lid a bit periodically to ensure the glue does not stick the latch to the lid.
Hinge Assembly
Check that filament can pass through both halves of the hinge without too much pressure. If needed a small drill / pin vise can be used to clean things out enough for the filament
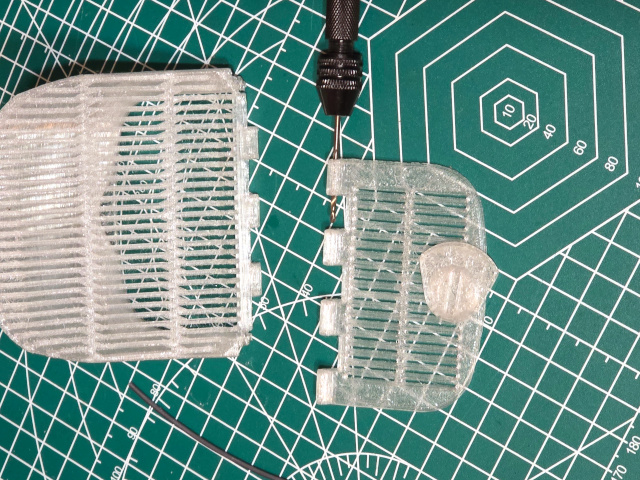
Carefully line up the two pieces, both in their printing orientations, and feed a piece of filament through until it reaches the far side. Trim both sides. For extra security you can put a drop of glue on one or both ends, or use a soldering iron to weld it in place.
Usage
To close, make sure the latch is turned towards the inner part of the lid and then rotate the lid closed until it seats
Using a coin, proper sized screwdriver, or some other tool, rotate the latch until it is engaged. The slot on the latch should be perpendicular to the end and the hinge.
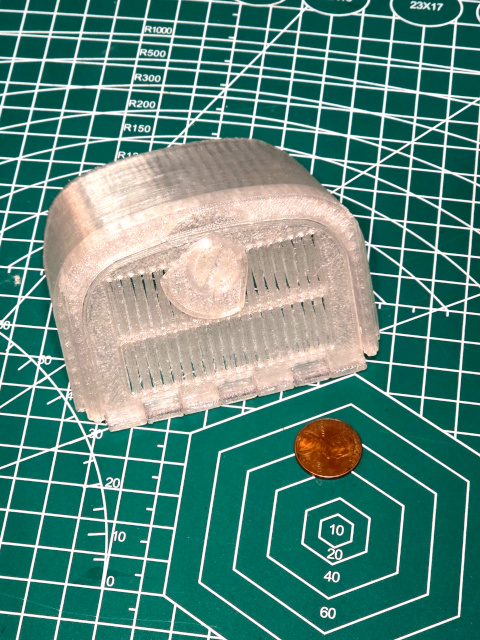
Now it should be ready to insert into the drybox, and hold up against most attacks from local house cats.
Tags
Model origin
The author marked this model as their own original creation.


