Cat Fidget
Description
PDFLesson Plan and Constraints:
The goal was to create a 3D printed object with multiple inner layers that could shake and move around without falling apart.
- All designs must be made from an initial shape, which is then offset numerous times, then extruded and cut to make a shape with smaller versions of the shape inside
- They must fit into a 8 cm by 8 cm square and the height must be 1 cm tall
- All cuts and extrudes must have a draft (this means angled inwards)
- Must not require ANY supports, (no supports).
- NO moving parts, (no gyroscopes, fidget spinners, etc.)
Summary & General Advice:
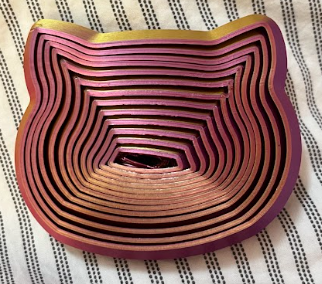
My object is a simplified version of a cat head that was offset 32 times to make 16 layers to shake. Since it is a fidget, I wanted it to be something that I liked, so I chose a cat because they are cool.
The offset tool plays a large role in this project, so I recommend being familiar with it before you start. I worked with a partner so we were able to help each other out as we went along.
Overview:
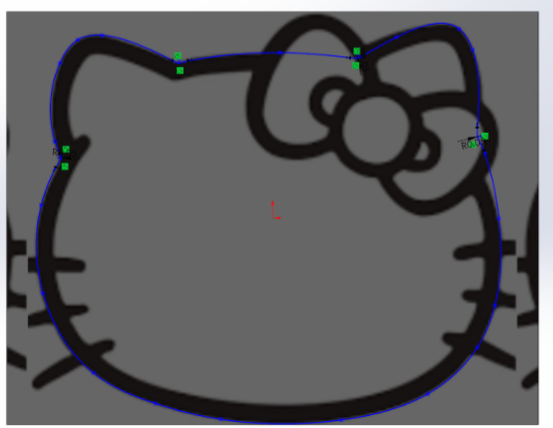
To start off I looked for a simple outline of a cat, and Hello Kitty happened to work well for this because of her simple shape.

Next, make a constraint box, mine was 7x8in. The next step was importing the image into solidworks to trace over to make the whole process more efficient. Adjust the image so that it fills the box. Using the arc tool, trace over the image until its fully outlined
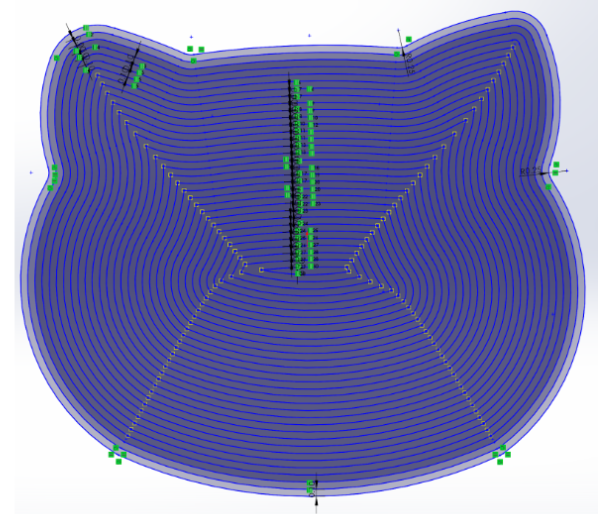
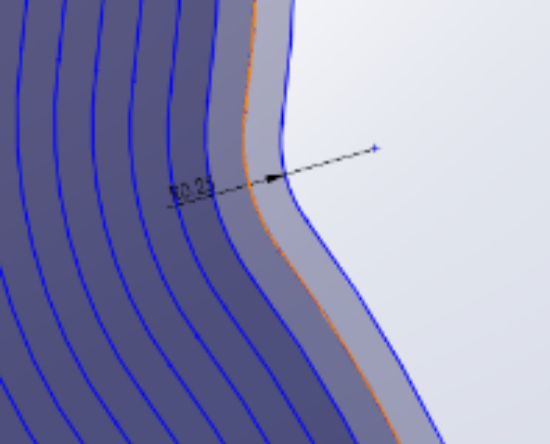
Then you’ll delete everything except for the sketch outline that you just made. Offset that outline, making sure to select reverse in the drop down menu on the left hand side, until it is filled. The distance between the offsets should be 0.1 cm. Once you are done, it should look like the image below.
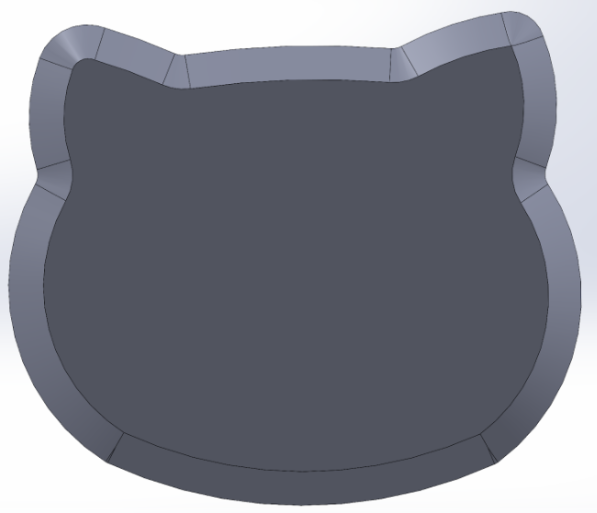
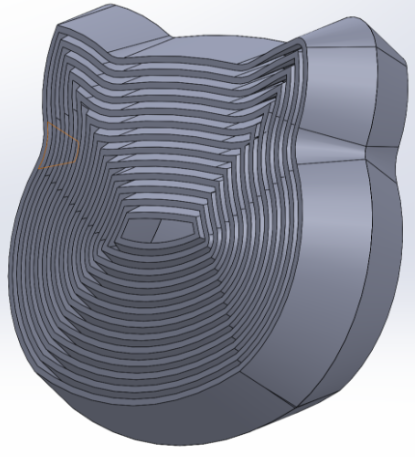
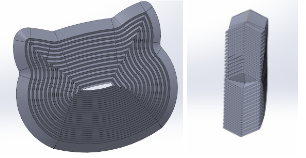
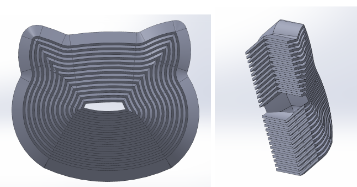
Save that sketch, and select the outermost offset. With that selected, in the features tab change hit boss extrude. I used 25 degrees for the angle, and 1 cm for the height. You can adjust these numbers as you like as long as all cuts and extrudes are the same. There is a chance though that it will not work if you mess with the numbers too much. It will look like the image below, do not worry, it’s supposed to look like that.
Now, you want to click the next line after the one you just extruded. You’ll have to manually turn on the sketch so that you can see it. Use the extrude cut tool, and make sure that you reverse the direction of it so that it’s cutting through the object. Also change “blind” on the left side of your screen, to “through all”. This angle will be set to 15 as well, and save.
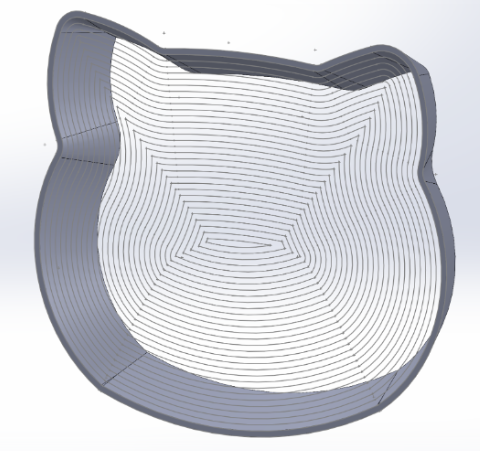
Now repeat these steps until you have the whole thing filled out. Once you’re finished it will end up looking like this. You want to be able to see through the center, it creates a better effect, and prints better.
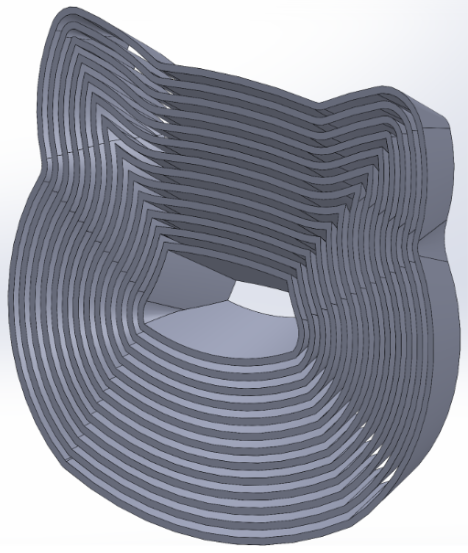
Then all you have to do is mirror this over the front plane and you’re done.
Design Choices:
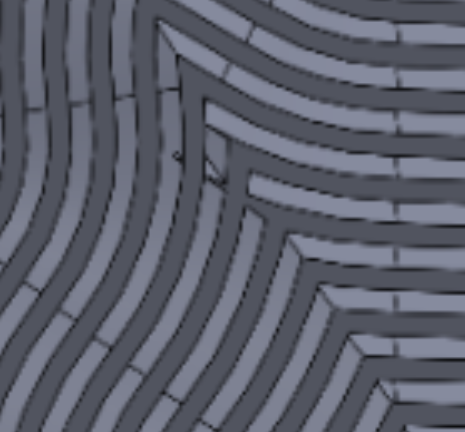
Before we set to work making the model, we made the decision to exclude the bow and whiskers the original outline we chose had. Without them, the fidget would look more symmetrical, though still recognizable. During the modeling in the software, we used fillets in some of the areas so there wouldn’t be any sharp corners as we offset the outline.
There was a strange jagged edge along a couple of the layers as we were extruding the offsets that we were not able to figure out how to remove. Since nothing could be done about the obtrusion, we printed it regardless, and it didn’t show up in the final product.
The center of the first print had leftover filament inside that was unable to be removed, so we decided to remove it and have it reprinted.
First:
Final:
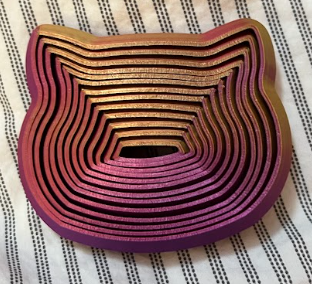
For the second print, we wanted to try and adjust the angles of the cut-extrudes so that the layers of the fidget would fall further. We were unable to as we had received error messages when doing so; we first tried 20 degrees, which didn’t work, and it was only until we tried 23 degrees that it allowed for the change. Since 23 degrees is a very miniscule change from the 25 degrees we had originally, we found there was no need to change the angles and left it as is.
Model origin
The author marked this model as their own original creation.


