Cyclone Shape Telescoping Fidget
Description
PDFProject Plan: This project aimed to create a telescoping fidget device by utilizing sketch offsets and drafted extrusions/cuts.
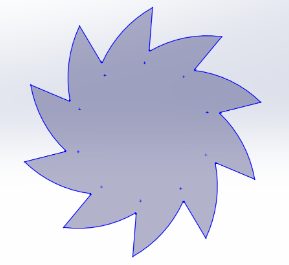
The sketch must have begun with a constraint box (center rectangle created from the origin). Our outermost outline must fit within an 8cm x 8cm box or equivalent area (64 cm2). Dimensions/Relations were expected to be efficient. Fully defining our entire sketch was not required, but it would have helped. The sketch must also contain zero error messages. We were expected to demonstrate efficient use of Offset Entities. I worked with Josy Wright on this project.
Inspirations: I was inspired to create a design based on a fairly simple shape, as I heard they performed better for the fidgeting feature. So, I searched for a variety of cool triangle shapes to base my design off of.
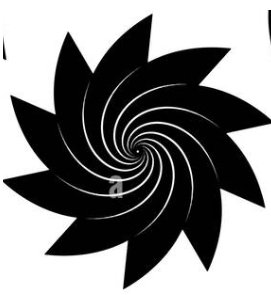
I stumbled upon this image and found it cool. I liked the outline, so I wanted to base my shape on that, as the inner cyclone part didn’t make sense for the telescoping part of the project.
Design Instructions:
- Create 2d sketch of the desired model
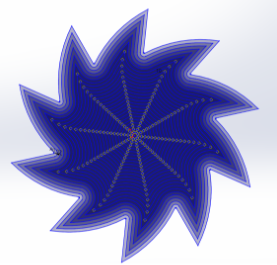
- Offset outer sketch chain as many times as possible inward (MUST HAVE EVEN NUMBER OF OFFSETS INCLUDING OG SKETCH AT THE END)
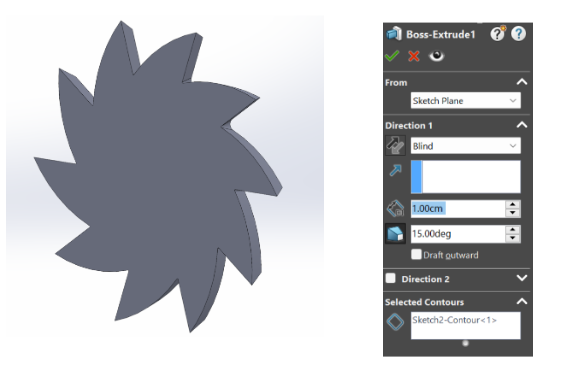
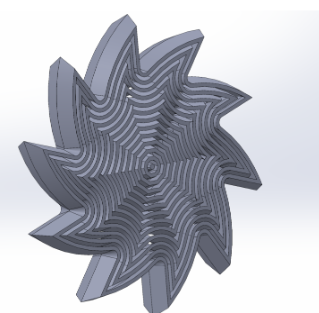
3. Boss extrude the outermost outline, by 1. cm and with a 15-degree draft, use these same dimensions for all cuts and extrudes. This extrusion should be “blind”
4. Cut extrude the next outline after the outermost outline. All cuts are “through all”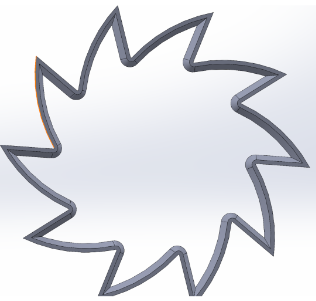
5. Then boss extrude the third outline. All of the boss extrudes from here on are “up to surface”, press on the extruded margin on the other side of the figure, for each face selection during the boss extrudes.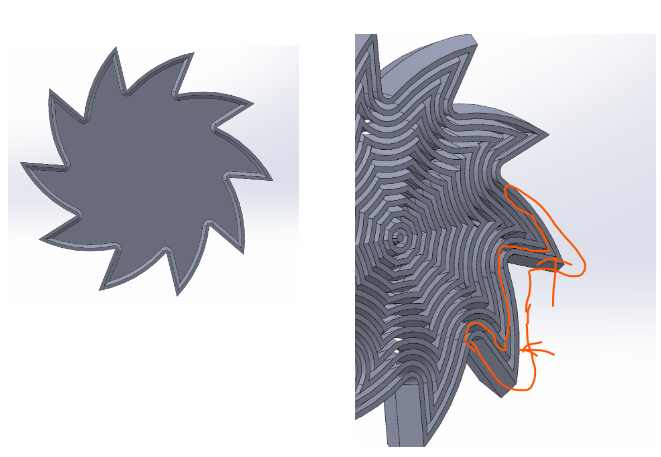
6. Then cut extrude the line after that.
7. Repeat this boss extrude/cut extrude pattern for the entire sketch until you can’t anymore, and so that there is an even number of lines.
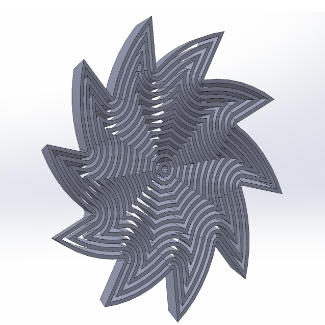
8. Then, mirror the plane the figure is sitting on.
9. Print! Ensure there are no errors going on.
Design Change 1:
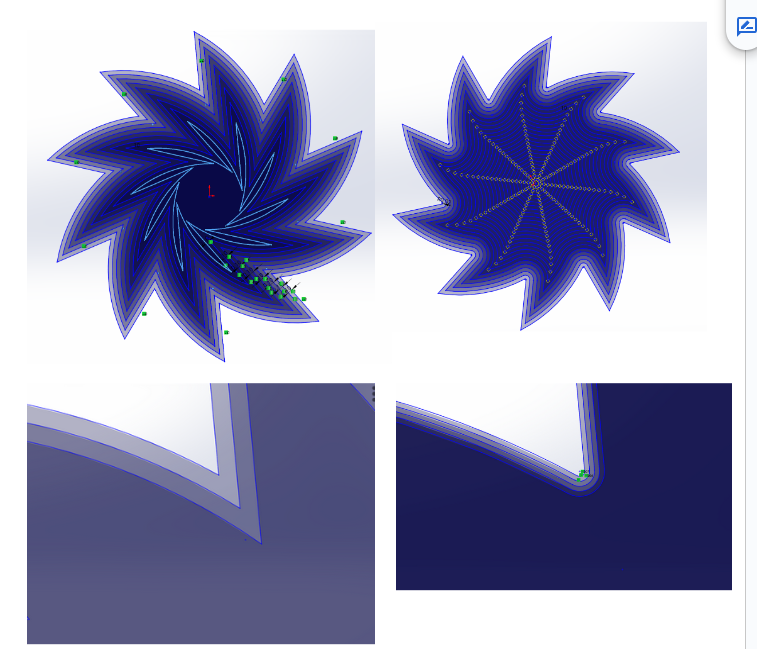
- Originally, I had planned on using sharp and pointy edges for the corners, however, this allowed for many fewer offsets to be done and caused complications fairly soon. To solve this, I rounded off the corners using the fillet tool and was able to fit many more offsets in a smaller area, and I could prevent those complications shown on the top left.
Design Change 2:
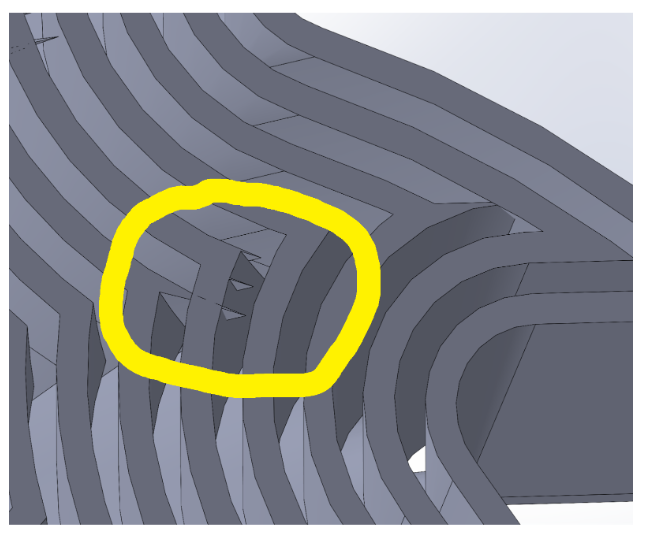
Throughout the creation process, many of these weird and unintentional shapes/errors were forming on my figure. This is likely due to the large amount of things going on in the software and is probably some sort of glitch. To fix this, it should be able to just go away through the 3mf file conversion.
Design Change 3:
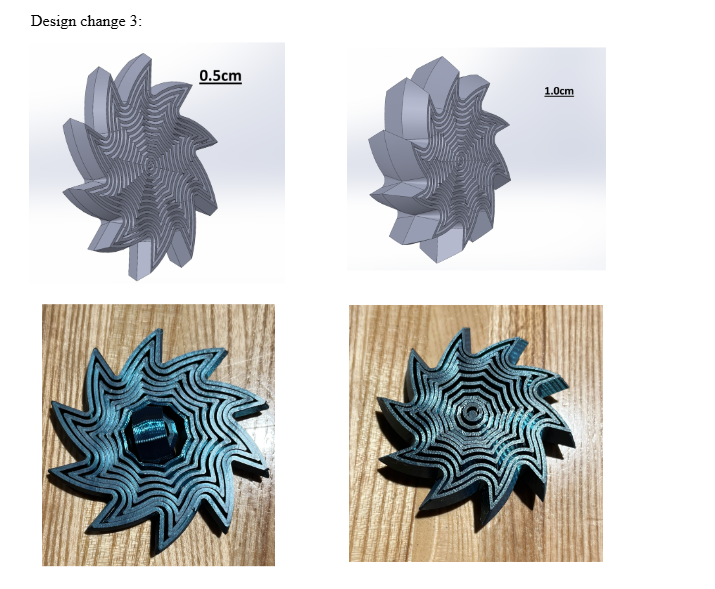
For the first print, I had planned for my boss extrusions to expand out 0.5cm, this is the thinner version of my figure. However, as shown in the image on the bottom left, some pieces were dislodged quite easily. To fix this, I changed my boss extrusions to expand out to 1cm, and this fixed all problems with dislodging as it kept all the pieces in place much more securely.
Model origin
The author marked this model as their own original creation.


