Simple and modular insect screen without size limits
Description
PDFOverview
WARNING: This frame is designed around the material features of ABS. ABS is known for having a massive flex, being temperature resistant and most importantly welding with acetone. If you want to use any other material you likely will fail. Feel free to prove me wrong, but do not blame me for wasting plastics.
This is the most simplistic insect screen frame for the cheapest screen available. I used the brand shown in the photos. It is a soft net and designed to be mounted with Velcro. As you can imaging the tape on the Velcro strip is not very good. Also the moisture gets into it, when the window is on an angle.
I looked up what is available on various sources and did not find any solution suitable for me. Beside spare parts for expensive commercial frames only some over engineered frames where available.
So I made my own very simplistic design. I don't say it is the best, but it works, is easy to print (if you know how to print ABS), does not need supports, can be extended to any size, can be removed within seconds without leaving a mark on the window frame and is easy to repair.
Simplicity is also the reason why I discarded using any connectors. With ABS and welding connectors are simply not needed and when for some reason the frame breaks there is no connector that will fix this. A splash of acetone will fix it for sure.
This frame is mend to be placed inside the window frame itself. European windows can be positioned in three ways. Beside being closed or opened using the normal side hinges, you can also open just the top section to some extend with bottom hinges. Standard frames have an air gab inside for inserting commercial produced frames, which are expensive and therefor more or less never used. Which keeps the price up.
This instruction and the build process may sound like a huge amount of work, but it is not. In fact you sit down for two minutes, weld some parts and done. The assembly part is best done intermittent. Since printing a single frame may take 20+ hours, print bars first. Then corners and spacers. Clips come last. That way you can process and weld the elements and determine what length you need to print, while printing.
Requirements
Beside around 300g of ABS per window you need an insect screen net. These are sold very cheap and usually come with a Velcro sticky tape. This tape is the main issue. Do to moisture it will loosen up over time. Especially if you need to remove and re-add the net frequently this is annoying work and sooner or later you start to fix the strip by using hot glue. This is no fun at all and takes ages.
The brand I used is shown in the pictures and came from a dollar store (Posten-Börse, LIDL). The box contains two nets of 1300x1500mm sold for a around 2,50 Euro. Even so the pack is cheap and the tape is crap, it works ok, until it doesn't. The net however is very nice and does its job very well. That is why this product is perfect to be used for the DIY frame here.
If you need a bigger net you probably can sew two nets together, but in that case you have to live with a vertical or horizontal seam.
In addition you may need two washers and a magnet depending on your window and the respective frame size. (see below in the mounting section)
Acetone welding
My frame solution needs to be glued from several parts available in different lengths to fit your window. Here in Germany old houses windows have slightly different dimensions, which makes a one fits all solution kinda tricky.
Since the area to glue is very small, I STRONGLY advice to print the frame from ABS material. That way you can simply weld the segments together using Acetone. The connection is as strong as the print itself once cured. If you break the frame in the future this will become handy as you can simply fix the broken area with a splash of acetone..
The key component here is ABS material because it can be welded. A flimsy looking frame made from at least 24 small parts? That cannot work? Wrong. The strength of ABS is its flex and the possibility to weld it. When done right the welded section is even stronger than a printed segment.
You need an old plastic bottle cap. Fill it up with acetone to around 3mm height. Food bottle caps will not react with the acetone. Now dip in the ends of the two prints and wiggle around for four to five seconds. Make the material soak in the acetone. Then quickly place the parts onto a flat surface and press them firmly together. A silicone soldering mat is perfect here. The frame connection will stick to it and keep the parts in position until the connection is cured. You can then simply remove the parts from the mate like you would do with sticky tape. A tiled floor will work too, but you may need to clean the tiles with acetone afterwards to get rid of the plastic residue.
Airflow will increase the base cure time on the outside rapidly and stabilize the elements so there is no need to hold or clamp them for hours. After around a minute the outer side of the prints will be welded. The inside takes far longer until the acetone is fully evaporated. Make sure to give it some time and glue other parts while waiting. If the parts are soft and gummiish after welding you did not wait long enough and you should re-weld the connection. When done right the connection is as rigid as the plastic itself.
I strongly suggest to wait at least two hours after welding. You can weld several sections at the same time, so the entire building process won't take too long.
Other plastics and specialized methods to glue those may work here too, but I designed and tested this model just using acetone and ABS. Remember the warning above!
Segments to print and framing
The frame can be printed on any size printer. On a smaller print bed it just takes longer as you need more smaller segments to print and assemble. I printed all elements with three walls and 42% infill. The infill is probably at little on the high side, but it worked and I did not want to experiment just to get weaker components.
This project only has three base objects to print. The corner piece, which you of course need four per window, the bar type object, which is available in various lengths so you can combine any number required to get the frame up to your window frame size. Last but not least there is the clip type object, which should be printed without support. It, as the name suggests, clips the fabric onto the window frame. I suggest using at least four clips per frame side. The longer the frame the more clips are required to get a firm and closed insect screen.
I usually printed six bars or eight clips at the same time to minimize the fallout, when a print fails. It did not happen for me, but if you dont have much experience with ABS and long components I suggest to start printing only one and see how that goes. A failing 5 hour print is painful. I used a 10mm brim on the outside, which adds a little waste material and some minor post production to the mix, but ensures to not end up with a set of unusable bend bars. Also keep in mind that the frame will not be seen once mounted as it is not a decorative item.
The entire frame system depends on an overall segment based design. I chose 20mm as base dimension. Depending on the used segments a bar can be a multiple of this value. I included the FreeCAD source file, so you can simply change the dimensions to whatever you need.
To calculate the width required you need the number of segments. If the center of the window gap is 1140mm wide you need. 1140mm/20mm sections. The two corner pieces together are 9 segments in size. The rest needs to be printed by using the various bars until you get to length. Test-fit before welding and you are fine.
Never the less I included 5mm, 10mm and 15mm spacers, which can be used to fine tune the frame size. Do NOT use them next to the corner pieces as the net mounting clips fail when spacers are used as you break the hole pattern and the net fabric needs to be fixated at the corners. Place those spacers somewhere in the middle of the frame if needed. I printed these spacers in a different color and used them as top-marker. So when getting the frames from storage you know which side is the top, which is important if the window is not square. Frame with the black segment to the top and it will fit.
I also suggest to start at the corners anyway. As you can see on the pictures in the first step I welded sixteen 200mm parts together in group of two. As the next step I added one of the resulting eight 400mm strips to each end of a corner piece. This way the entire build stays manageable on a table. This ends when you need to weld the four center parts of the frame, which I did on the floor. Unless you have a huge workspace there comes a point where you need to use the floor anyway.
When having the four corner pieces make a test fit at the bottom of your window to estimate the missing length for bottom and top and then weld them in.
Afterwards place the top and bottom part into your window frame and estimate the amount of length required to finish the vertical frame. I suggest to use some packaging tape to fixate the upper part temporarily within the top frame.
Once your frame is full “glued” together you can to a final test fit. This is also a good opportunity to learn on how to insert and remove the frame and also to loose the fear of breaking it during the process. It will not happen unless you have a giant window and therefor a giant and heavy frame or a weld wasn't done properly. My Frames are all around 1270x1300mm and there was not a single issue when handling them around. I printed three frames by now and none failed.
Netting up the frame
Time to add the insect net fabric and create the screen itself.
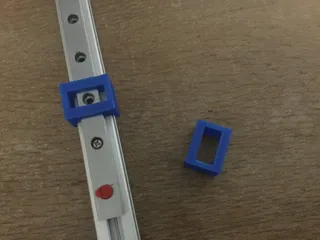
The third main part included in this project is a clip, which is NOT meant to connect the bars and corner pieces. It also should NOT be welded on. This clip element just is for fixating the fabric on the newly build frame.
The net needs to be wrapped around the frame and the clips slides from the outside over net and bar. This way you can flatten the net and fixate it onto the frame like a trampoline. Just make sure the small pegs within the clip align with the frame, when sliding them over the fabric.
It is not required to print as many clip sections as bars to fill all holes. The frame will reside inside the window frame, so it will be invisible. However. It for sure will strengthen the frame a little, when using more clips. The additional pegs will also provided additional grip onto the net. Simply use as many clips as you need or wish. The corners need clips for sure, so eight clips is minimum per insect screen.
If the net gets damaged over the years or picked by stupid birds you can un-clip and replace it without reprinting the frame or the clips.
You should mark the center top of the net. The brand I used has a more dense 10mm area on one side, which I used as top. The marking is very visible there. Do the same with the frame and mark the center. Clip all clips required on the top and when the net is fixed, continue with the sides towards the bottom. Keep in mind that the screen may need a little flex, when the window gets closed. Also ensure the fabric is covering all holes of the frame when adding the clip. The pegs inside the clip will fixate the net and also prevent the clip from getting loose again.
In my experience it is the easiest to put the net flat on the floor and place the frame on-top using the center alignment markings as reference. Now simply wrap around the top and work downwards the sides. Last step is to finish up the bottom frame and cut the fabric if required.
The net I had was a little short on the left and right side (1300mm for a 1270mm window), so I needed a few more clips to convince it to stay on the frame and not pull to the center and create small holes next to the frame, where insects could slip through. The fabric therefor also needed a little more stretching.
Congratulations, job done.
The result should be a flexible square trampoline style net. The frame remains flexible and still has a certain wobble, which may vary depending on the number of clips you used. Just insert it into the window frame as you practiced on your last test fit run.
Mounting the frame inside a frame
Even so the frame may reside firmly a fixed in position, it may be pushed towards the inside by a gust of wind, when the window is in angled ventilation mode. Closing afterwards may break the insect frame, and you cannot easy reposition it without opening. To open the window, you need to close it first, which breaks the insect frame. You get the problem.
To prevent the inserted frame from tilting it is enough to simply attach the two top corners to the window.
This can be done by using Velcro pads or the crappy tape which came with the net just in the top corners.
Another way is using hot glue and M10 washers inside the window frames top corners and to the same with a neodymium magnet onto each top corner of the insect frame.
In my case I setup the length so it barely fits into the window frame. After flexing it into the window frame it pushes itself from the inside and the sides of the insect screen are slightly formed like a bow, so it pushes constantly to the sides and keeps it firmly pressed in. Inserting is a little harder, as you need to flex it more to get it into the window frame, but no additional mount is required.
Remember: If the end result is not fitting or too loose for some reason. Just cut the frame in the middle - preferable where you added spacer block and thereby avoiding to break the hole pattern -, flatten the cut area and weld in an additional or different spacer in between. Problem solved. There is NO need to reprint the whole thing. ABS is great! That is why I love it! Even works for Prototyping on the final product.
Summery and last words
These instructions and the entire assembly process may sound like a huge amount of work, but it is not. In fact you sit down for two minutes, weld some parts and done. The assembly part is best done intermittent.
Since printing a single frame may take 20+ hours, print bars first. Start welding sections of the frame while printing the corners weld them to the already welded sections while printing spacers. Clips for the fabric mount come last.
That way you can process and weld the elements and determine what length you need to print, while printing.
The entire process is more an "oh, print is done and needs a restart and I can weld a few more elements." The curing time is small compared to the print times. Without printing and curing the welds building a frame takes about 30 minutes. The hours in between can be used for fun stuff.
Do not waste time waiting. Multitask is the way to go. It does not matter if the frame takes two days or a week to be finished, when the total time you spend building it just remains 30 minutes.
Happy Printing!
PS. I will add more images, while adding more frames to my windows, if something interesting needs to be shown. As you can see I had a black prototype, just to make the images better. All later frames where printed in Noyes White ABS.
PPS: If there are any questions, suggestions or you need a special element size and don't want to deal with FreeCAD, let me know.
Tags
Model origin
The author marked this model as their own original creation.


