Toyota Tacoma Under-Seat Accessory Panel

A seat-mounted panel for your connectors or accessories.
5
9
0
385
updated October 21, 2024
Description
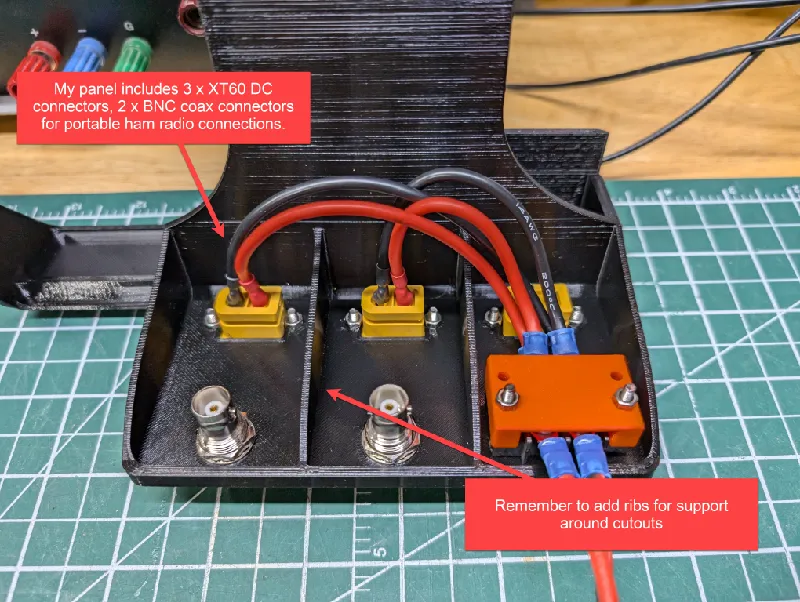
PDFThis panel mounts under your for connectors or whatever (I used 3 x XT60 DC connectors and 2 x BNC Coax connectors for portable HAM radio). Fits my Gen 3 Tacoma Sport passenger seat with no power controls. You can try on other seat configurations (or the driver seat) and let me know if it worked.
Includes the Fusion 360 archive, a blank panel, and an optional part with pre-arranged cutouts for my radio setup.
Printing Instructions
- Open the Fusion 360 archive file or the blank STL file and add your connector cutouts. Observe the sketch showing the area obstructed by the chair slider lever. You can still have connectors behind this, but the cable will need to bend away from the slider - avoid this area if you can.

- After adding cutouts, remember to add ribs to support the panel so it doesn't flex as much when you plug/unplug:
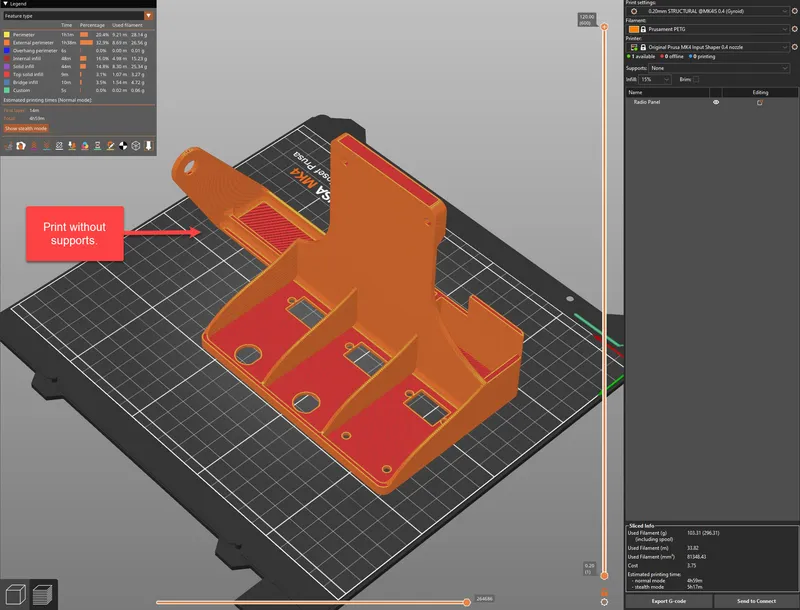
- Print with in PETG/ABS or other heat resistant filament. No supports, as per below:
Installation Instructions:
- Set the seat in the middle of the tracks and fold it fully forward. Remove all four (4) seat bolts.
- Tip #1: Tilt the seat back, exposing the underside connectors. Undo all connectors.
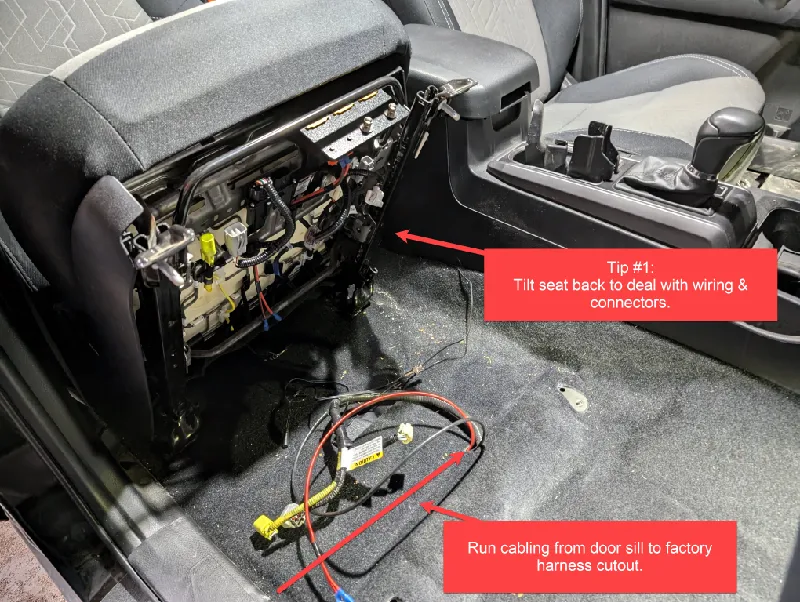
- Tip #2: The main harness is taped to a clip under the seat – this clip is hard to pop out. Simply cut the tape with a knife, and ty-rap it next time – much easier.

- Tip #1: Tilt the seat back, exposing the underside connectors. Undo all connectors.
- It's easiest to remove the seat from the truck, but you can leave it in too. Arrange the part into position, removing one (1) M8 Torx (T40) – you'll see which one gets removed and reinstalled. The panel lines up with two (2) empty holes under the seat – use #8 x ¾" screws with a nut on the back (or similar sized machine screw). Tighten down the two (2) #8 screws, and the one (1) M8 Torx bolt.
- Reinstall the seat/cables. Test your cable routing to make sure there's ample cable slack for the seat to roll forwards/backwards.
(Optional) My Pre-Cutout Radio Panel
- The parts marked (optional) are for my radio panel which I have wired to battery power with two (2) BNC connectors routed to external antenna connectors. If you want to use my radio panel, here's the material you'll need:
Tags
Model origin
The author marked this model as their own original creation.


