Omnipanels - Square

Description
PDFTLDR: Just print the A1-panels in the A-B-C folder, as this is the most modular panel. Add B and C panels to the surface of the structure to increase strength. If these panels are too tight for assembly, print the L-B-C panels (L stands for 'Loose').
System Overview
The latest and (probably) final version of the Omnipanels square. Inspired by Polypanels, produced by Devin Montes back in 2019, I have gradually developed Omnipanels as an open 3D printed construction system.
Key Features:
- Highly modular, can be built into a grid of any shape and size. More standard shapes e.g. triangle are in the pipeline.
- Many mechanical and moving parts have been designed for the system: gears, wheels etc. and will gradually increase over time. Some of the basic components have already been designed.
- Theoretically compatible with the excellent Multiboard system by “Keep Making” (and other systems) as both use a 50mm pitch for the grid system. Fully compatible with Multibin Inserts, see image below (also see the remixed versions of the previous Omnipanels by “Paul Corbett”).
- Designed in FreeCAD, STEP files and the CAD files will be released for custom modification and designs. The CAD files are parametric, allowing adjustment of various parameters, including clearances for the snap connectors to work with different printers.
- A base for other systems in development, including Omni-Tiles, allowing decorative tiles to be clad over Omnipanel structures.
Design Aim
The Omnipanel square can be used to build grid structures in any size and shape. This forms the base for many objects and designs. The core aim of the system is a construction kit similar to Lego Technic or K'nex, but designed from the outset for 3D printing and open for modification (I will release the FreeCAD files soon). I have already designed some of the basic parts: gears, wheels, triangle panels etc. and will release them in the coming weeks.

Building with Omnipanels
Omnipanels join together using connectors. There are two main types of connector:
- Standard connector - The connector type with with more ‘fingers’. Standard connectors clip to other standard connectors (as shown below) or internal connectors:

- Internal connector - The connector type with only three ‘fingers’, as shown above. Internal connectors cannot join to other internal connectors, only standard connectors.
Up to four connectors can be joined together at an edge (2 standard and 2 internal). This allows Omnipanels to be built into grid structures in any size and shape. The more connectors added at an edge, the stronger the joint becomes.
A grid system of any shape and size can be built with just the 'A-Panel'. But stronger structures can be made with the A, B and C panels (shown from left to right below):
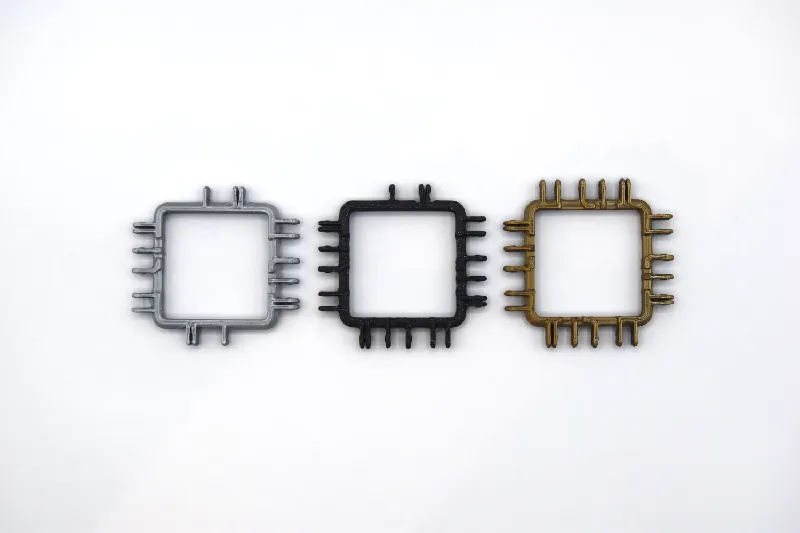
Note: D, E, and F panels are also included (covering every possible combination of connectors on a square panel), but are not neccessary for building grid structures, just the A-Panel alone is all you need to start building.
To build a grid of any shape and size, simply follow two simple rules:
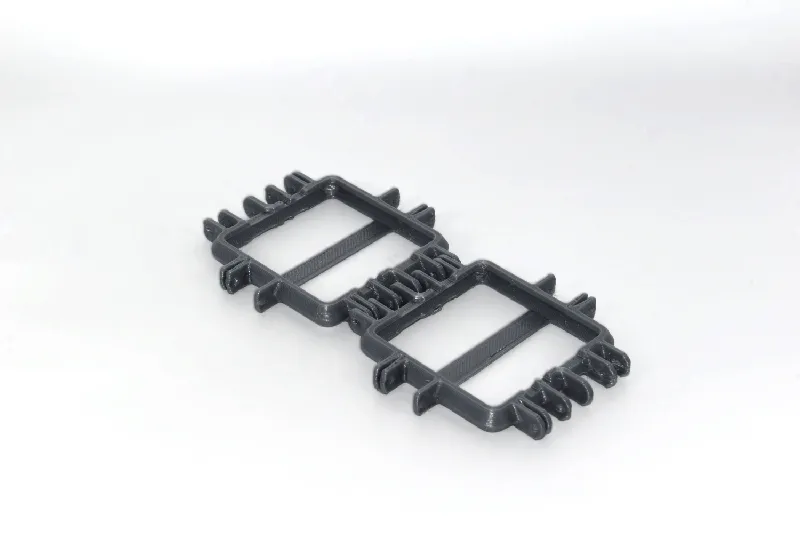
RULE 1. To attach two panels in line, use the same connector type and orientation:
RULE 2. To attach two panels at right angles, use different connector types:
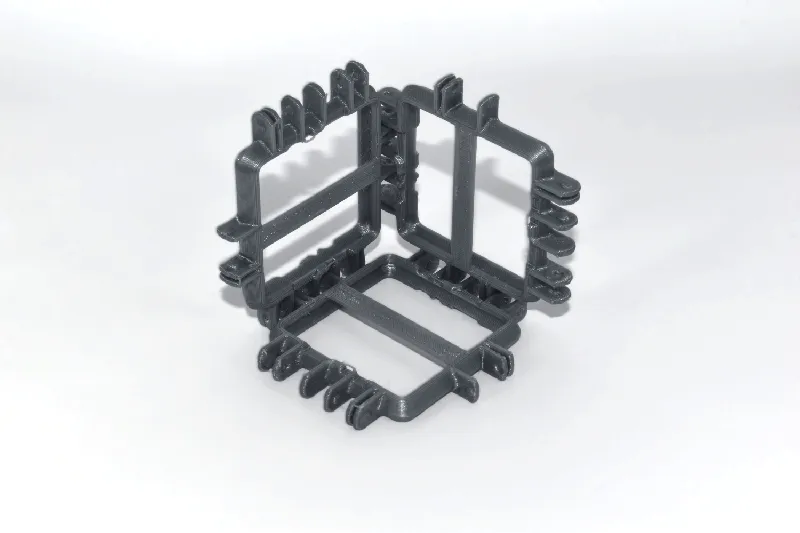
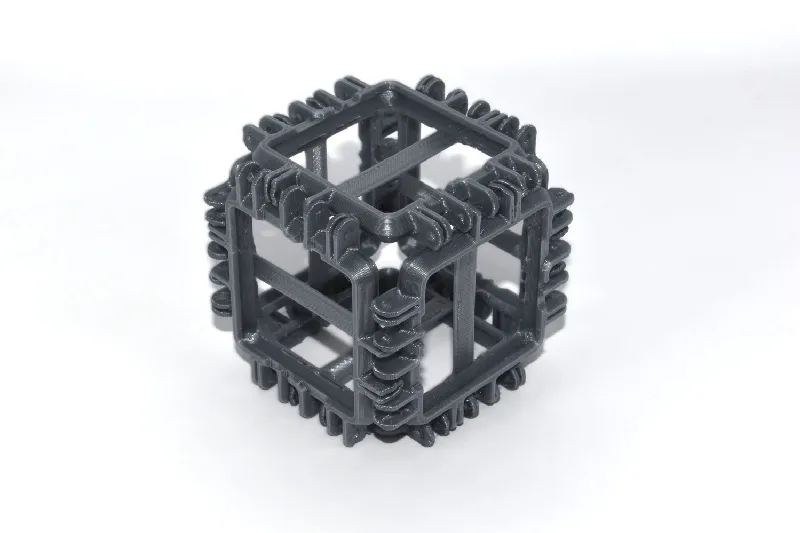
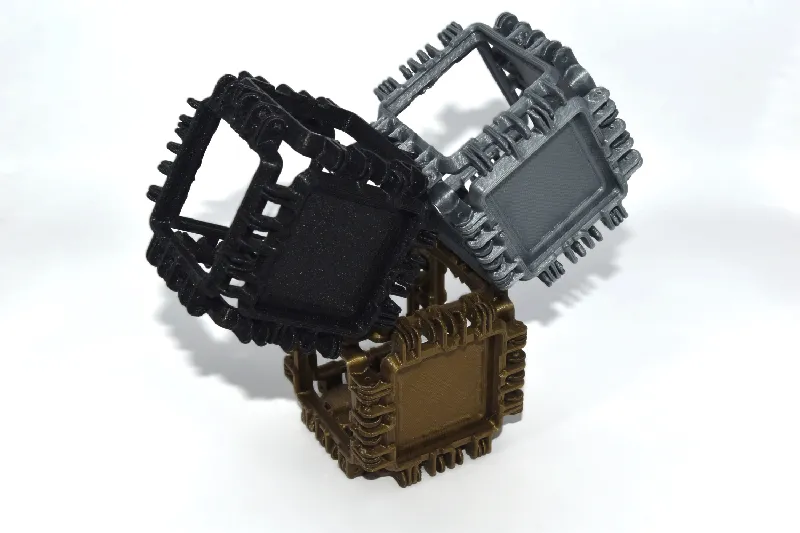
By following Rule 2, you can build a simple cube (the middle lines were added to these panels to highlight the orientation):
Then applying Rule 1, we can continue the structure upwards:
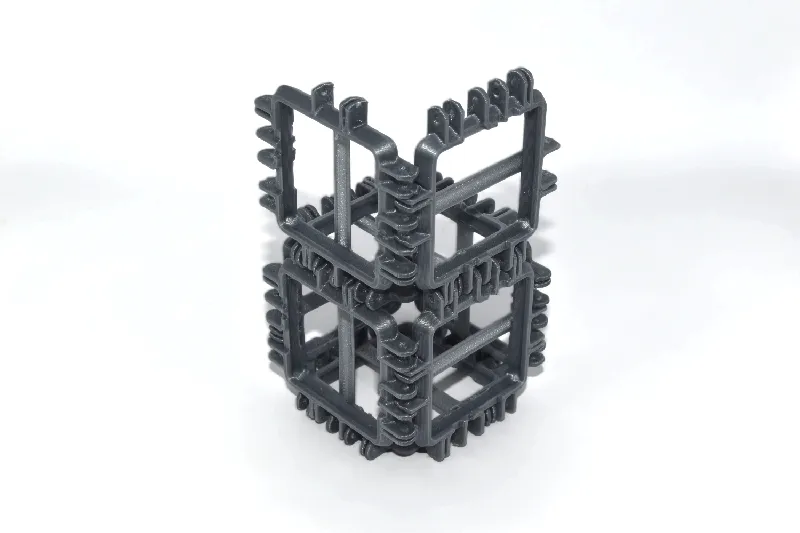
The structure can now be built to any size and shape using only A-Panels using these simple rules:
With four panels connected at a joint, the panels achieve their maximum connection strength. The panels may be hard to join at first, but generally get easier to assemble as the parts ‘bed in’. I have included ‘Average’ and ‘Loose’ versions on the panels to suit depending on your particular printer, materials and desired fit (panel types and names are explained below).
It is fully possible to build a grid structure with just the A-panel, but some connections are weaker on the surface. This is remedied by replacing the external panels with B-Panels.
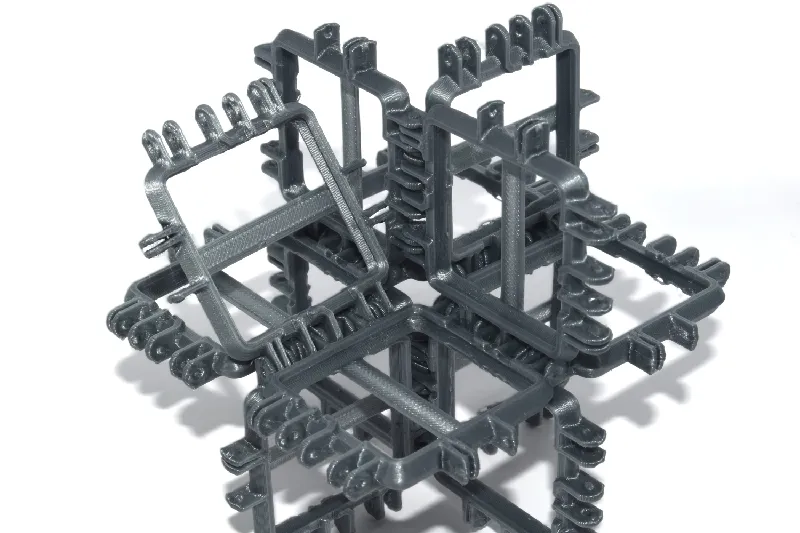
B-panels have one extra standard connector, instead of an internal connector, so improve the strength of joints by adding extra standard connectors at the surface. Covering the surface with B-panels, is an easy way to make stronger structures, as shown below (A-panels silver, B-panels black):
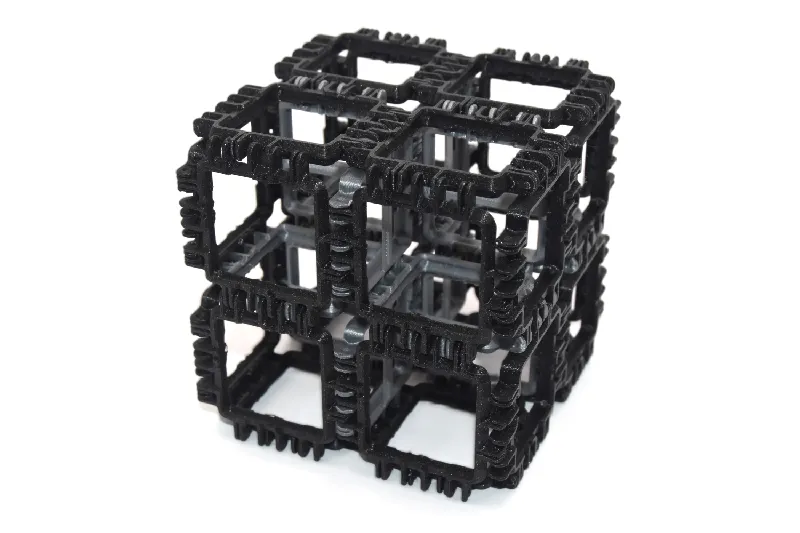
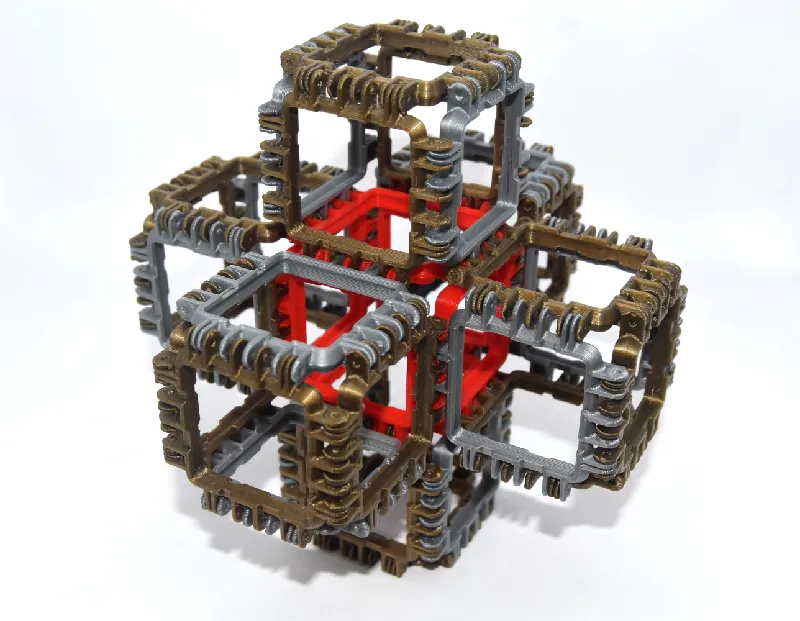
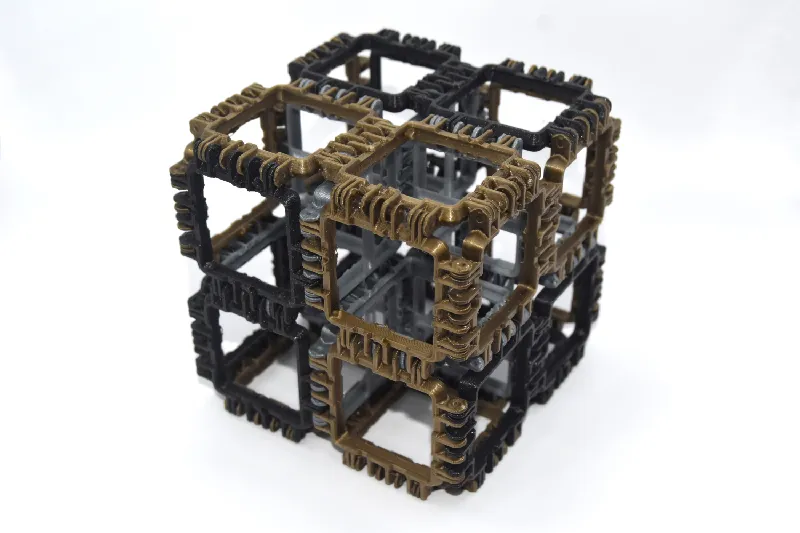
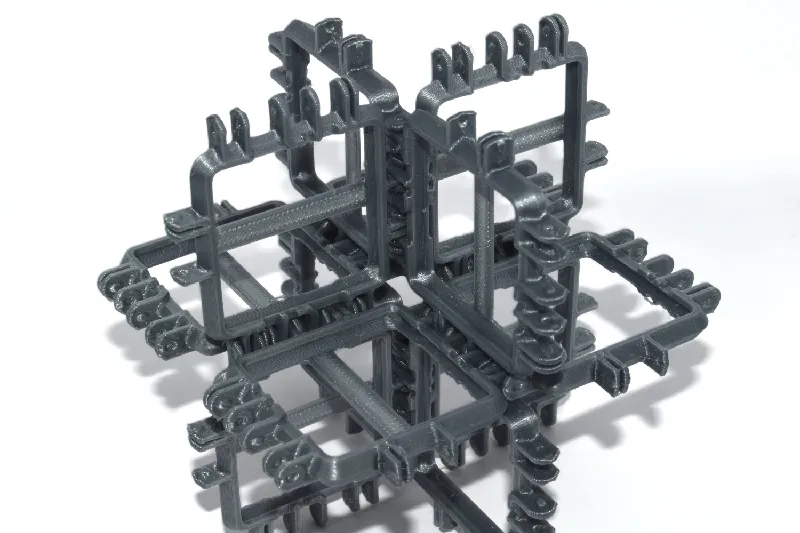
Furthermore C-panels (which use all standard connectors) can be fitted in some locations to increase strength further. The structure below uses an optimum mix of A-panels for the internal structure, and B+C panels for the surface to make the strongest grid structure possible (using only panels, the strength can be increased even further with other parts e.g. Clips):
NOTE: When adding B and C panels to the surface of an A-Panel structure, Rules 1 and 2 above do not need to be followed, the B an C panels simply fit wherever they can.
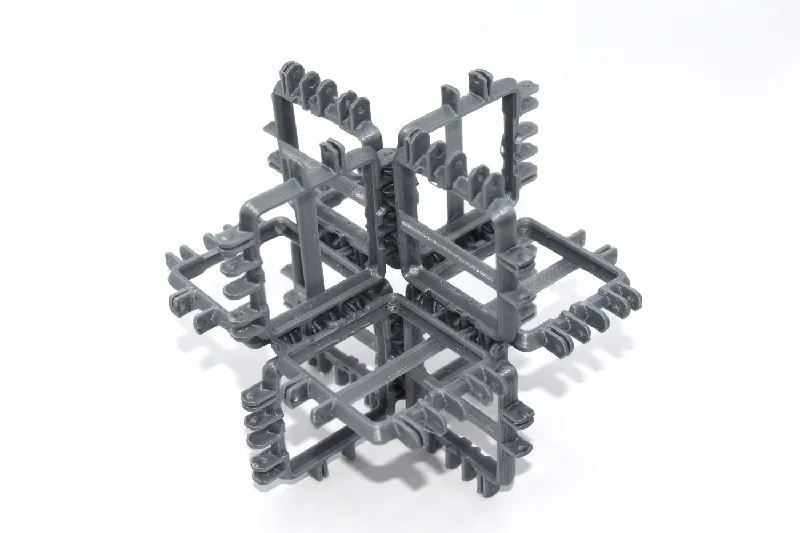
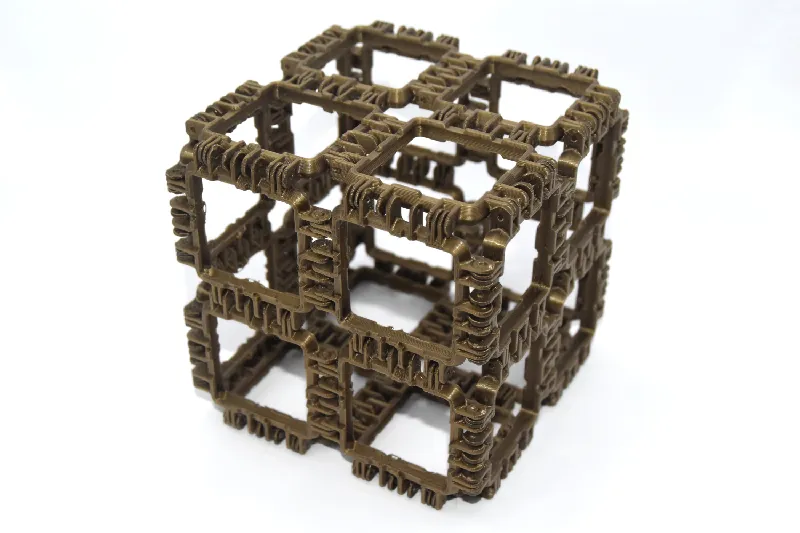
C-panels are also ideal for building hollow surface structures e.g. a large empty cube (these are similar to the original Polypanels):
‘Solid’ versions of panels have the internal space filled in, useful for custom containers, and also increase panel rigidity (and concequently joint strength, although they can be harder to join together):
To fit a panel into a corner, it is best to follow the steps below:
1 Snap one side of the standard connector, furthest from the corner, into place:

2. Snap the other side of the standard connector into place, making sure the internal connector fits inside one of the squares:
3. Rotate the panel, so it is in line with the joint (clearance cuts are included in the panels to make this easier):

4. Push the connector into the joint, ensuring it is lined up correctly:
Panel Types
TLDR: just print the A,B, and C panels in the A-B-C folder, as these are the most modular standard panels. If these panels are too tight for assembly, print the files from the L-B-C folder (L stands for 'Loose').
A panel name may be described as follows:
OP Squ A1 A-B-C Open
- OP stands for Omnipanels, all parts for this system will have the OP prefix.
- Squ is short for Square, the shape of the panel. Tri=Triangle etc.
- A1 is the configuration of the connectors, giving the panel type. A1= A-panel, B1= B-panel etc. (the number 1 is meaningless currently but may be used later e.g. connector design iterations)
- The following A-B-C letter code describes features of the connectors:
- The first letter descibes the fit for the connector: A=Average, L=Loose, T=Tight (yet to be released).
- The second letter describes the type of large connector: B=Standard, C=Clearance (Clearance connectors will be described and published later once I have published bearings and pins).
- The third letter describes whether the panel has clearance cuts or not: C=Clearance cuts N= No clearance cuts. Clearance cuts make it easier to fit panels together in tight internal corners, described in the 4 step proceedure above. Panels without clearance cuts are stronger, but are harder to assemble into tight places.
- After the 3 letter code, the function of of the panel is simply described e.g. Open, Solid, Bearing, etc.
So an “OP Squ C1 L-B-N Solid” panel, would be a square C-Panel, with Loose fit, Standard connectors, No clearance cuts, and a solid infill to the panel.
Future Parts
I have already designed many parts for the Omnipanels system, which will be released soon, including:
- Triangle Panels
- Shafts, 12mm and 8mm
- Pins
- Spur Gears
- Helical Gears
- Bevel Gears
- Reinforcement clips
- Panel inserts (to add different functions to an open panel)
- Panel Joiners
- Ratchet
- Wheels (with tyres)
- Pulleys
- Springs
UPDATE (25/10/24): STEP files for all the panels have been added. All the panels have been updated with changes to their general tightness and fit. Loose panels should fit more easily now.
Tags
Model origin
The author marked this model as their own original creation.


