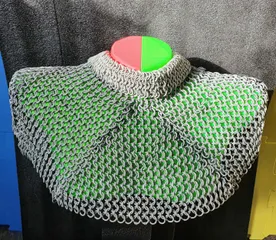
Chainmail hood (Coif)
Description
PDFEasy to make wearable chainmail coif, no supports needed. I have also added a test mini version you can print in 9 hours so you can practice printing and assembly.
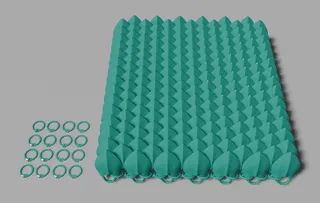
Print the CoifPart 6 times, 2 parts can fit on a standard 220mmx220m standard build plate at once.
When printing stacked chainmail peel the layers apart carefully, taking more time at the sides where each layer connects to the one below it. Discard the solid plastic base and walls, they are not needed.
You will also need to print about 170 of the connector parts. about 120 can fit onto a standard build plate, fair warning though if 1 detaches it can mess up the others so I print in smaller groups.
Instructions for assembly:
Parts needed:
6 x CoifPart
170 x connector
- Arrange your 6 parts in a fan shape the triangle sides pointing into the center. Figure 1
- Taking a connector clip the tip of 2 adjacent sheets together
- Add a second connector attached to the first connector so that it hangs adjacent to the 2nd row of the tip of the sheet Figure 2, then connect it to the edge ring of either sheet on the 3rd row Figure 3 .
- Repeating this step with the 3rd connector so that it hangs onto the 2nd connector and attaches to the edges of the 4th row.
- Continue this until you reach the bottom of the pointed end of the sheets Figure 4
- To join the straight parts of the sheets add a connector every 2nd row so that it attaches to the 2 rings (one on either side) on the row above and the 2 rings in the row below Figure 5
- You should now have 2 of the parts joined, repeat the process of joining the edges of the parts together so that all 6 parts are connected, this should curve into an almost bucket shape perfect for on a head!
- Now comes the artistic part, there are many designs for how the coif should open for the face, by cutting links you can decide how big you want the face opening to be and in what shape, I hope you have fun and it all works out for you
Notes: You will find a hole in the center of the piece where they all connected you can fill this in by adding 6 connectors each attaching to 3 rings see Figure 6. Also connectors are very useful for if a chainmail link breaks when taking it off printed supports/ during handling.
Further reading
These are some links that have been very useful to me during the assembly.
https://discover.hubpages.com/art/How-to-make-a-chainmail-coif
https://chainmailjoe.com/chainmail-joe-european-4-in-1-tutorial-1
Tags
Model origin
The author marked this model as their own original creation.


