Description
PDFKeeping hygroscopic filaments dry is mandatory for good prints, so I was looking for a solution to print from a drybox. At first I bought a very large airtight storage box for various spools and printed from there, but for several reasons that's quite inconvenient. So I wanted a solution for 1-2 spools with a very short filament path to the extruder and without the risk of accidentally dropping the box from the enclosure. That's why I created this model which mounts an Ikea 365+ 10,6l storage container neatly to the side of the original Prusa enclosure.
Parts
This model consists of four parts:
- upper frame
- backplate
- bottom frame
- bottom inlay
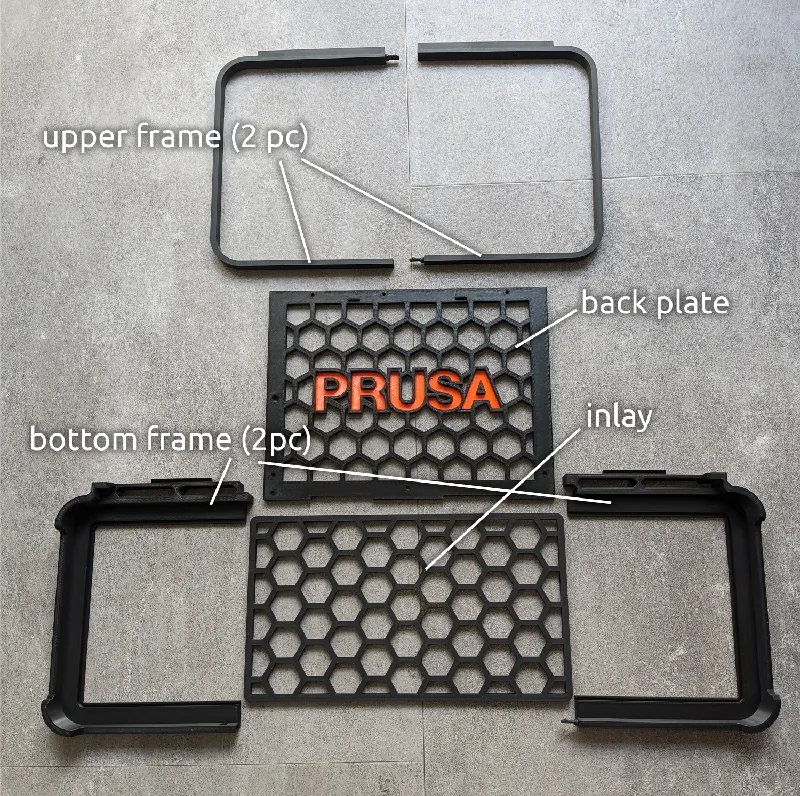
Both frame parts are split into two pieces to fit onto the MK4 build plate. The 3mf project file of the backplate with the Prusa logo includes multiple letter parts, so you can assign them to multiple extruders and print it in multicolor. If you don't want the Prusa logo, there is also a no-logo version of the backplate.
I originally created this model to be mounted on the left side of the enclosure, but I also uploaded a version for the right side.
Printing
All parts got printed in PLA with 0,2mm structural preset. I highly recommend PLA because of its rigidity/stiffness (or other stiff materials like nylon or carbon filaments). Supports are required for the frame parts like shown in the 3mf files.
Other required parts
To mount it to the original Prusa enclosure you need:
- 3 M3x8mm screws
- 2 M3x20mm screws (3 if you use the transport handle)
- 3 M3x12mm screws (2 if you use the transport handle)
- 8 M3 hex nuts
The mount gets attached by these five holes already provided in the Prusa enclosure:
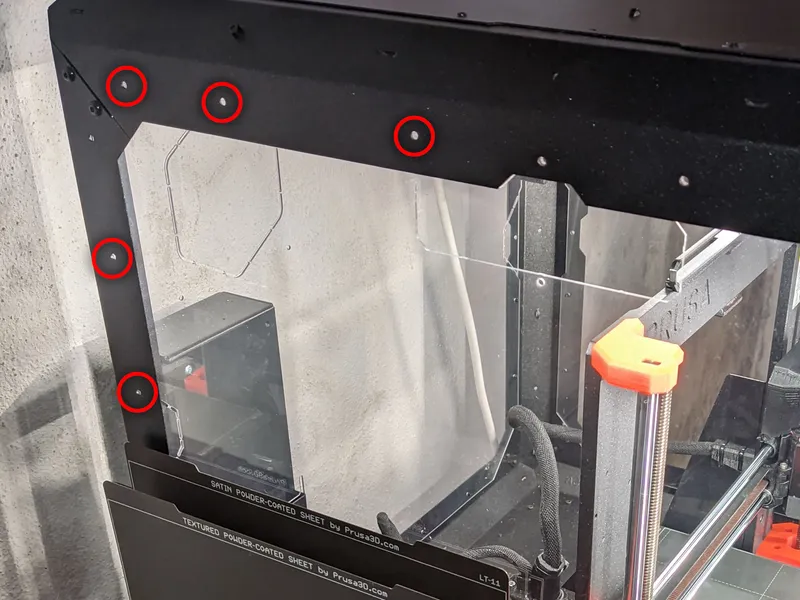
The nylon rivets which hold the transparent panels get replaced by the M3 screws.
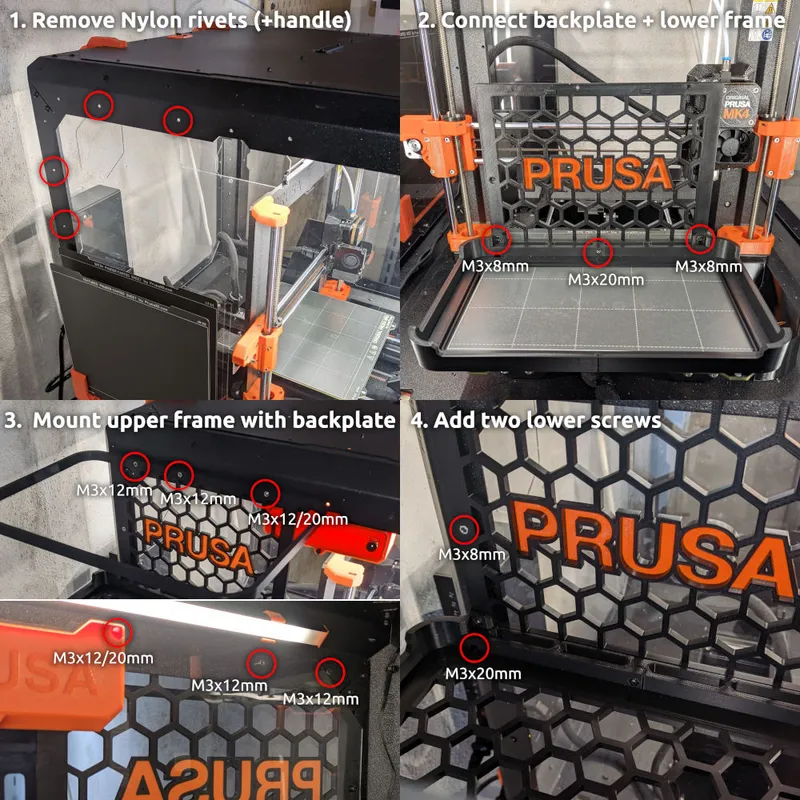
Assembly:
- Remove Nylon rivets (and transport handle if used) like described here
- Join backplate and bottom frame with three screws
- Mount backplate together with upper frame to enclosure with three screws
- Add two lower screws
Transport Handle:
If the transport handle is used, you need to replace the original model with this modified version. It replaces one square nut slot with a bore to enable mounting it with a screw from the inside to the upper frame of the mount. For additional comfort I also added a filament pass through which keeps the filament path from drybox to extruder as short as possible.
Drybox parts
I added all parts of my drybox in this collection.
Tags
Model origin
The author marked this model as their own original creation.


