Slim card wallet (8 cards, multicolor, airtag)

Description
PDFAfter printing both the amazingly designed Cascade card wallet (Print-in-place) from Hugo and the remix for multiple parts (Assemble after Print - Cascade Card Wallet Remix) by 815 Design, I wanted to join in by creating a design for 8 cards.
Since I did not like the print-in-place mechanism of the original (too rough in daily use for me, as 815 design mentioned too) and would like some color added to my wallet, I based my design on that of 815 Design.
Now you can have both the benefits of stronger, more durable PETG for the body and smoother mechanics and more colors outside with PLA while having up to 8 cards on the inside!
Update 2023-05-19
Added a new model that combines the AirTag holder and the clip.
Update 2023-01-27
After using the original design for months now, I've created some additional models that you might enjoy. They all feature tighter tolerances for the cards so they don't have a tendency to slide out if the wallet is upside down.
- Slim model.
- Slim model with single bill thumb hole (which allows you to attach an AirTag too!).
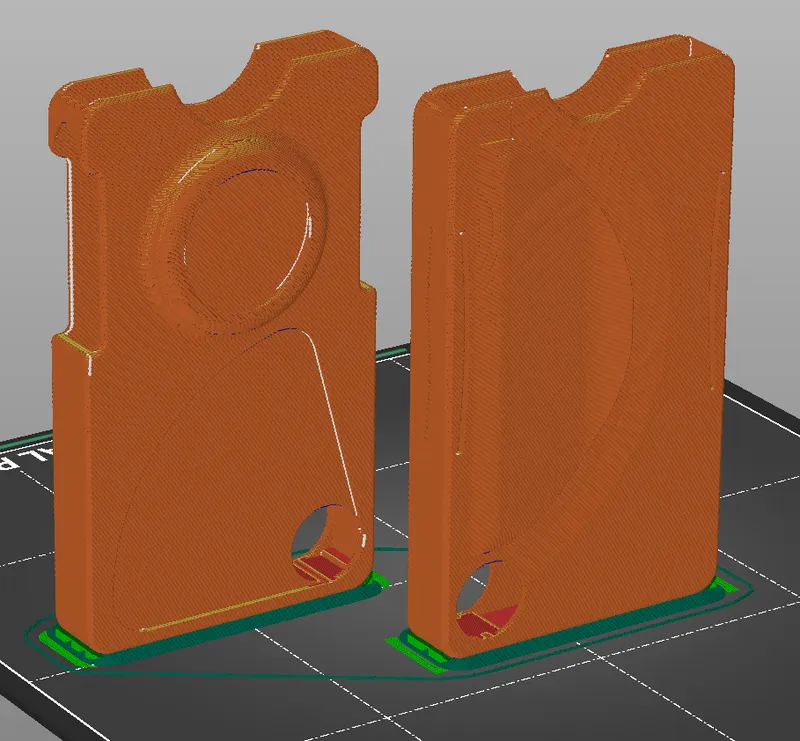
- Slim model with dedicated AirTag holder (front).
- Slim model with dedicated AirTag holder (back) and single bill thumb hole.
Gcode files
Attention: I've added GCODE files for indication purposes (time, weight) only. I recommend you do the slicing yourself so its optimal for your machine and filament!
Pictures
A small note about the pictures: I've personalized some parts in the pictures for my own use. The parts added here are all plain without any text.
Printing the body
- The body is best printed standing up.
- I would recommend PETG for durability. It will work with PLA, but then my cards have the tendency to slide out more easily.
- No supports are needed.
- Yet I recommend using the brush to add some supports manually on the bottom corners (see screenshot below). On my Prusa Mini the overhang there is a bit to steep for a (in my opinion) proper result.
- 2 perimeters work just fine.
- 0.4mm nozzle, 0.2 mm layer height with 10-15% gyroid infill
- A brim is recommended since the footprint is pretty small compared to the height.
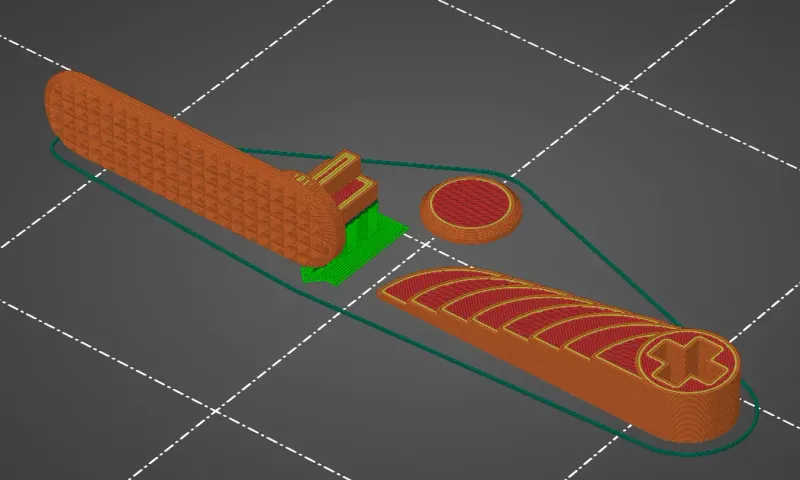
Printing the rest
- I placed the lever horizontally for optimal strength characteristics and used 3 perimeters.
- Other parts use 2 perimeters.
- The cap can be printed on its face, but the slope causes a bad surface on my Prusa mini. Therefor I print it with the face up and a very snug support on the inside.
- 0.4mm nozzle, 0.15 mm layer height with 10-15% gyroid infill
- Use a brim if it's not a smooth/sticky plate.
- Note: the fitment of the lever can be very tight into the fan. Consider printing the lever part at 99%.
Assembly
The fun part is to assemble everything.
- Lay the body on its backside, so that the lever recess is facing up.
- Slide the inner fan inside. Be sure that the part for the lever is on the correct side. The fully flat side should go in first so that the rounded parts face the (soon to be in there) cards.
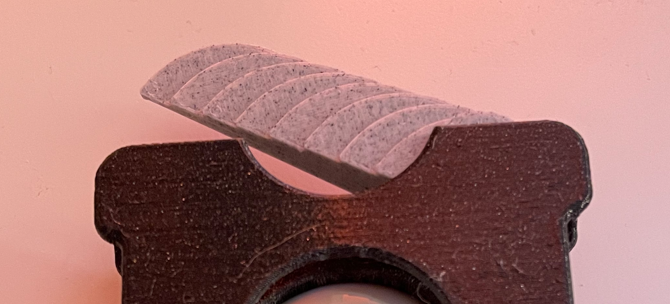
- Align the cross of the fan to the hole in the body. I used a little screwdriver for this.
- Press the lever through the inner fan. It will be a very tight fit, so no glue is needed! Use some grinding paper or cutters if its too tight. Alternatively print the lever at 99%.
- Turn the body around and press the cap on. I used a little PVC glue there to make sure it will not detach any time soon.
- For the slim model with dedicated AirTag holder only:
- Use some grinding paper to smooth the insides of the AirTag holder. The tolerances are quite small so the device fits snugly.
- Check the clips on both sides of the holder. They should be a little recessed. Use a knife/cutter to cleanup if necessary.

- Position the AirTag and the Apple brand logo correctly. Otherwise it will be bothering you! (or that's just me?!)
Tip: lay the AirTag on one of your cards to position it. Worked better than my fingers inside the wallet. - The tag should be flush with the outside and snap into place.
When printed in PLA it worked for me every time, but with PETG I had to clean/grind it a bit more. I might adjust the tolerances a bit here. (TODO)
- You are ready to add cards to your new wallet!
I'm using the wallet for a couple of months now and everything is still working smoothly. I might add extra models with some sort of card release mechanism so the cards can not slide out unwanted when there are less then 8 cards present.
Support
If you appreciate my effort, go ahead and give this remix a like and share it with your friends!
Tags
Model origin
The author remixed this model.


