Morpho Knight Gacha Figurine (from Kirby and the Forgotten Land)

Description
PDFThis is a multi-part model, composed of 37 parts, that requires some assembly but no painting.
All parts made by me in AutoCAD. The stand is inspired by this one posted by Lazlo: https://www.printables.com/model/167542-kirby-collectible-stand-kirby-and-the-forgotten-la
Dimensions at 100% scale: 17.5cm x 12cm x 16cm (7in x 4.75in x 6.3in)
I. OVERVIEW
This mess of a figurine is printed in 37 separate parts and then assembled with some glue. As long as you have the right colors, no painting is required.
To make the entire model, you'll need to print ONE (1) of every part, with these exceptions:
- MorphoStarMed (x2 required)
- MorphoStarSmall (x2 required)
- MorphoBladeGem (x2 required)
Many parts are marked "L" for left or "R" for right. These parts are all mirrored, so you need to print one of each.**The directions are from Morpho Knight's perspective!! So, "left" is Morpho Knight's left, and "right" is Morpho Knight's right.
II. PRINTING
Almost all the parts are already oriented on a flat surface, and should be printed as-is without rotating or adding supports. I printed at a layer height of 0.1mm for just about everything except for parts like the alligner or the large stand. You could make do with 0.15mm or 0.2mm for most parts, though you'd lose some detail on some of the more intricate pieces.
Special consideration should be taken for these parts:
- Both horns need supports
- Mask piece 1 needs supports and may need to be rotated slightly
- Mask piece 2 needs supports
- Both shoulders may benefit from supports
- MorphoGripTunnelTop.stl and MorphoGripGemTop benefit from supports
Here are the colors you should use if you want to match the model as closely as possible:
RED / RED-ORANGE
- MorphoMask1 & MorphoMask2
- HornL & HornR
- ShoulderDecalL & ShoulderDecalR
- SwordBlade
- SwordPommel
ORANGE
- FootBottomL & FootBottomR
- WingL & WingR
YELLOW / GOLD
- FootTopL & FootTopR
- GloveL & GloveR
- SwordGrip
- GripTunnelTop & GripTunnelBottom
GREEN
- Base
- Stand
BLUE
- GripGemTop & GripGemBottom
- BladeGem (x2)
BLACK
- BodyFront & BodyBack
WHITE / SILVER
- EyeL & EyeR
- ShoulderL & ShoulderR
- StarLarge, StarMed (x2), & StarSmall (x2)
ANY COLOR
- Alligner
I used PLA for all parts of my model. Here are the brands I used:
- Eryone (red, white, black)
- Hatchbox (yellow, blue)
- Voxelab (orange)
- Overture (green)
III. ASSEMBLY
Before attaching anything to the main body, start by assembling some other parts of the body.
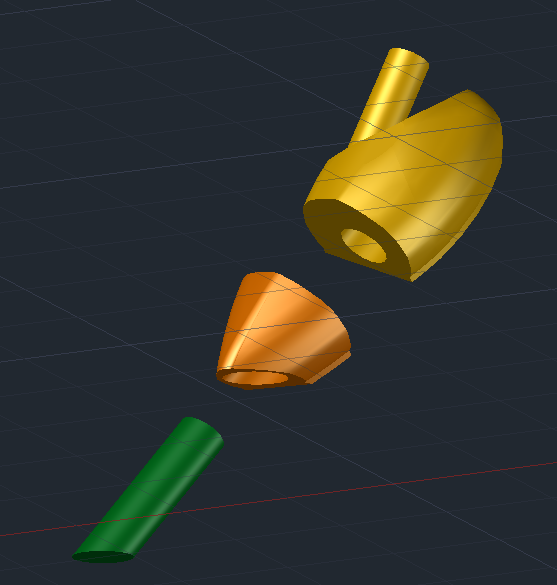
The sword has the most parts, so start with the blade and its associated gems (MorphoBladeGem x2). Glue one into the cutout on the top of the blade, and one to the bottom.
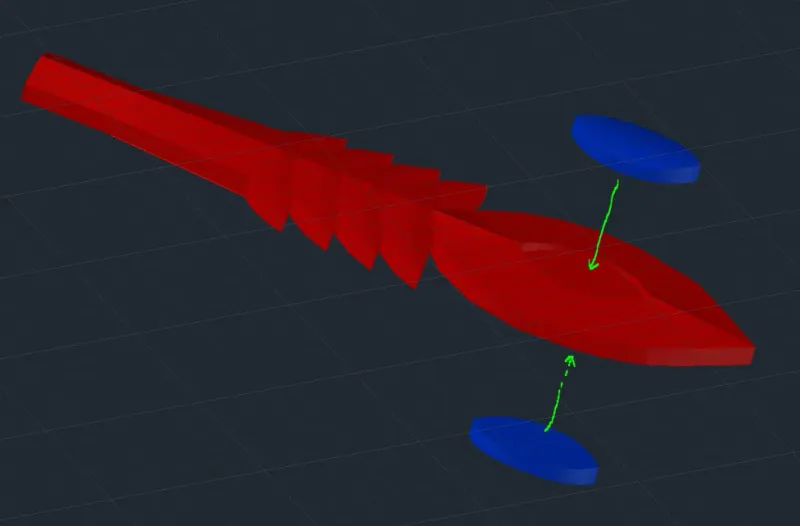
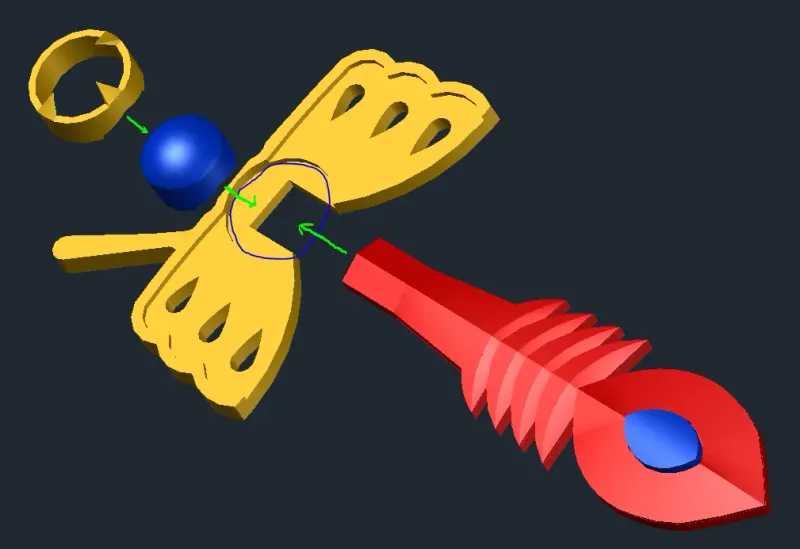
Using glue, adhere the sword grip, the sword blade, and the top tunnel & gem. The tunnel and gem slot into the circular cutout. The tunnel and gem also have a cutout that allows them to sit atop the blade, which is not flat. This will help you align the parts properly.
Allow the glue ample time to cure before doing anything else with the sword!!
Attach the shoulder decals to the shoulder pieces using glue. There is a small cutout indicating where the thicker end of the swirl should go. GENTLY squeeze the pieces together with your fingers to be sure they adhere. The shoulder pieces are very thin and may snap if they are twisted or if too much force is applied.
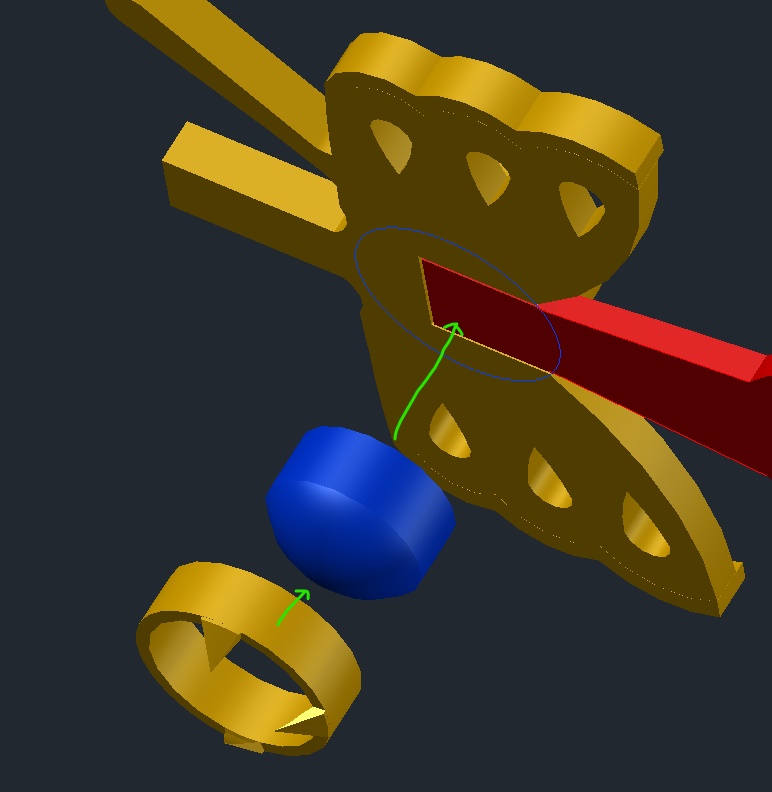
Once the grip and blade of the sword have had time to dry, gently adhere the bottom tunnel & gem to the bottom of the grip/blade. There's no cutout for this part, so be very careful.
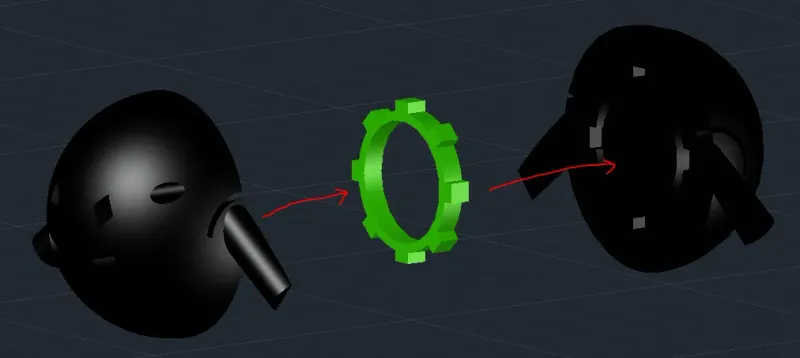
Press the alligner into the cutout of either half of the body, and the two halves will fit together. Use some glue and squeeze them tightly to ensure a good fit, using the bifurcated arms and the shoulder slots as a guide to make sure it's perfectly straight.
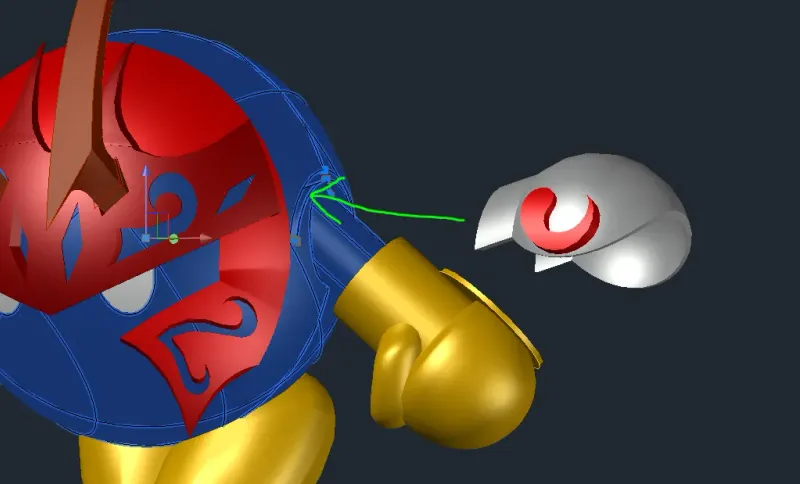
Press the eyes into the cutouts FLAT side first. Slip the gloves onto the arms as far as they will go (about halfway, indicated by yellow circle).
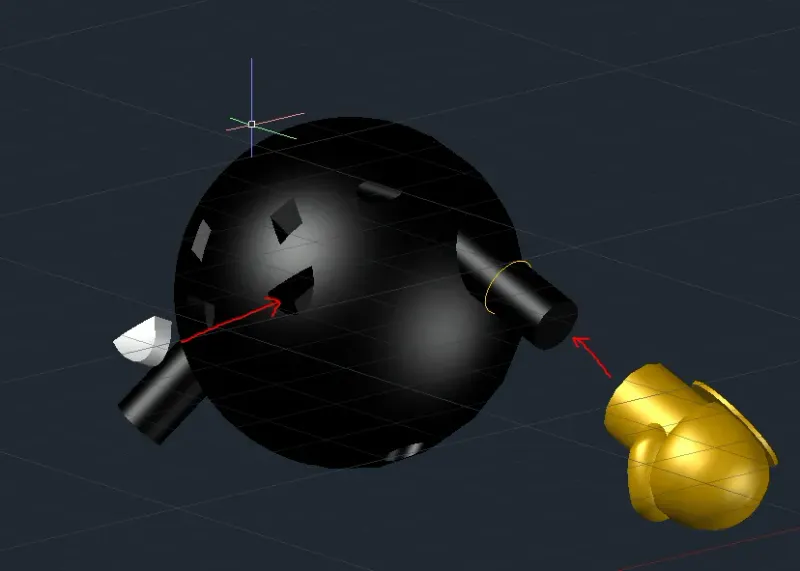
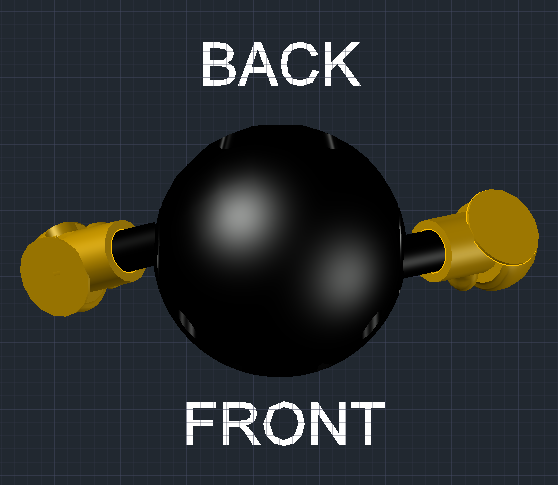
Angle the gloves appropriately. The circular patch on the LEFT glove should point slightly backwards, and the RIGHT glove should point slightly forward. Remember that the L/R directions are from Morpho Knight's perspective.
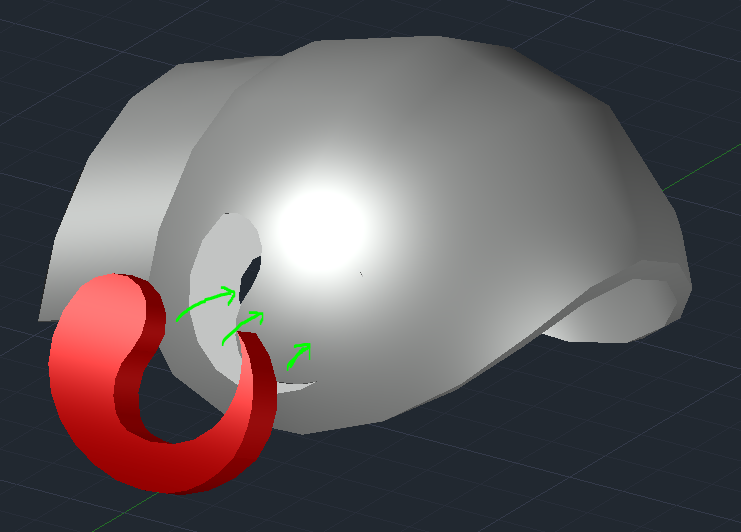
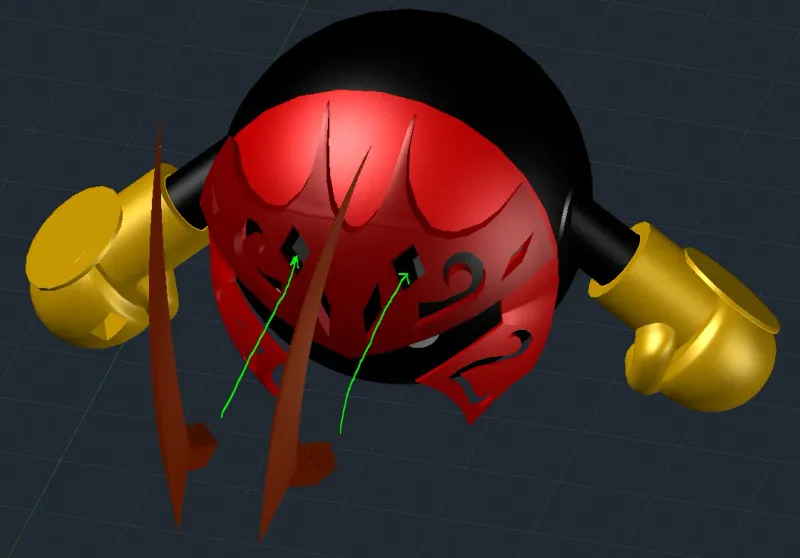
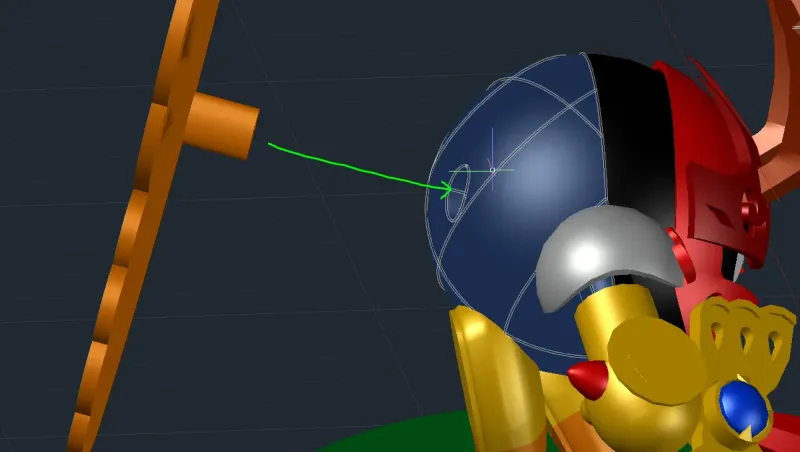
Gently slip the long prongs on mask piece 2 through the appopriate holes in mask piece 1. Then push the prongs into the holes on the front of the body.
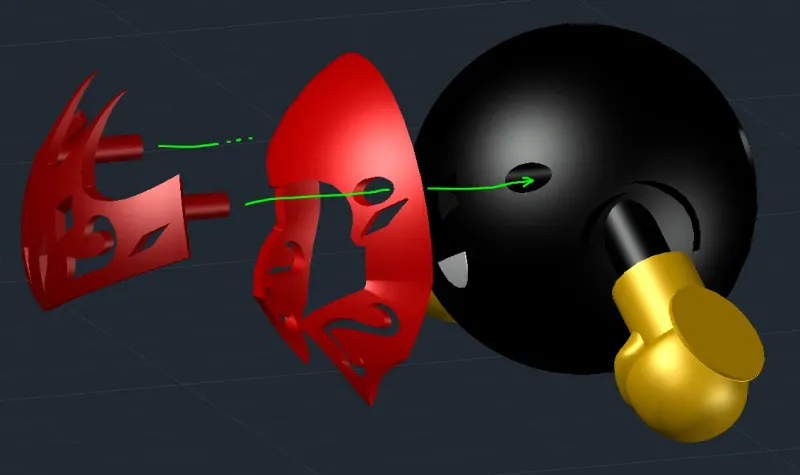
Once the mask is attached, slip the horns into the diamond-shaped holes.
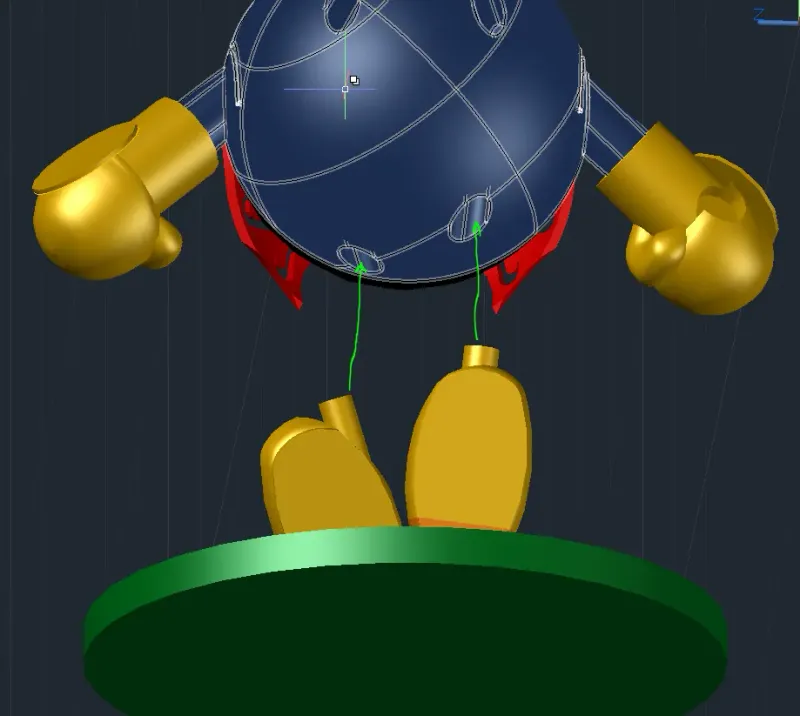
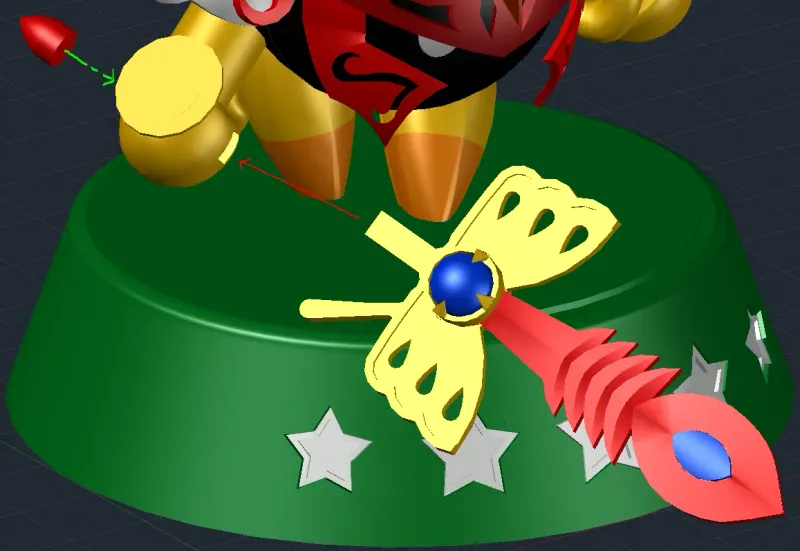
Slip the feet pieces onto the prongs attached to the large circular base. The prong should stick all the way through the bottom half and into the top half, with no gap between the halves. You can use some glue to keep everything together, but make sure the top halves of the feet can still move and twist around a little bit!
Attach the feet to the body by sliding the foot prongs into the holes on the back half of the body. They don't slide straight up/down, so you may need to slightly twist them together.
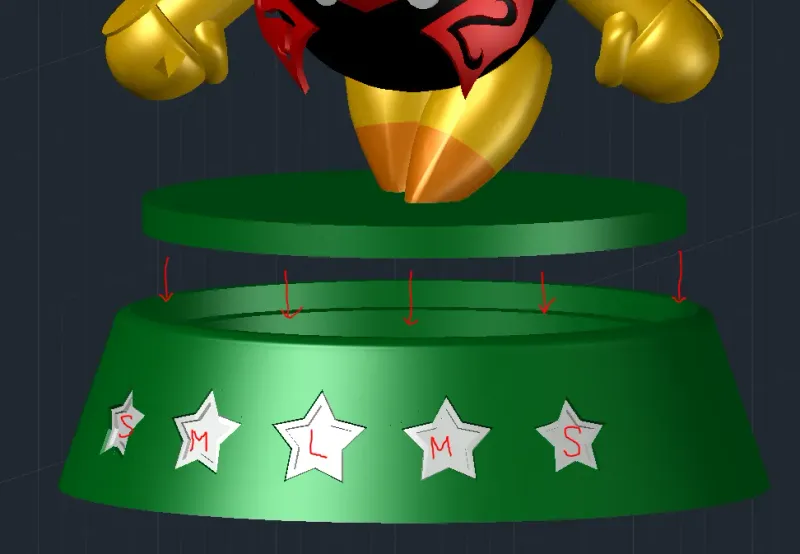
Press the circular base into the stand. It's a very tight fit, so press it down as straight as possible. Slot the stars into the indicated cutouts — large in the center, medium on either side, and small on the outer cutouts.
GENTLY press the shoulder pieces into the curved cutouts on the sides of the body.
Slide the completed sword into the rectangular cutout on the right glove. Adhere the pommel to the circular cutout on the other side of the glove. If you've aligned the glove correctly, it should slide into the cutout without hitting the mask or the circular base beneath.
Finally, press the wing prongs into the cutouts on the back of the body.
Tags
Model origin
The author marked this model as their own original creation. Imported from Thingiverse.


