


I love this. I had made a new LCD bezel that housed the switch and USB. Recently I got the wireless card and have no need to remove the USB and more. So changed out the bezel and needed a spot for my switch on the front of the printer. I didn't want it in the lower portion of the leg. That is too much orange from my liking. This is a much better alternative. I know the switch is upside down on. My MK3.5S is upside down on purpose in case something falls on it. This one matches the MK3.5S which is near it.


@BigOwnge_4728 Nice, DeWalt yellow. Looks good. I went with Ford Black for mine. :)

Printed and works well. Really like that the battery latches into the holder. Thanks!

@DonMiller_1918633 Looks good in DeWalt yellow


Nice idea! And especially the hole for punching it out, mine is stuck now so i should definitely have thought about that.
And with my iPhone 12 mini i can have it vertical with the original model *dude with sunglasses emoji*
@JakobT_432251 Yeah, I have a 14 Pro big boy. Which reminds me.... I need to charge my phone :)
@menerso Heh, i have to charge my mini all the time too, the battery life isnt great, and especially not after 2 years + ios 17... :)

Do you know if this works with iPhone 15 Pro? Wondering if the camera cutout will interfere
@nakleh_1493149 yes it does. I made it for my 14 Pro and they are the same size
@menerso thanks!


Would you mind to share step-file or make a tab-less version for wall-storage without the need for pushing the relase-button?
@GustavForsry_1463887 I added a link in the description for you to download any format you want or you can remodel in OnShape for free.

This worked out perfect for me. Needed a simple storage fix for my batteries since they kept getting shuffled around in the tool box.
Printed super easy with no supports in PETG


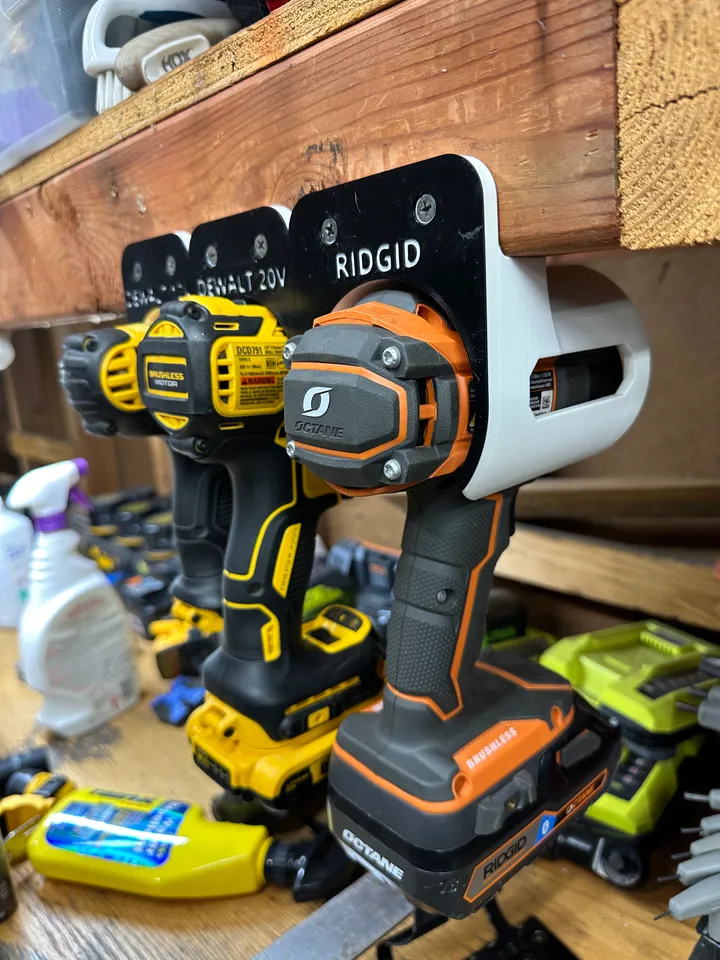
Works well. Printed no issue. I have a 12v (left) and a BRUSHLESS 12V (right) that did not fit into the 12V model so I printed the 20V model and it worked well with the brushless 12v. Thanks for creating the files and sharing.

@DonMiller_1918633 Those drills don't look like they get used at all. ha ha

Perfect holder. Very nicely and cleverly processed. For example, the upper auxiliary hole so that it does not deform into an oval when printed. Very cool! I recommend it.


This is an absolutely fantastic model that solves a problem I've been struggling to find an answer to for a while.
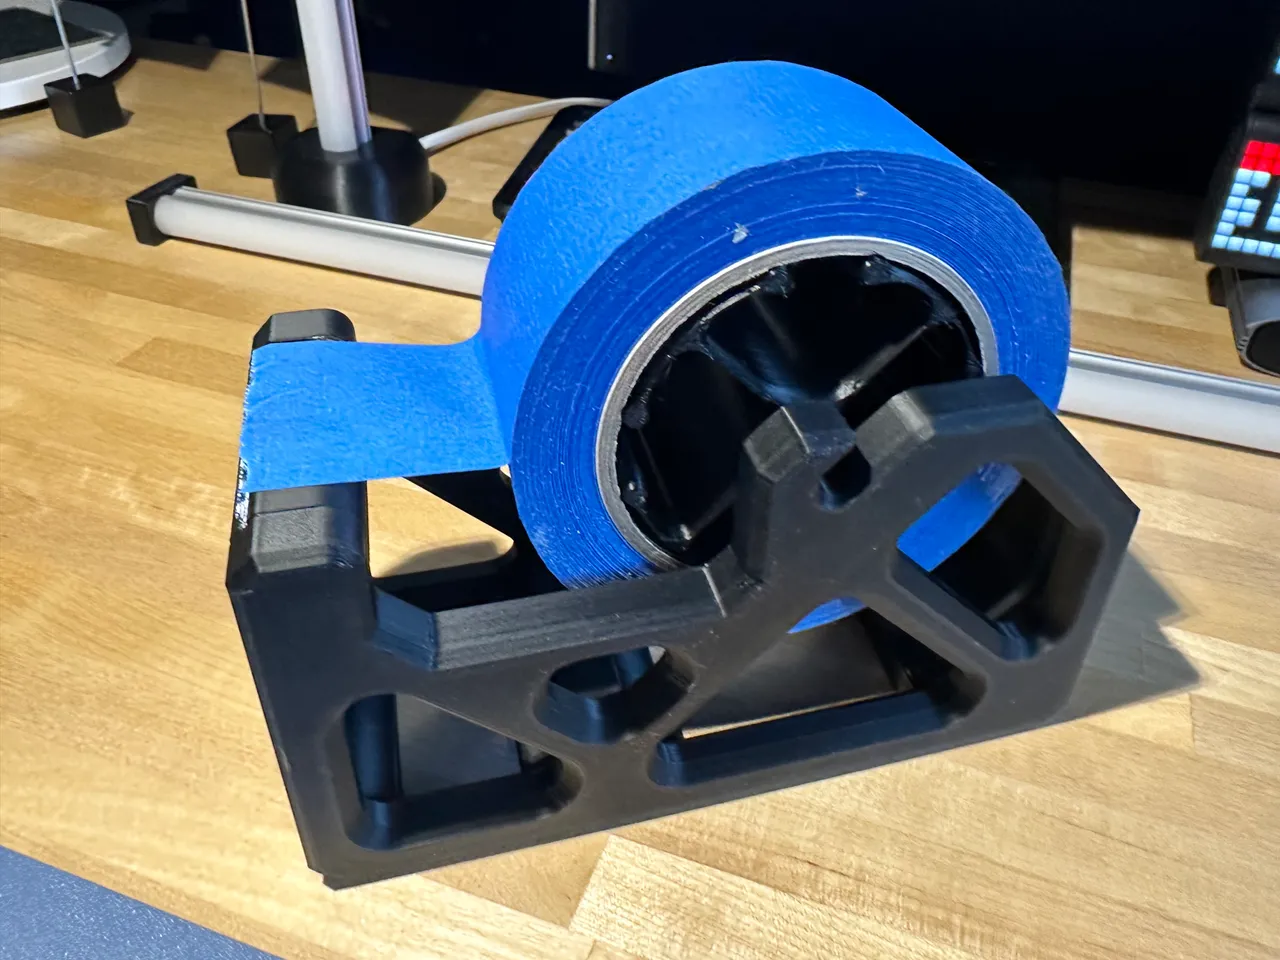
My only problem is that grooves that hold the filament spool have sharp edges after removing the supports, so they puncture my vacuum bags very easily. I solved this with a bit of sandpaper to dull the edges down a little, and some duct tape to soften the surface.
Perhaps altering the model to add a chamfer or a slight redesign to allow printing vertically without the need for supports would help with this. (edited)


Thank you for sharing the onshape on this! I didn't have those magnets and I needed to change some of the dimensions up and it worked out perfectly for what i needed!
Can't wait to slap it on! I have a box on the shelf below that this is going to work perfectly for! I was about to sit down to design this very thing, but you saved me an hour of work, thanks!