
That is awesome! This very moment i have some trouble with pcbway to get a stl file printed sls in steel. Not sure but i guess they have some trouble with finding the thickness because stl files are only meshes without a thickness definition. You did you solve that?


@yahbluez I haven't had this problem. I don't think your body is waterproof. It can easily be repaired in the Prusaslicer, so maybe that will work.


Some time has passed since I uploaded the last model, but over the holidays I was not idle and created my biggest MMU model so far. A large display model of a Canadair CL-415!
This time, after a while, a model for the Printables Store. It consists of 52 parts and the larger version has a wingspan of 568mm!
It was a lot of work but I love the result! If you have a second I'd be very happy if you leave a like for my model :)
https://www.printables.com/model/1133940


New upload: I saw a video of this thing made of metal and wanted to have it too. So I tried to build it myself as a challenge and this is the result!
It is a cuboctahedron which can be formed into an octahedron by rotating it.
Here is the model: https://www.printables.com/model/1048153-octahedron-expanding-into-cuboctahedron


Triangles PLA, joints PETG. A quick print 1+0.5 hour, neverending play. Works perfectly, thank you.


Printed nicely on my MK3S, used yellow PETG for the joints and tri-color (blue, purple, black) Geeetech PLA for the triangles.


💡Insight: Hello folks, this Insight is about a rather small feature that basically has a place on every one of my models. Chamfers and roundings, depending on your taste.
Many people add them to their models, but many don't. In my opinion, however, they are essential for a “professional” overall impression of a design, as they simply add the finishing touches to a model.
I mainly use chamfers as I personally find them prettier than roundings and the angle can be adjusted so that the overhang does not exceed 50° depending on the orientation. I make them in all possible sizes, whereby I differentiate between 2 types. On the one hand, chamfers that are 1mm or larger for the design, I often combine different sized chamfers to give the model a certain look.
On the other hand, chamfers with a size smaller than 1mm which are not really visible later in the print but on the file itself, which is especially good for renderings of the model, as they provide more light refraction. In addition, if one of the surfaces has contact with the print bed, this can prevent an elephant foot.
Depending on the size and duration that the printer needs for a layer, it can happen that even 45° are not printed cleanly, by using a chamfer with a less steep angle you can achieve the look and still ensure a clean print. If the layer duration is long enough, a chamfer smaller than 45° can also work. However, I only use this to the smallest extent if it is not possible otherwise.
There are many great designs which have curves on the underside which are printed messily. If you prefer roundings instead of chamfers for your design, there is a trick with which you can get almost the look of a rounding without the print becoming unclean in the lower section.
As you can see in the picture, a chamfer is made first and then a rounding on the upper edge. This is a small compromise but in my opinion much better than a simple rounding.

This is great, I've been meaning to write about this. I call them "Filfers" or "Chillets" (Chamfer + Fillet).

@LineArcLine So your rounded edge is a Redge at the end.
Hello folks! I was really stunned when I saw that I actually made it to the finals of the Printables awards! And not only that, even my rubberized doorstop is in the final selection, wow!
I'd like to thank everyone who nominated me, who liked or downloaded something or is just following me and my work, thank you so much! ❤
Now it's on to the final round, I didn't even know there would be one.
So, if you have a moment I would be really happy if you vote for me one more time, thank you very much!
https://www.printables.com/awards


💡Insight: Today I would like to show you how the closure of my 3d printed drybox is designed.
The main intention was to create a closure that is easier to use than the one on the original Polymaker Drybox, as it is extremely tight and requires a lot of force to open and close. So I opted for this version with two hinges as you can often find on boxes.
This closure is rarely found on 3D printed parts, but then screws are often used, which I wanted to avoid. The advantage of this closure is that the tension can be adjusted very easily by the length of the link and it is not too susceptible to printing inaccuracies, which with other types can quickly lead to the closure being too tight or too loose.
The decisive factor for this type of closure is that it is moved slightly beyond the narrowest point to close, so that the closure is automatically held shut.
The challenge was not to generate any overhangs that were too steep and would produce an unclean print. However, I could not avoid a bridge on the container where the closure hooks in.
It was important to design the hinge in such a way that it is stable enough not to fall off in everyday use but also flexible enough for easy assembly. This is why the joint is slotted as you can see.
The round attachment points of the joint are not completely round but slightly cut off on the underside. This provides a larger contact surface and ensures that the attachment points are printed cleanly in the lower area.
In addition, the joint on the side of the lid has a small corner which limits the angle of rotation and ensures that the closure cannot rotate beyond a certain angle. This would result in the closure dangling around and getting in the way when the lid is placed on the box.
This small but important detail keeps the cap away from the box.
This latch looks great!
When you adjust the tension of the latch, what part of the model do you change the length of? The Hook part, the attachment arm part, or the distance to the body’s hook?

@LineArcLine Thanks! Basically you could adjust it with all three, but A is the smallest part and the easiest to change and reprint.

Hello folks, I just published this new parametric design, actually they are two different models that are built very differently but still look the same!
This is the Upload: https://www.printables.com/model/1027928
If you like it, please leave a like, I would be very happy!
I had an idea for a container that has these two shadow gaps as a design element.
In order for this to look right at the bottom, the model needs a 90° overhang, which means that support structures would be necessary.
I therefore decided that the two parts which are printed in the secondary color should be printed separately and then plugged together. This means that neither a support structure nor a color change is necessary.
The model is parametric, in Fusion you can open the f3d files and create your own sizes.
And since some people don't mind printing supports or changing colors, I made the model the easy way too, which by the way only took a fraction of the time.

Saw this and wondered why there was no likes yet, and then I looked when it was posted. Perfect timing (edited)


Hello. This is a very beautiful design, looks amazing.
Printed PETG material without any problems.
Thanks for sharing.


So cool glad I found this, and the bowden adapter is awesome. Going to start printing and I'll post after. I've been looking for a spool holder not connected to my printer :)


💡Insight: Hello folks, in this Insight I'd like to show you a practical way I've been designing the holes for attaching models to the wall for some time now.
When it comes to mounting a 3D print e.g. a wall bracket, hooks, shelf supports, etc. to the wall you never know what kind of screws others want to use. Ideally, others can use both flat head and countersunk head screws.
Apart from the fact that it's not ideal to screw a countersunk head screw into a socket designed for a flat head, due to the reduced contact surface, there is the further disadvantage that the cone quickly exerts forces on the print, which can cause it to break (due to the small contact surface).
I therefore came up with the idea of constructing a kind of washer which is simply placed in the blind hole for a flat head screw when using a countersunk head screw.
This saves the effort of designing two different versions of the model, and depending on the print orientation of the model, the most stable alignment to print the washer is always guaranteed.
Even if, in theory, the washer would break due to the tightening torque of the countersunk screw, a good distribution of the force on the printed model is still ensured.
Depending on the orientation in which the model is printed, I don't create a round hole for the drill holes, but use the teardrop shape shown in the picture to ensure that the overhangs are not too steep.
This improves the print quality and ensures that the washer always fits into the blind hole. I set the tolerances slightly higher at 0.3 mm, as a little more play doesn't hurt in this case.
I choose a somewhat larger diameter for the blind hole. A screw with a flat head is used with a washer, the larger the diameter, the larger the washer can be that you have lying around somewhere. I also make the countersunk hole slightly larger than necessary, the head diameter of a countersunk head screw is usually twice the screw diameter.

Such details are differenciators of great design. Keep up good work!


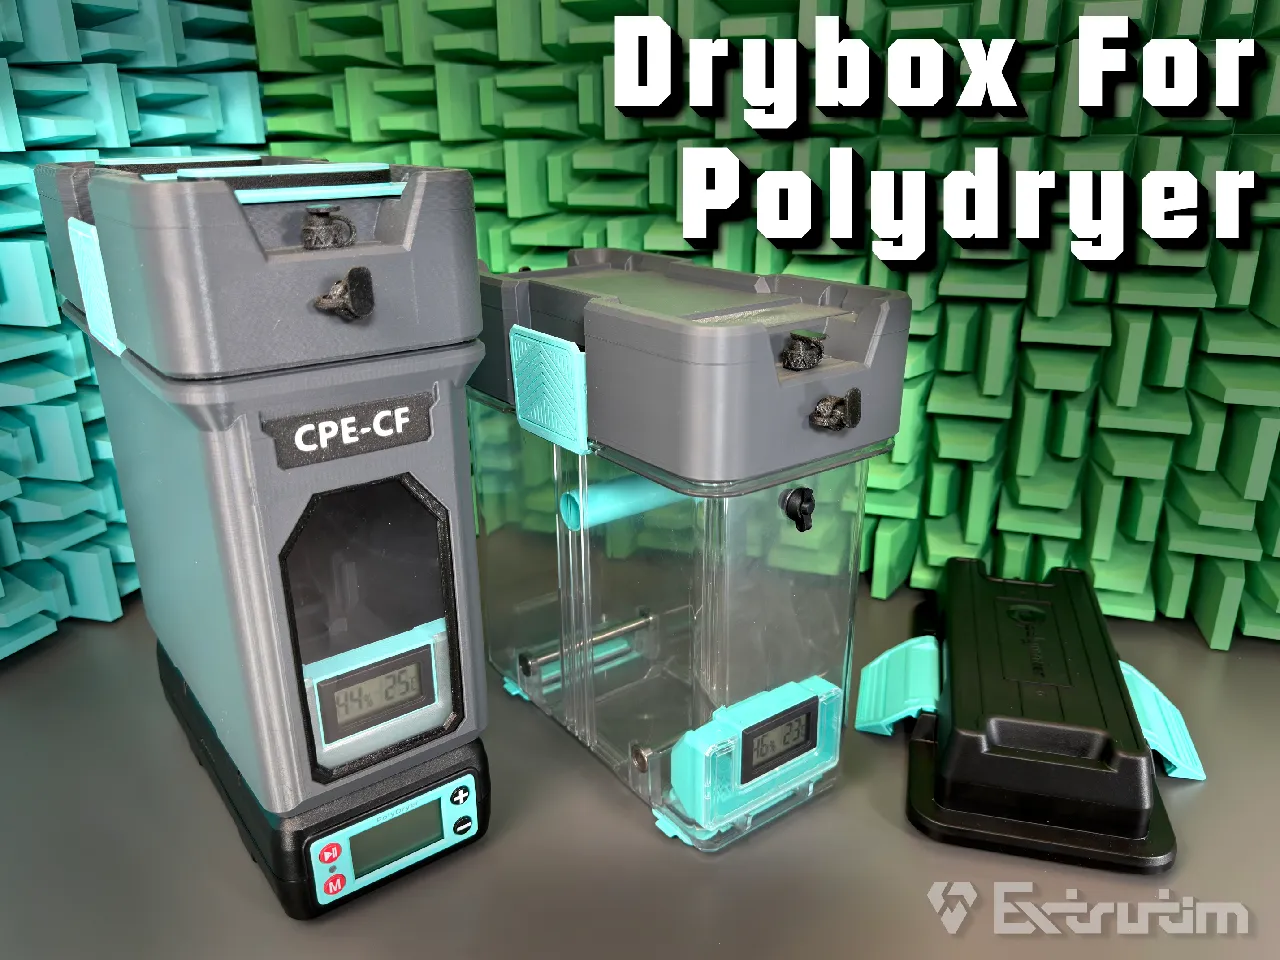
💡Insight: We're continuing with the construction of my drybox for the Prusa XL!
It is fully printable and has a lock which not only closes the box but also serves as the lid for the silica container.
Since the drybox has to be as space-saving as possible, the best solution was to place the container for the desiccant in the core of the spool. I also wanted the desiccant to be as easy to change as possible and the color of the color indicator to be easy to check when changing the spool.
With the container attached to the lock, you have it directly in your hand when changing the spool.
The limiting dimension is the diameter of the spool core, slightly smaller because the air holes are also located on this surface. 47mm is the dimension I've chosen.
So I work from the outside in. Subtracting the wall thicknesses and tolerances finally results in the size of the silica container.
The closure is similar to a bayonet lock, with the lid of the box acting as the spring. It snaps into the recesses via a 90° turn and a slight ramp.
It's important here (as with all features) that you pay attention to the printability. All overhangs are chosen so that a clean print is guaranteed. From 45° it becomes critical, if possible I always stick to 50°, every printer should really be able to manage this well.
As you can see, the inner seal is trapezoidal, so it hold securely to the part, with the narrow side lying on the print bed to ensure a smooth surface.
The box should also have a viewing window. In my opinion, the best method is to use some clear plastic packaging. Everyone can find something like this at home.
All it takes is to construct a frame with which the piece of plastic can be fixed. This was a bit of try and error due to the curvature of the window until I found a size that worked well.
If you have any further questions, please ask!
@Extrutim Strange, maybe Prusa may optimise the way we can adjust notifications etc. more granular and like with messengers, to put them silent for a period of time.
I like the series, would even love to watch a tutorial on YouTube.
Thanks for the insides!

Sharing insights like this here is awesome idea!


Hello folks! With this post I'm starting a type of content I've been wanting to do for a long time to take advantage of the Printables community tab and what better time to start than now ;)
I'd like to give you regular insights into features and details of my constructions with small posts, which are difficult or impossible to see on the finished model but contribute significantly to a decent functioning of the model.
I often get questions about how things are constructed or why some things are designed the way they are.
I hope to be able to give you some tips or ideas for your own constructions in this way!
I mainly show you pictures of sectional cuts of my constructions to give you a better insight into the model, views that are not really visible on the finished stl and make it easier to understand the function of a feature.
So let's start with the filament sample box I recently published!
The goal was to replace the old box that required screws and magnets with a new, fully printable version.
The hinge was the easy part, the pin has a slot through which it can be compressed and the detents can snap into a recess. The pin is printed horizontally and is not completely round but has a smooth contact surface, just large enough so that the overhang of the rounding can still be printed cleanly.
The closure was more difficult.
Requirements:
- Avoiding support structures using overhangs that are not too steep or bridges
- Clip printed on the side to ensure a clean surface on the visible front
- Solid fit on the box, no rickety parts that fall off quickly or are too flimsy
- Force used to open the clip must not be applied in the same direction in which the clip can detach from the lid
- Fully printable
(At this point I unfortunately have to interrupt the post due to a limit of 2000 characters. You'll find the rest of the text in the comments!)
Thanks, I’m looking forward to it.
It took me some time to find a solution that combines all the points mentioned.
Only the lid has a bridge, with a little force the clip can be snapped into the lid.
The closure of the box is only as tight as it needs to be for such a box, so it doesn't snap into a 90° bridge at the bottom, but only into an angled one.
The printed surface is cleaner, a bridge would often have a few loose lines which might prevent a clean closure.
I hope you like this kind of content, apart from the standard tutorials you can find for many CAD programs. In any case, I have many more models with small details that I would like to share with you!


The Printables awards are here, this is so cool!
Even if I won't win, because there are so many much more talented designers than me out there, it would still be a great honor for me to be nominated by some of you if you like my designs! Thank you so much!🙏❤


Hello folks, I've given my popular Filament Sample Box a complete redesign from scratch, the box is now fully printable!
No more screws or magnets are needed and there is space to place labels so you can keep an overview. For the really crazy among you, there are also different large versions with space for up to 180 samples!
Here is the upload: https://www.printables.com/model/212195

hell yeah just when my old one was full


🔔 Added two modules to the Bosch 12v station today!Battery and screwdriver module for the large 4/6Ah batteries.So now the screwdriver can stand safely in the station even with these batteries. https://www.printables.com/model/713445


Thank you. Would you be open to share .step ?

@Extrutim I would be interested in the step file too or at least see a version which I can use hardware fittings for the PTFE tube instead of printed ones

Great design! Printed the gaskets with Shore 40D TPU. Drying performance it at the same level as the original box. Did a sponge test to find out.


I received two 3D prints out of titanium for a new project from Justway. @MeisterEdel showed me how to sand the edges properly and took these awesome photos!