Price Labels for HSW - 10 Sizes

Description
Introduction
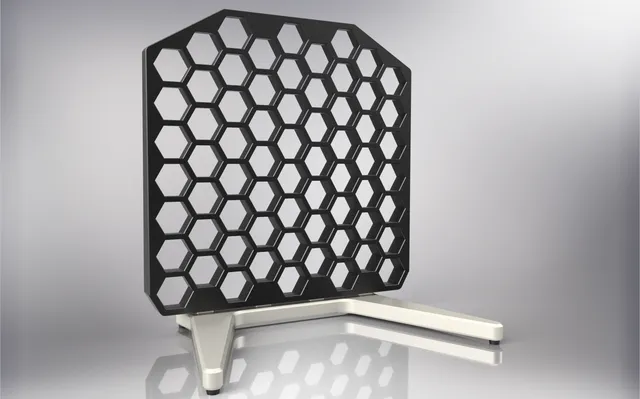
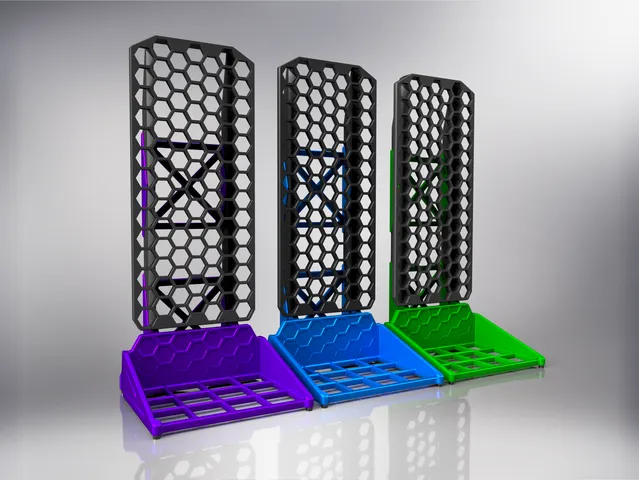
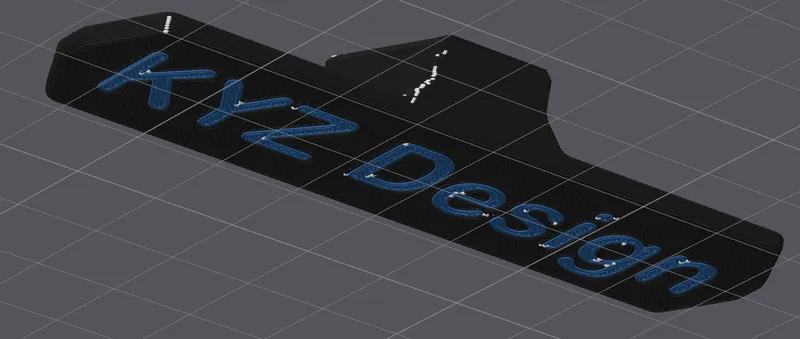
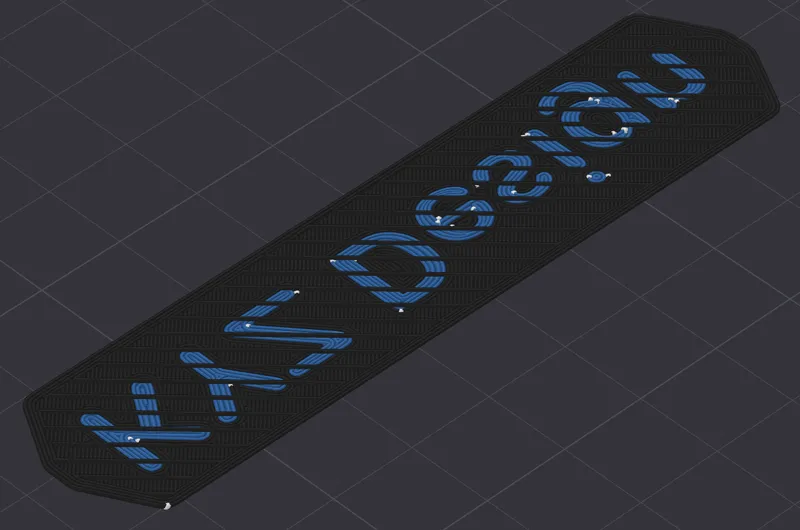
You are probably here as you've printed one of the KYZ HSW Display Stands (such as this one or this larger one) and you are a vendor! These parts display prices and descriptions clearly and matching the theme. The tags are easy to swap out and reposition, and you can customise the text, font, font size and colour in your slicer. The front faces are inclined at 15 degrees for easy legibility.
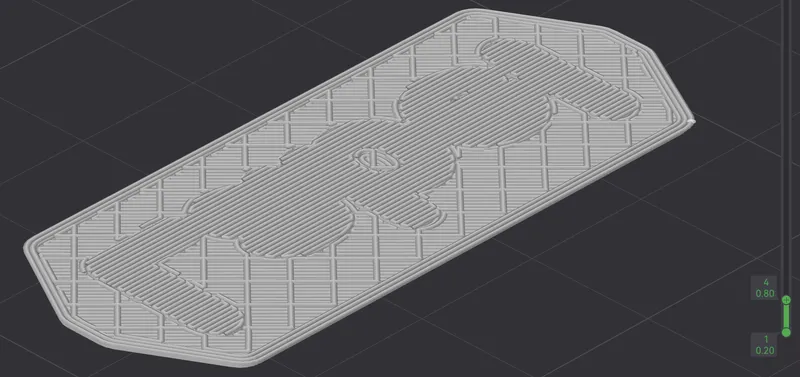
There is a “base” part which connects to the HSW hexagons, and 10 sizes of label parts which slide onto the “base” with a snug friction fit.
This is a fairly simple model for the price but purchasing this model is a way for those that use the KYZ HSW Display Stands (which are free to everyone) as a part of their business to say thank you and get some neat professional looking labels.
Licence
The flexible clip fittings used in this design have been designed from scratch by me to be compatible with the HSW system.
You can print, sell, and distribute as many 3D prints of the model as you want for commercial use.
You are allowed to modify (remix) the 3D model files.
It is forbidden to distribute original or modified 3D model digital files in any way, such as sale, exchange, reupload, donation, etc.
Purchasing this model extends the same “Commercial Use” licence rights to these two models: KYZ HSW Bowls and KYZ HSW Round Shelves (which are free for personal use).
Print Setup, Customisation and Orientation
Section 1: Bambu Studio and Orca Slicer users
- Download and open the .3mf template file
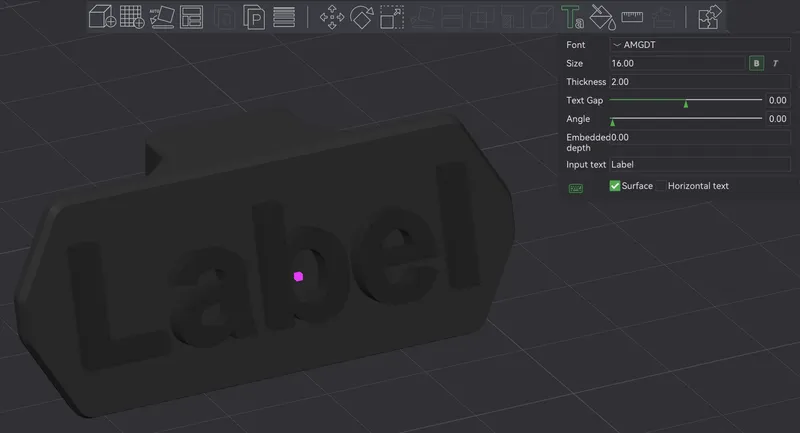
- Select the text modifier object (not the “assembly” with both the text modifier and the part, just the text as shown), then click the “Text Shape” button at the top. The text is shown as yellow because it's a “modifier”, not because it will be printed yellow.
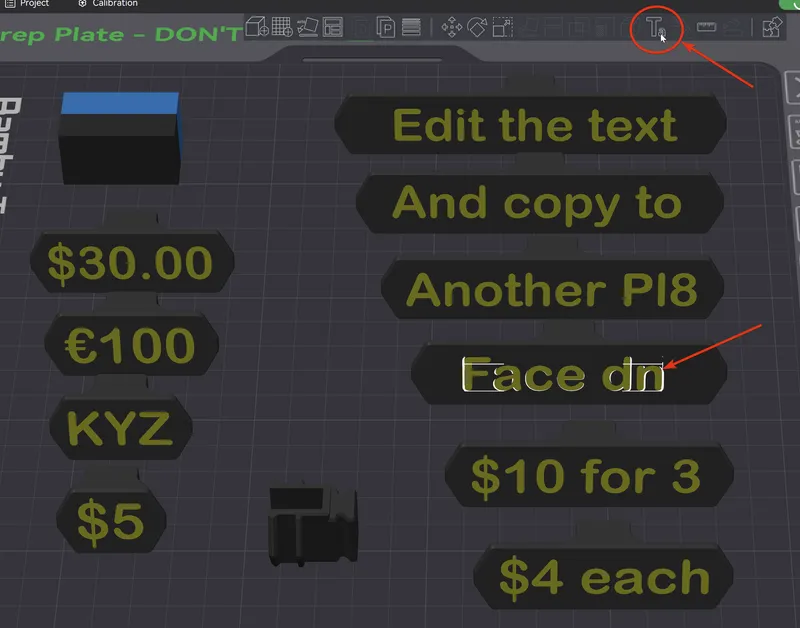
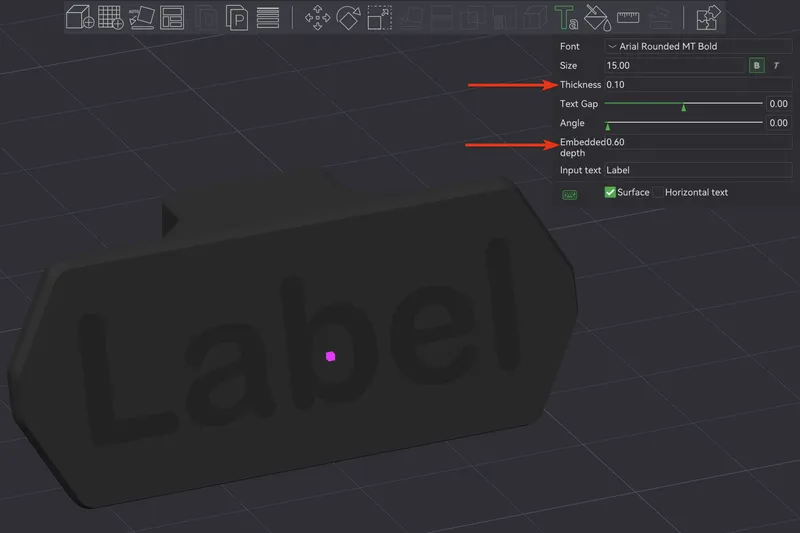
- Edit the text, font, size, etc in the pop-up box. Drag the dot to reposition the text while in the “Text Shape” mode. Do not reposition the text when not in the “Text Shape” mode as the text may move away or into the part. Dragging it on this mode keeps the text on the part. The “thickness” doesn't matter, and the “embed depth” controls how many layers of the text will be printed in the text colour.

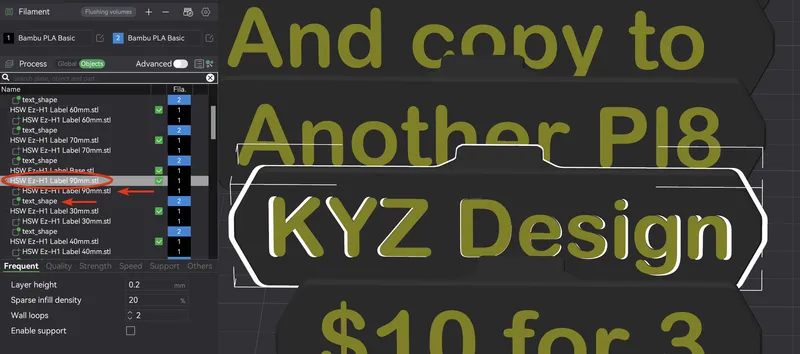
- Copy the assembly and paste it onto another plate. The assembly contains the text modifier and the part, and when selected, both should be highlighted like this:
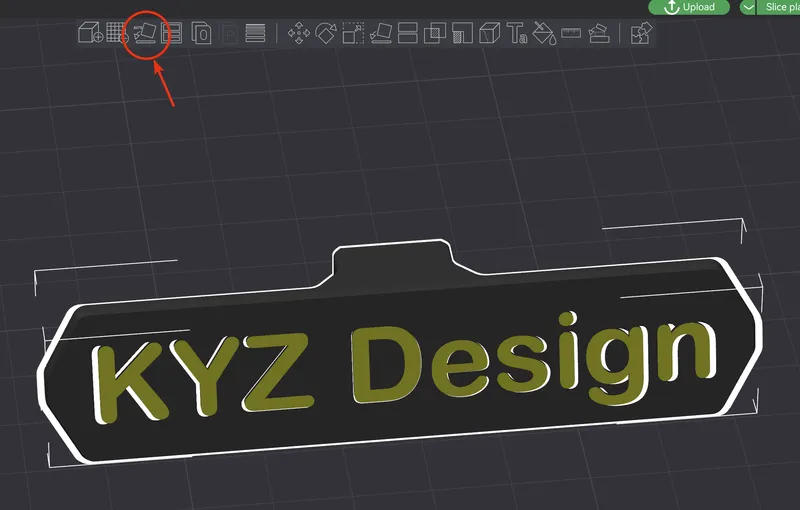
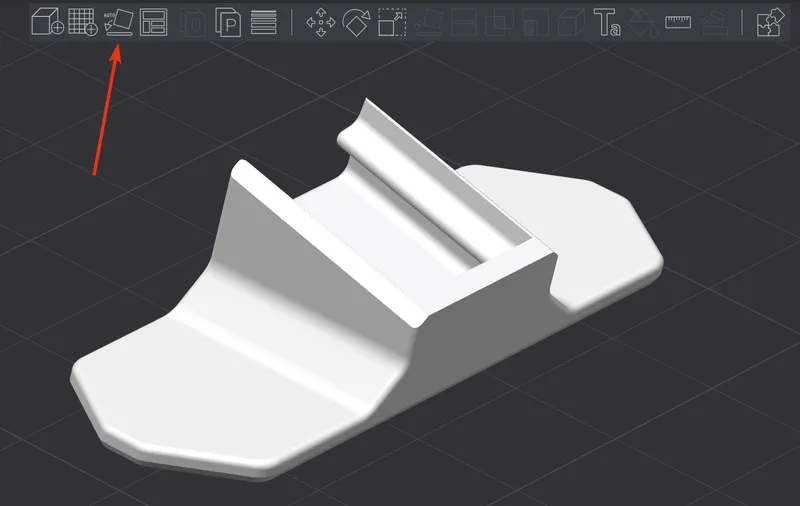
- You could print in this orientation but this will take significantly longer with many more colour changes required. You should orient the assembly face down for a nicer looking and much faster print. Do this by clicking the auto orient button. (The template is not already oriented this way as I have found that editing the text when the parts are already face down may cause issues with the text being oriented at the correct angle)
- Now pick your filaments and colours, slice, scroll through the layers to check everything is OK and print!
Section 2: How to start from scratch (for other slicers: Prusa Slicer/Cura/etc.)
This example is shown for Bambu studio, but similar features should exist in any modern slicer. The buttons you need to press may be in other places or hidden away.
- Download the STL files and import the appropriate size into the slicer. You may want to import all of them at once, but don't import them as an assembly as they will all be joined together if you do that.

- With the part selected, click the “Text Shape” button. Type in your text in the pop-up box and click in the middle of the front face to get a preview.
- Adjust the font and size, and reposition as required.
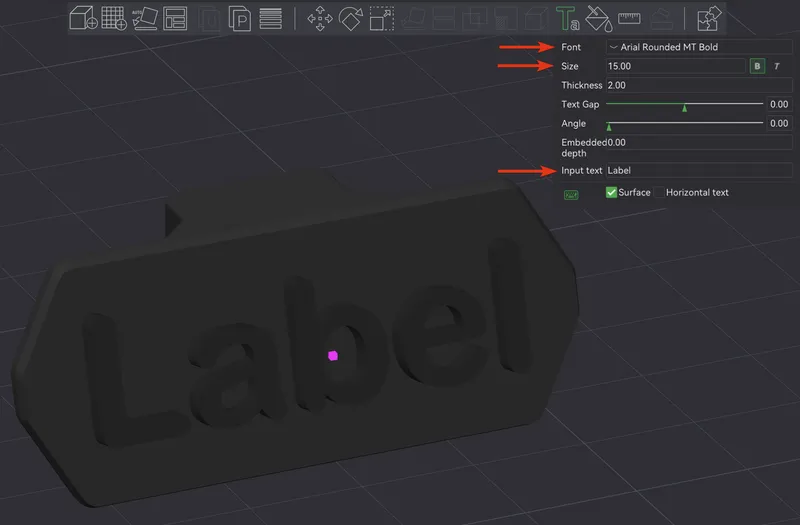
- Change the “embedded depth” to 0.6mm (this will add 3 layers of text at 0.2mm layer height). Optionally - change the “thickness” to 0.1mm - this just makes the label easier to visualise but won't make any difference to the print.
- Click on the plate or press esc to get out of the “Text Shape” mode. The objects list, right click on the text and click “change type”.
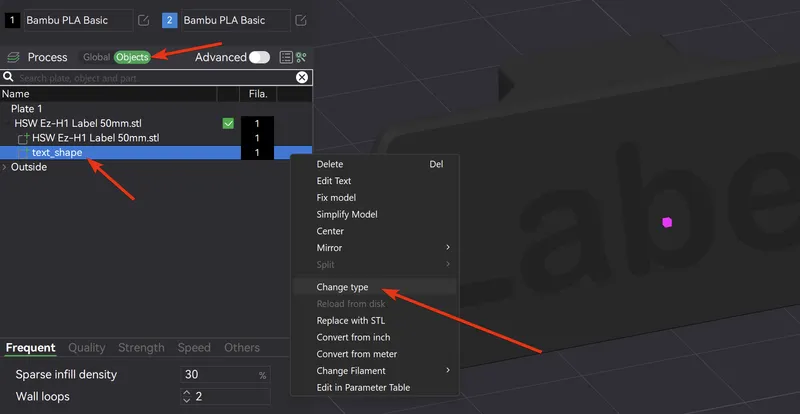
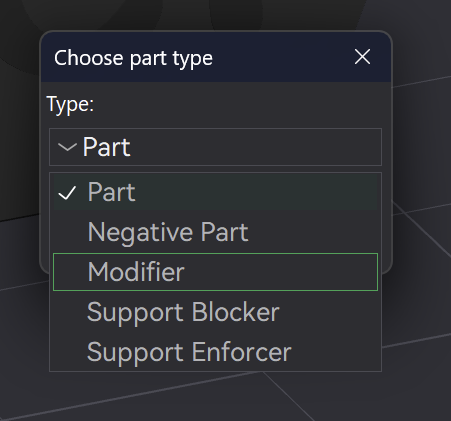
- Select “modifier”. This means that the intersection between the part and this “text shape” can have the settings changed. We will be changing the colour shape. The intersected areas are parts where the text shape is embedded into the part.
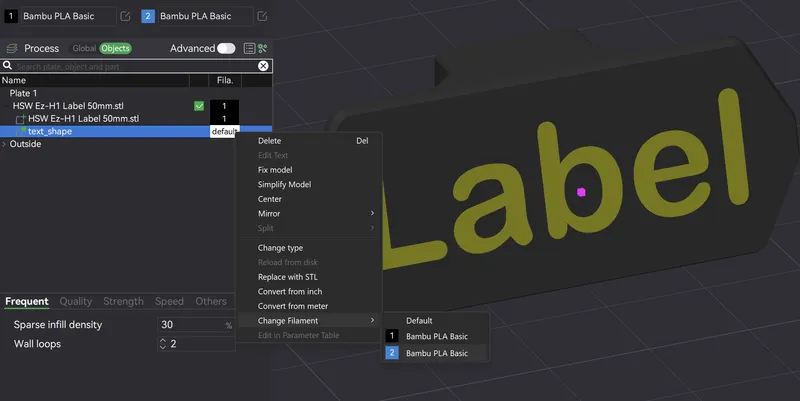
- Right click on the text shape again in the objects list and change colour by clicking “change filament”. You may need ore filaments added to the project if you only have only one filament added.
- From here, you can follow the steps described in section 1!
Special settings for Printers without AMS/MMU/etc.
If you don't have an automatic colour changer, you can still get great looking labels with only one manual colour change. Please check that your printer's firmware supports pause commands before starting this.
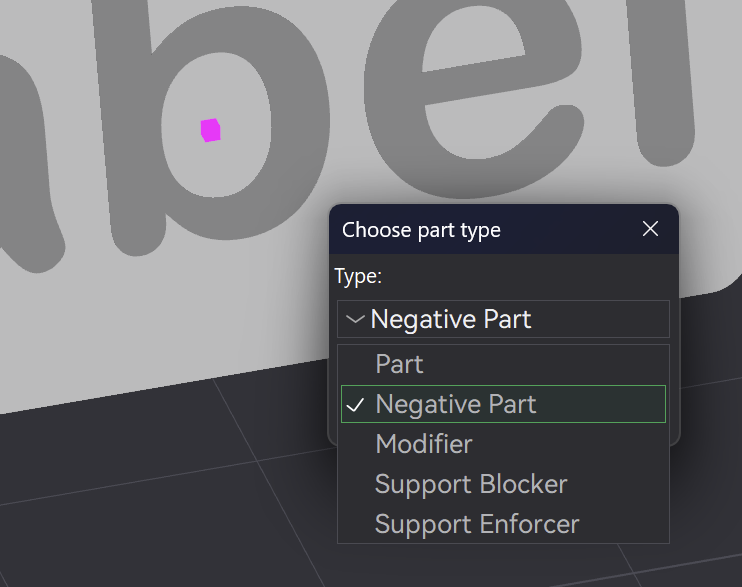
- Follow section 2 up to step 6 where you change the filament type. Here, select “Negative Part”. (I've made the whole part white to be able to see the part better.)
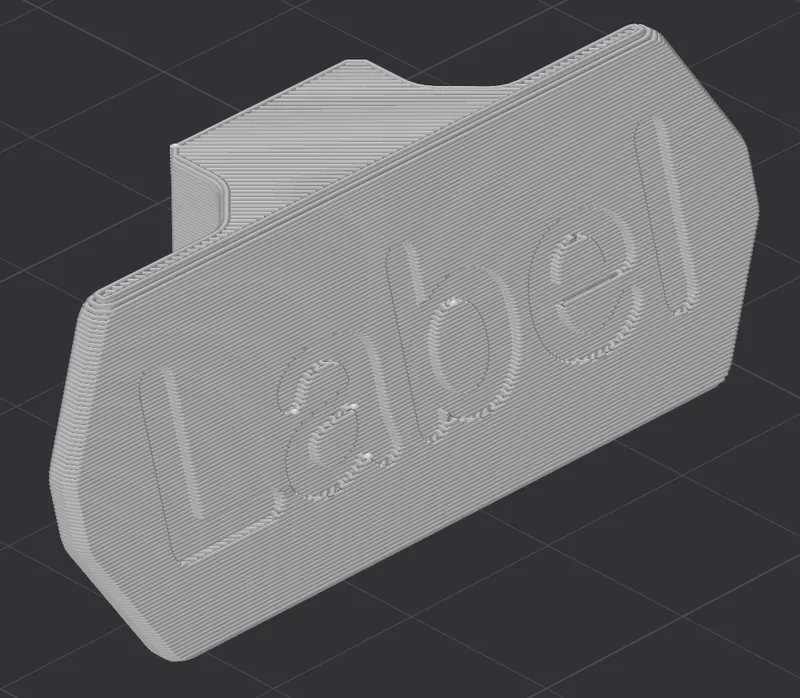
- If you slice it to have a look, you will see that the text is cut away from the part. We are not going to print it like this, this is just to see what we've done.
- Orient the part face down by clicking auto-orient.
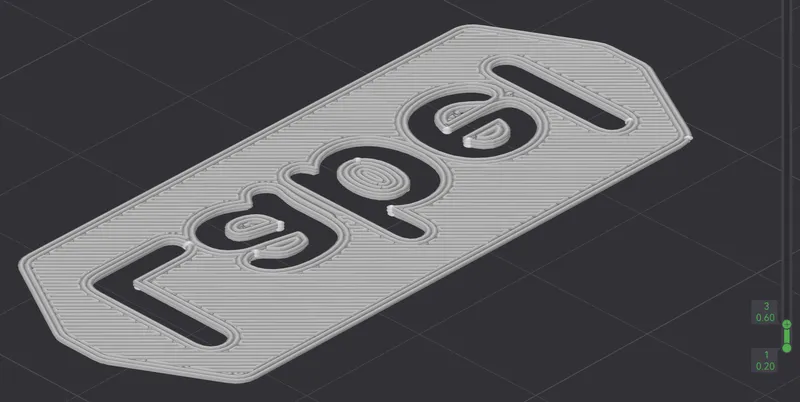
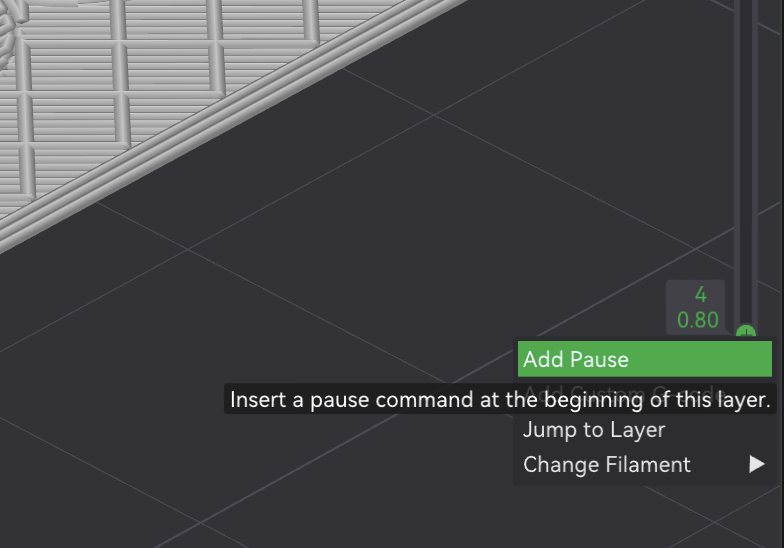
- Press slice, then scroll to to the 4th layer. This is the full solid layer. You will see that on the 3rd layer, the text is visible, and on the 4th layer, it is filled.
- Add a “pause” command to this layer by right clicking on the layer slider's “ + ” and click “Add Pause”. This will pause the printer to be able to change the filament manually.
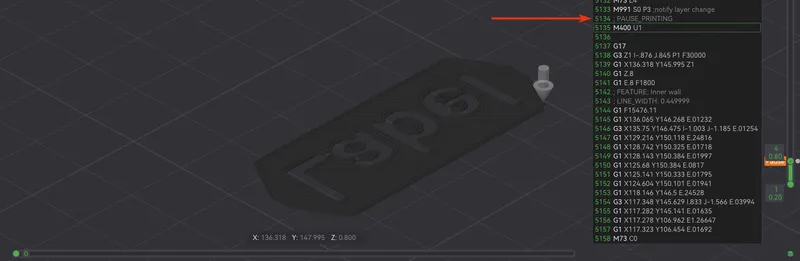
- Slice again. You can look at the gcode preview to see that a pause command (in this case it's M400 U1 but this can differ between printers) has been added.
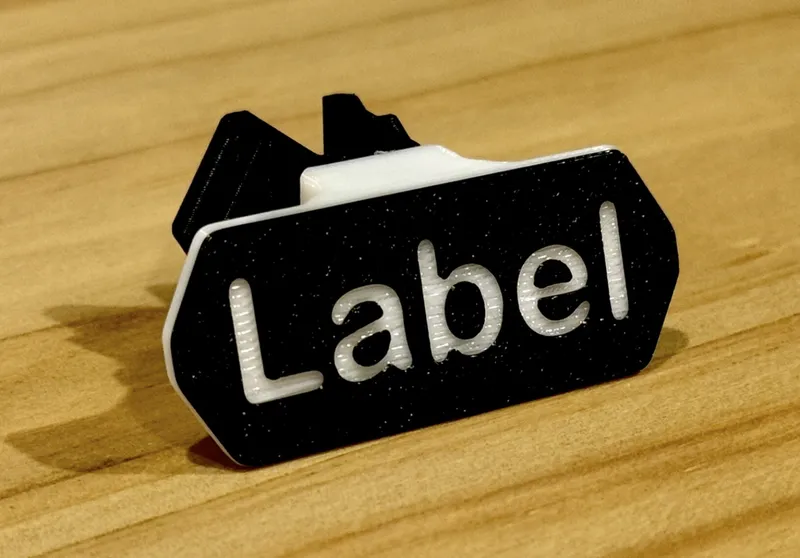
- Now scroll through the layers to check everything is OK, load the first filament and print! When the printer pauses, load the second filament and go. You may want to print many labels at once to save time. Here is my finished product - I think the 3D-ness makes it a little nicer looking than the flush one!
Print Settings
0.4mm nozzle for clean text and 0.2mm layer height, 2 perimeters.
The text face is intended to be printed face down on the build plate to minimise the number of colour changes required.
Materials
Recommended: PLA (take care using dark PLA in the sun or if leaving in a hot car), PETG, ABS, ASA
Versions
7 July 2024 - Launch with base clip and 10 sizes of labels (detailed instructions to follow)
15 July 2024 - detailed instructions added
Tags
Model origin
The author marked this model as their own original creation.