Gridfinity Magnet Installation Alignment Jig
Alignment Jig for installing 6mmx2mm magnets into Gridfinity Bins.
14
77
0
413
updated April 13, 2024
Description
PDFDo you love Gridfinity?
Do you love magnets?
Do you hate installing magnets into your Gridfinity bins?
Well, you aren't alone. I've always found it to be a particularly fiddly process to make sure you have the right polarity and to keep magnets from flying off and sticking to whatever applicator you're using.
This alignment jig is here to solve all your Gridfinity magnet problems!
Its quick to print, quick to use, and makes installing the magnets a breeze.
Assembly + Usage Instructions
Materials Needed
4 X 6x2mm Neodymium Magnets
Glue
Instructions
- Print the parts, no supports needed.
- On the Alignment tool, glue in the 4 magnets. If you're looking down at the face with the magnets, the polarity is the same as the polarity in your baseplate.
- Let the glue set and test the polarity of the alignment tool - It should stick to the bottom of an assembled gridfinity Bin.
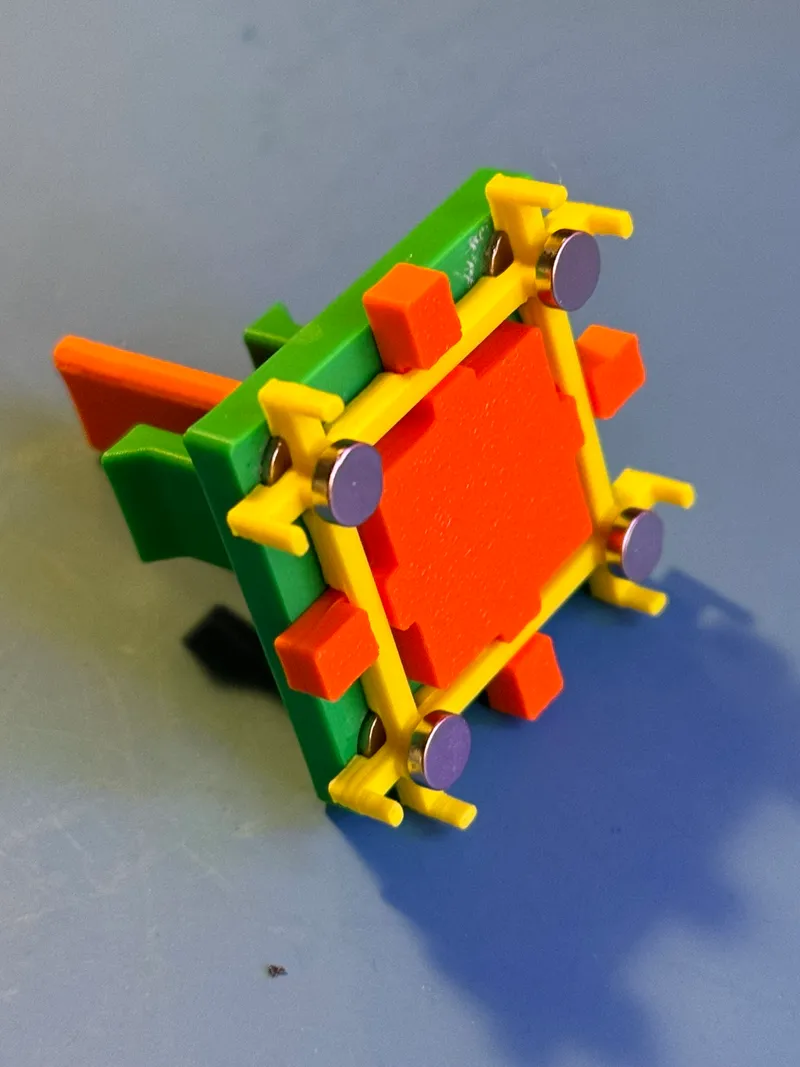
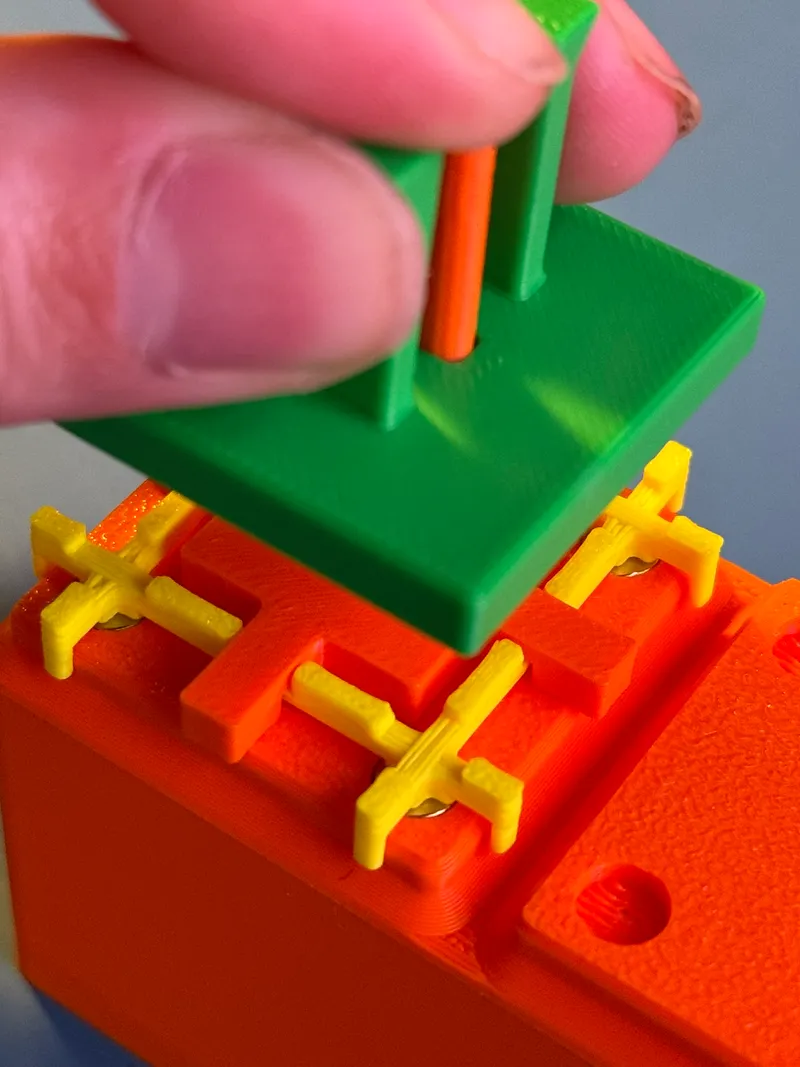
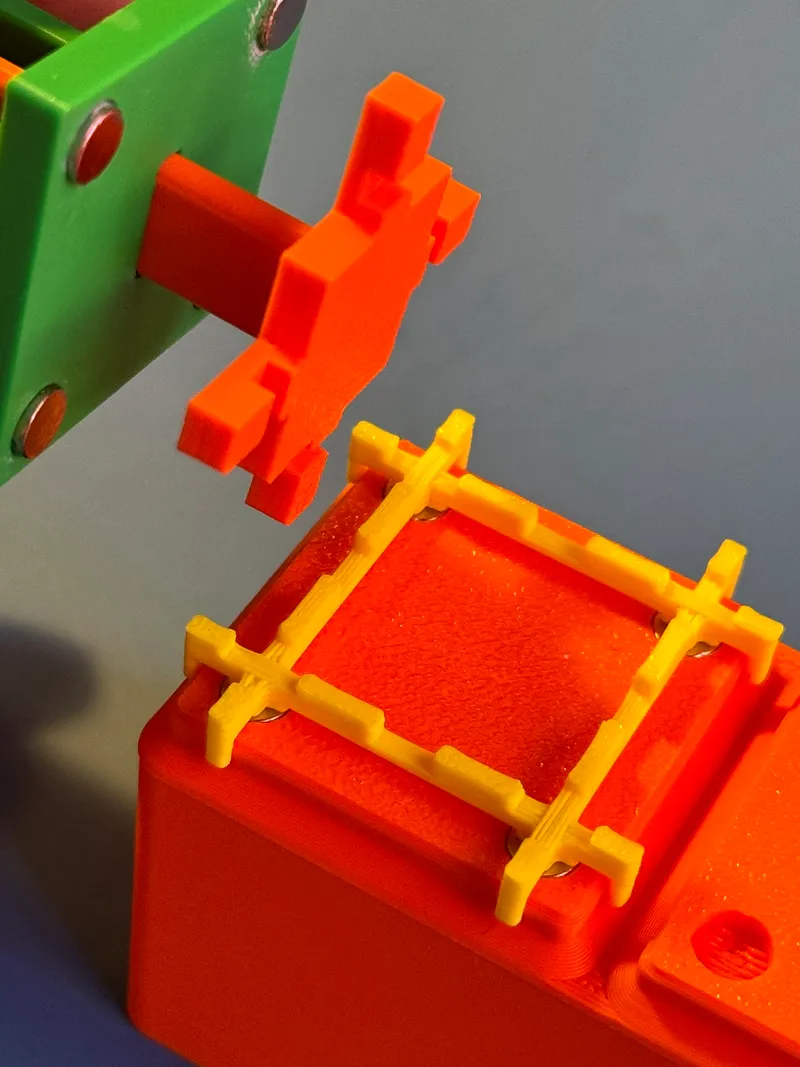
- Insert plunger into the alignment tool and place the magnet press plate into the plunger as shown.
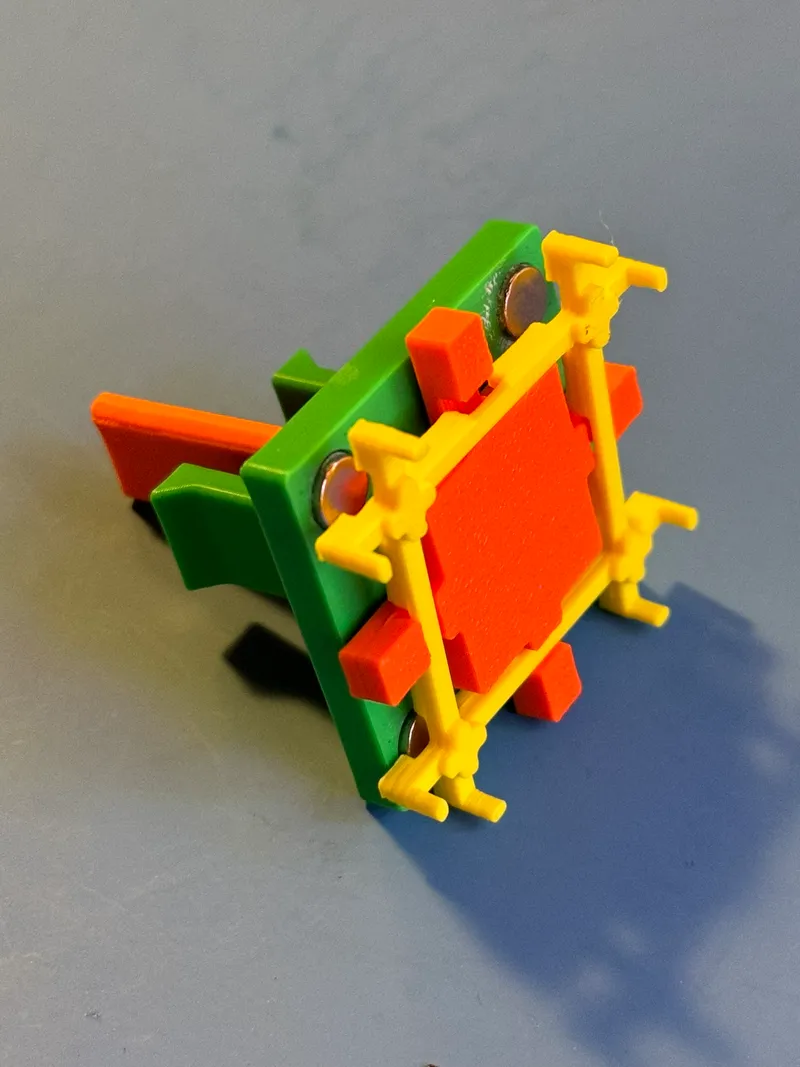
- To use, place 4 magnets on the crosses of the plate. The polarity should automatically correct itself. Note: You don't need to use all 4 magnets if you are only installing in some of the holes.
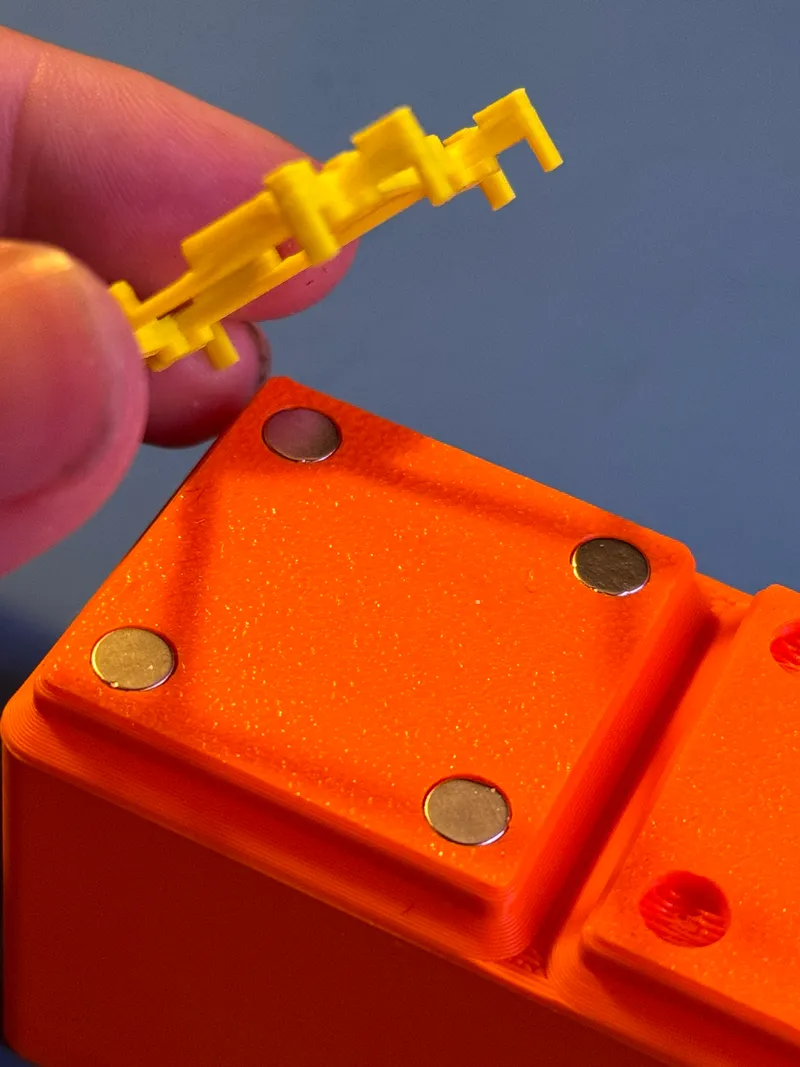
- Put drops of glue onto each hole and place jig onto bottom of bins.
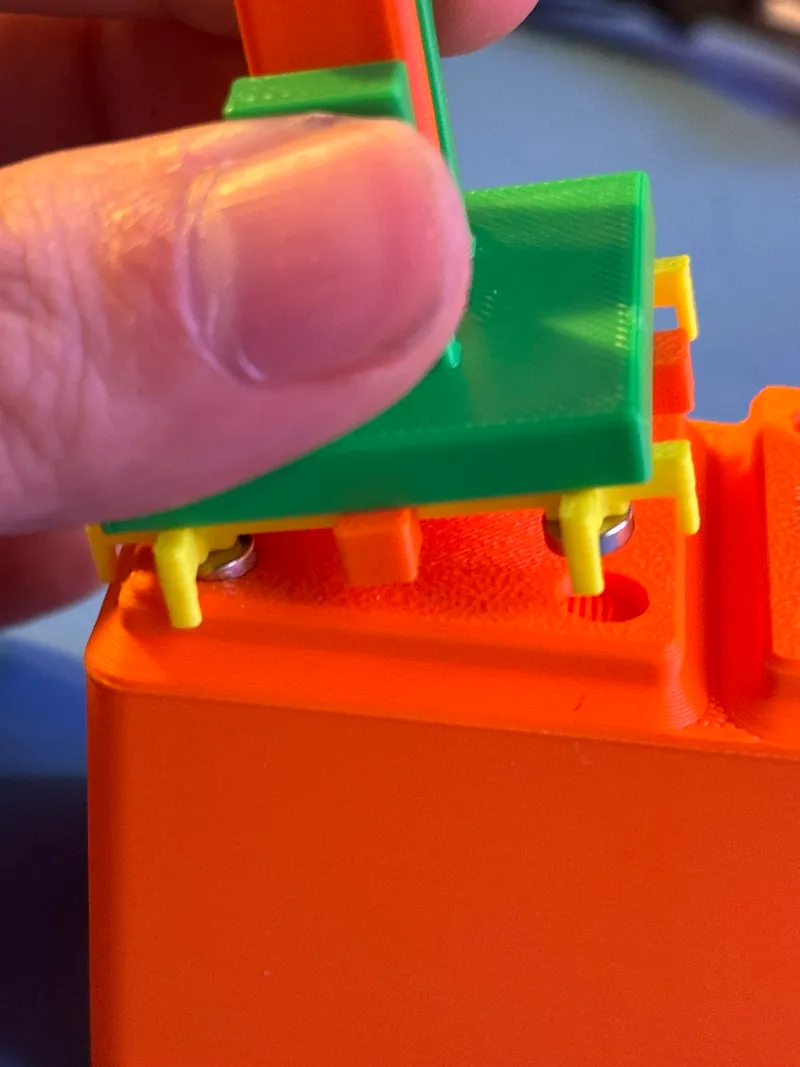
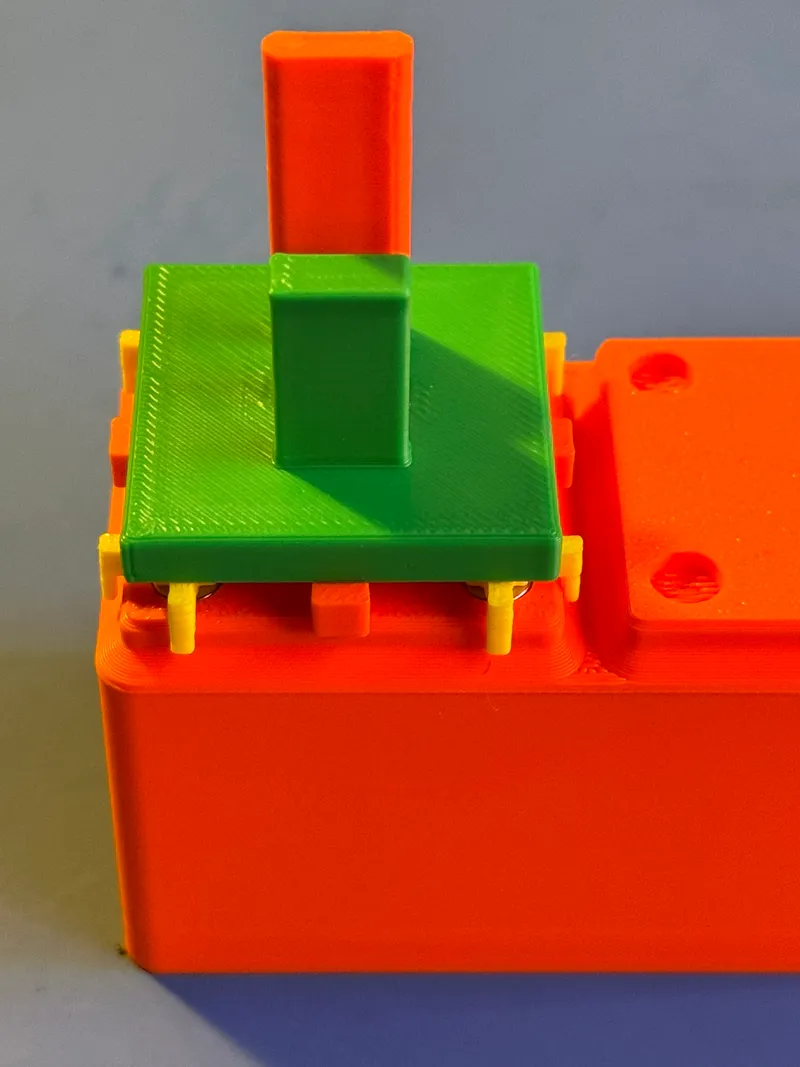
- Push down on the alignment tool to set magnets.
- Push down on the press plate while lifting the alignment tool to release magnets before lifting assembly away.
Tags
Model origin
The author marked this model as their own original creation.

