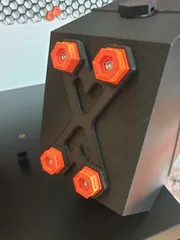
Junction Box, different sizes
Description
PDFPrint your own junction box and attach various WAGO terminals. Whichever you need for your application.
Secure your cables with zip ties or various cable glands. Use the threads for your cable glands or drill your own holes to secure the cable gland with nuts.
If you miss a variants please let me know! Anyway, if my time permits, I would like to provide further variants!
Update 29.02.2024: Clip-on lid added
Update 02.03.2024: Box 80x60 added
Update 11.03.2024: Box 120x120 added, nuts thickness from 5mm to 4mm, thread of the sleeves extended by 1.2mm
Update 21.03.2024: Higher lids added (15mm and 25mm for each box size), generic insert as stp-file, to create your own inserts.
Features:
Fix your cables with zip ties:
 |  |
Clip different WAGO Inserts in a rail:
 |  |
 |  |
| To mount the Wago inserts, they are clipped onto the rail. The Wago terminals can also be clipped in before or afterwards. | |
Add various cable glands and accessories:
 |  |
 |  |
Inserts:

- WAGO 2273-202
- WAGO 2273-203
- WAGO 2273-204
- WAGO 2273-205
- WAGO 221-412
- WAGO 221-413
- WAGO 221-415
- generic insert
Choose your lid:
- Lid 80x60, with screws, height: 7mm, 15mm, 25mm
- Lid 80x80, with screws, height: 7mm, 15mm, 25mm
- Lid 120x80, with screws, height: 7mm, 15mm, 25mm
- Lid 120x120, with screws, height: 7mm, 15mm, 25mm
- Lid 80x60, clip on
- Lid 80x80, clip on
- Lid 120x80, clip on
- Lid 120x120, clip on
| Example: Lid 80x60, with screws | |
 |  |
| Example: Lid 80x60, clip on | |
 |  |
Box Variants 80x80:

| Breakouts | M12 x 1.5 | M16 x 1.5 | M12x1.5 zip ties | M16x1.5 zip ties | Rail for inserts | Note | |
|---|---|---|---|---|---|---|---|
| 1 | NO | only box | |||||
| 2 | 8x | NO | |||||
| 3 | 8x | NO | |||||
| 4 | 8x | NO | |||||
| 5 | 8x | NO | |||||
| 6 | 8x | NO | |||||
| 7 | 4x | 4x | NO |
different Positions | |||
| 8 | 4x | 4x | NO | ||||
| 9 | 4x | 4x | NO | ||||
| 10 | 4x | 4x | NO | ||||
| 11 | 4x | 4x | YES | ||||
| 12 | 4x | 4x | YES | ||||
| 13 | 4x | 4x | YES | ||||
| 14 | 4x | 4x | YES | ||||
| 15 | 4x | 2x | 2x | YES |
Box Variants 120x80:

| Breakouts | M12 x 1.5 | M16 x 1.5 | M12x1.5 zip ties | M16x1.5 zip ties | Rail for inserts | Note | |
|---|---|---|---|---|---|---|---|
| 1 | NO | only box | |||||
| 2 | 10x | NO | |||||
| 3 | 10x | NO | |||||
| 4 | 10x | NO | |||||
| 5 | 10x | NO | |||||
| 6 | 10x | NO | |||||
| 7 | 4x | 6x | NO |
different Positions | |||
| 8 | 4x | 6x | NO | ||||
| 9 | 4x | 6x | NO | ||||
| 10 | 4x | 6x | NO | ||||
| 11 | 6x | 4x | YES | ||||
| 12 | 6x | 4x | YES | ||||
| 13 | 6x | 4x | YES | ||||
| 14 | 6x | 4x | YES | ||||
| 15 | 6x | 2x | 2x | YES |
Box Variants 80x60:

| Breakouts | M12 x 1.5 | M16 x 1.5 | M12x1.5 zip ties | M16x1.5 zip ties | Rail for inserts | Note | |
|---|---|---|---|---|---|---|---|
| 1 | NO | only box | |||||
| 6x | NO | ||||||
| 3 | 6x | NO | |||||
| 4 | 6x | NO | |||||
| 5 | 6x | NO | |||||
| 6 | 6x | NO | |||||
| 7 | 2x | 4x | NO | ||||
| 8 | 2x | 4x | NO | ||||
| 9 | 4x | 2x | NO | ||||
| 10 | 4x | 2x | NO | ||||
| 11 | 4x | 2x | YES | ||||
| 12 | 4x | 2x | YES | ||||
| 13 | 4x | 2x | YES | ||||
| 14 | 4x | 2x | YES |
Box Variants 120x120:

| Breakouts | M12 x 1.5 | M16 x 1.5 | M12x1.5 zip ties | M16x1.5 zip ties | Rail for inserts | Note | |
|---|---|---|---|---|---|---|---|
| 1 | NO | only box | |||||
| 2 | 12x | NO | |||||
| 3 | 12x | NO | |||||
| 4 | 12x | NO | |||||
| 5 | 12x | NO | |||||
| 6 | 12x | NO | |||||
| 7 | 4x | 8x | NO |
different Positions | |||
| 8 | 8x | 4x | NO | ||||
| 9 | 4x | 8x | NO | ||||
| 10 | 8x | 4x | NO | ||||
| 11 | 6x | 6x | YES | ||||
| 12 | 6x | 6x | YES | 2 rails | |||
| 13 | 6x | 6x | YES | 2 rails | |||
| 14 | 6x | 6x | YES | 2 rails | |||
| 15 | 6x | 2x | 4x | YES | 2 rails | ||
| 16 | 8x | 4x | YES | 4 rails | |||
| 17 | 8x | 4x | YES | 4 rails |
Print Settings:
- See the different examples in download section, especially for orientation
- I used PETG, PLA will work too
- 0,2mm layer heigt
- 0,4mm nozzle
- 15% infill
- no supports needed
Screws:
- Use countersunk screws M4 to assemble the lid with screws
Miscellaneous:
- Electrical work may only be carried out by trained electricians.
- Does not represent a certified junction box according to VDE or similar standards.
- Use at your own risk.
Tags
Model origin
The author marked this model as their own original creation.


