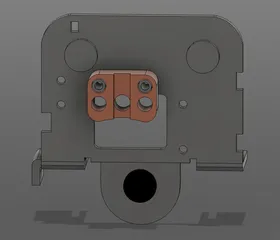
Ender 3 V2 NEO - Sherpa Micro Extruder || Stock Toolhead
Description
PDFV3.1 Is now released - New features;
2mm thicker top mount - 0 visible flexion now @ recommended print settings
Added some parts to increase rigidity, moved cable tie hole
Tidied up design
--------------------
DISCLAIMERS:
Print on TOP face / aka upside down.
(NOT for ender 3v1, v2, pro, s1, etc etc AFAIK)
This is in beta, I have now printed the previous version and this is the updates from the minor issues I discovered.
[Please feel free to message me if the model needs updating, or help installing.]
This will allow you to fit your Sherpa Micro (not mini) to your stock Ender 3 V2 NEO model.
I did initially try to adapt another design but ended up resketching the whole project from scratch as the v2Neo carriage plate & toolhead is just too different compared to e3+v2.
Mini instructions for the installation of the mount only (I will make a full build guide and BOM if there is absolutely any interest at all)
1. Remove the shroud - 1x hex bolt at rear, pinch your index around the bottom right, then pry bottom left with index or allen-key
Remove Top two POM wheels - M4 bolt (allen) & nut on the rear of the wheel.
Remove 8mm(D) spacers, then both bolts (right bolt is a pain to get out but with enough perseverence it will)
Remove 4010 Fan ( 2x M3 bolts)
1.5 Take the 2x metal spacers and press fit them into the bottom 2 holes of the Mount
2. PTFE Tube - Cut a piece to 30mm~ , Install and tighten down in the hotend
3. Slide the mount down over PTFE, fit both bolts, wheels, then nyloc nuts
3.5. Trim PTFE tube, fit locking ring, and trim to the height of the inside of sherpa (+8mm or so?)
4. Install the Sherpa Micro ( Make SURE you have tested/calibrated your e-steps + lowered your VREF on the mainboard FIRST!!! [mine is 0.71v, test yours!] )
Enjoy your new silent direct drive system.
And I mean silent! After I ran a few meters of filament through it to tune (e-steps/rotation distance)
( PS. Youll see a TZ hotend in the pics, I did have it running on the stock hotend previously so it is 100% compatible)
I have provided stl, 3mf (I always use 3mf as its just better), and step if you need to tweak it.
This mount, while I wont call my version a remix, was definitely the inspiration and cause of mine - so thankyou Emtrax!
Recommended print:
> PETG, ABS, ASA, basically anything with v.low flexibility and decent TG. (NEMA14 runs hot but its mostly transferred to the Sherpa itself - measured temps using laser earlier and mount underneath the motor was around 30c vs 65c motor)
Layers:
Top 8Bot 8
Perims 8
Infill 70%+
Tags
Model origin
The author marked this model as their own original creation.

