Miniature Painting Handle with Magnets and Add-ons

Description
PDFI have tried a number of printed model handles and never found one that I really liked so i decided to take a crack at one myself. After some time i came up with a paint handle with multiple versions most of which utizing 10x3mm magnets at the heart of the system (although there is the option for a version that is usable with just printed parts):
- Magnetic handle with magnetized cap
- Slotted magnetic handle for accessories with magnetized cap
- Handle with screw top (magnetic bottom optional) and screw on cap
Magnetic handle with magnetized cap
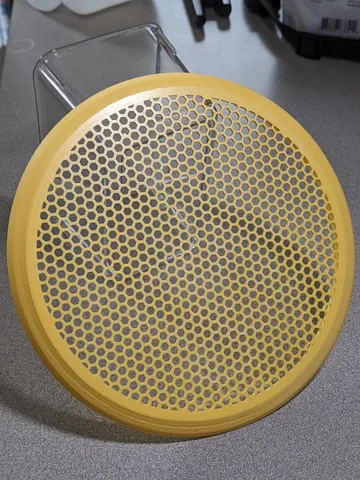
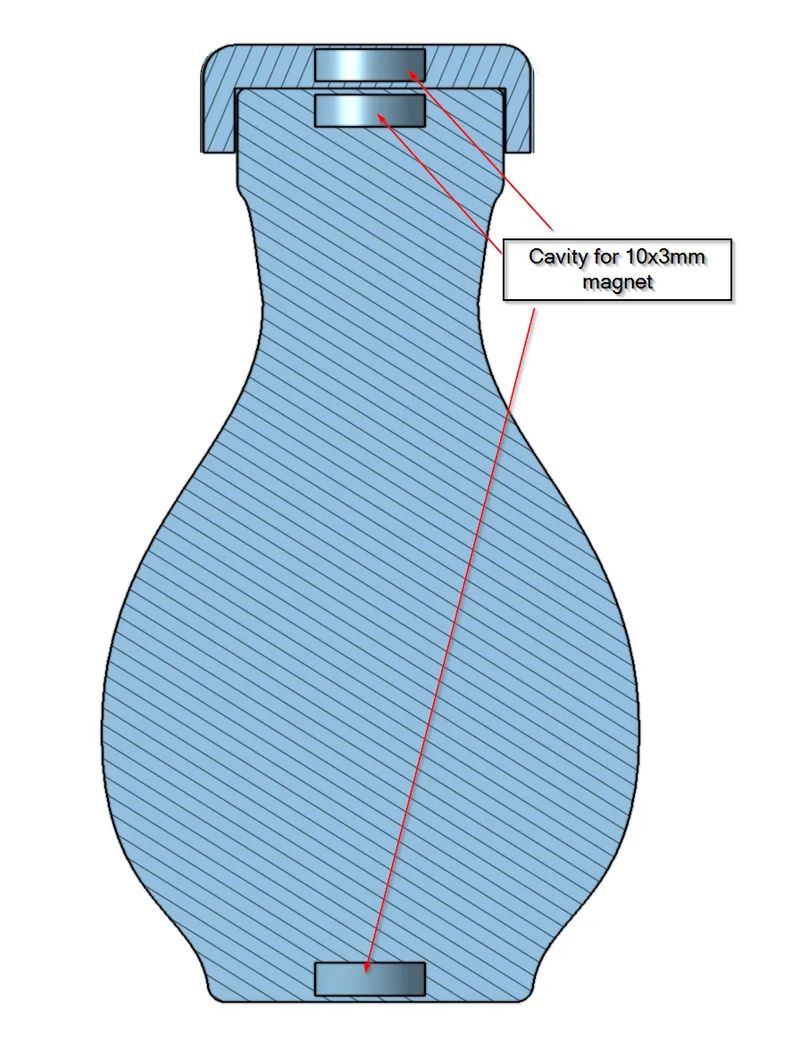
This version was my first idea when I decided to take a crack at my own painting handle for minis. The handle has facets with a roundness to the bottom. The bottom and top of the handle contains a cavity for a 10x3mm magnet so that the handle can be set on a magnetic surface which helps to prevent knocking it over or also useful for transporting in a painting bag. The cap of this version also has a cavity for the same 10x3mm magnets. When aligned properly, the cap will magnetize to the base and is able to be spun while painting.
I typically nest the handle down into my hand and either rest my index finger on the cap to prevent it from spinning or holding it lightly with my index and thumb to spin slightly as needed. The mini base can be attached with blue tack, double sided tape or can magnetize to the cap with something like a 10x5x2 magnet which should fit in most mini bases (assuming your magnets are aligned properly, if you have magnets already on your model you may need to print one of both polarities unless you glued them in all the same direction)
This model is great for someone that just wants a handle and cap but still wants the flexibility that the magnets provide.
Slotted magnetic handle for accessories with magnetized cap
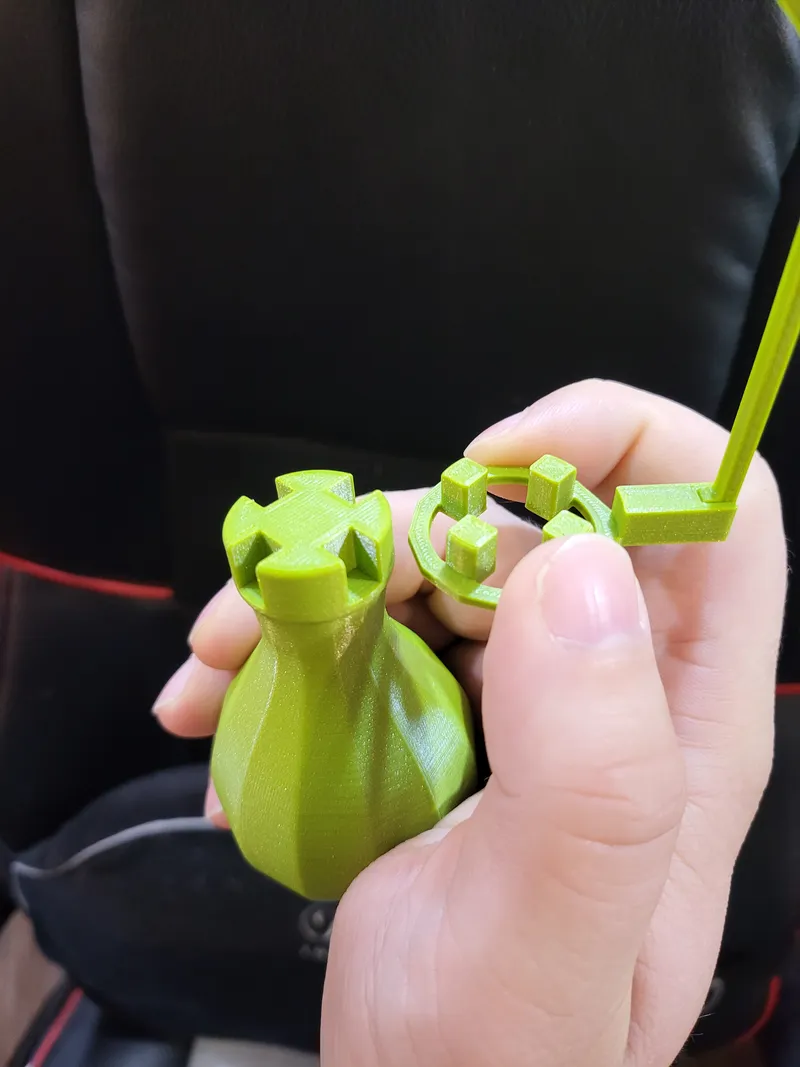
This version is a more flexible version of the first. The magnets in the bottom and top of the base remain, but there is the addition of 4 notches that allow for add-ons to be slotted on.
Once the cap (same cap as above again retaining the 10x3 magnet cavity) is magnetized to the top, the add-on is secured in place and you are still able to spin the cap freely as needed. For those that wish to have the best of both words I suggest this model for 2 reasons:
- If you wish to use the handle without an add-on, simply remove it and put the cap back on. The add-ons are designed in such a way that the cap can spin with or without the add-ons attached making this handle the most flexible.
- I have also designed a version of the cap that has notches for those that would prefer not to have the cap spin.
If you are unsure of what version to print and know you want to use the 10x3 magnets, I strongly suggest this version as it allows for the most flexibility. You can start with just the cap and base with the magnets and print add-ons as you have the need or want for them. Should you also discover that you would prefer to have the option for a stationary cap, just print off the notched cap and you can choose while painting if you want the cap to spin or not.
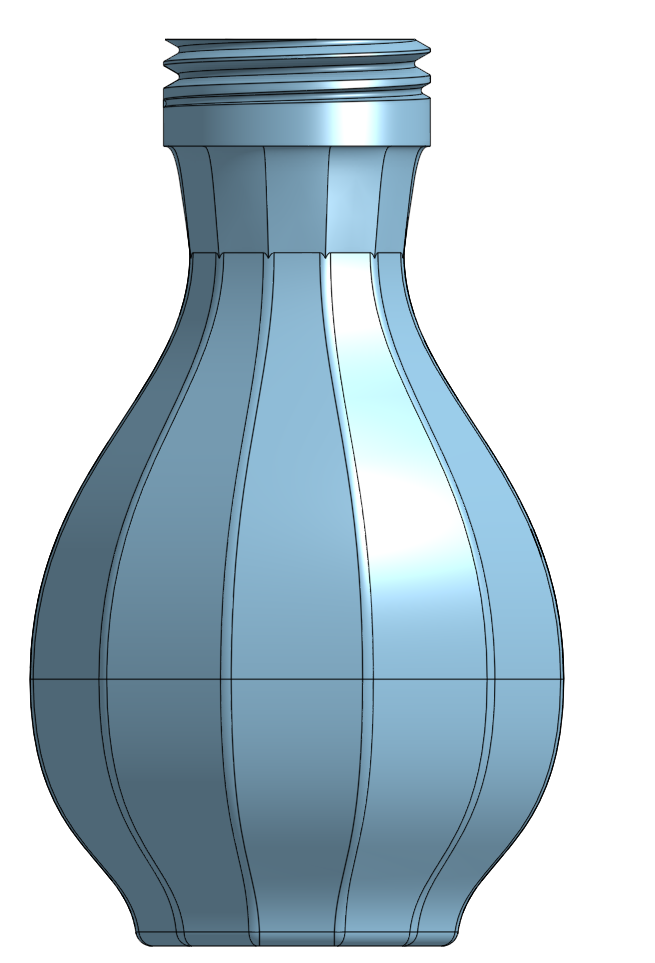
Handle with screw top (magnetic bottom optional) and screw on cap
This version of the paint handle is the only one in the collection that you do not need magnets for. There still is a cavity in the bottom of the base for a 10x3mm magnet (which I suggest using as it's very helpful when setting down a model) and also a version of the cap with the cavity as well for a magnet, but you do not need to add it and you can print the model without inserting a magnet and have no issues.
The top of the base has been altered to have a screw top and due to this the cap also has been modified to add matching threads.
If you want to give the model a try without buying or otherwise losing a magnet to a print, this is the model for you. Though this model does not have the flexibility of the add-ons, it does allow for testing of the model or for someone that would rather rely on a screw on top to keep the cap in place.
Printing Recommendation
All models can be printed without supports and are arranged as you should print them. The models have been tested at a .2mm layer height which is important for the magnet insertion. In order to add the magnets, you will need to pause the print in your slicer of choice at the correct layer. You want to pause the print on the start of the layer that adds the top to the magnetic cavity. Once paused, check polarity of your magnet, insert and resume the print. At a .2mm layer height the nozzle does not collide with magnet however if you with to double check this you can use a set of calipers to measure the depth of the hole and the thickness of your magnet just to make sure.
As for material, the models were tested in PLA but PETG would work fine as well. You may run into issues with other materials due to material shrinkage.
Magnets recommended (not affiliate links):
- 10x3mm magnets (the size magnets needed for this model): https://www.amazon.com/gp/product/B07842PSJD/ref=ppx_yo_dt_b_search_asin_title?ie=UTF8&th=1
- 10x5x2 (used for bases of miniatures if desired): https://www.amazon.com/gp/product/B0B6PBXBVJ/ref=ox_sc_act_title_4?smid=A1PGHUQ22VUJLM&th=1
Enjoy the model. I can't wait to see people using this to help their painting and if there are any add-ons you wish to see added please let me know!
Tags
Model origin
The author marked this model as their own original creation.