SCX10II mount for RC4WD 4Runner body
Description
PDFChassis kit:
https://www.axialadventure.com/product/1-10-scx10-ii-4wd-raw-builders-kit-v2/AXI90104V2.html
Body kit:
https://store.rc4wd.com/RC4WD-1985-Toyota-4Runner-Hard-Body-Complete-Set_p_7220.html
The rear hinge comes in 2 parts. Use long (30 to 35mm) M3 screws as a hinge pin.
The lower part (A) screws into place on the chassis where the rear bumper mount normally goes. The upper part (B) glues into the back of the bed of the body.
It's best to assemble the hinge before superglueing it on the body, the screws will be hard to reach after.
The rear screws that hold the hinge to the chassis can be reached with the body in the up position to completely remove it.
The bolt goes into the front bumper mount, some cutting at the back side of the mount may be needed to make the bolt come out the front far enough. Wrap something elastic around the bolt and the bumper mount. M3 screws/setscrews can be put into the bolt pins to make them more rigid.
The strike plate glues onto the chin spoiler and the front bumper, it should be flush with the bottom of the chin spoiler. Glue it on last to make sure it is in the correct position.
The small screw plugs can be used to fill the 4 screw holes in the sill of the body. Some filling and sanding will be necessary.
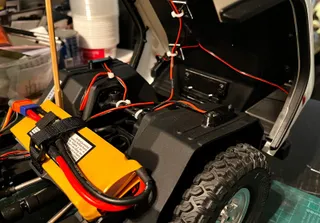
The body will sit high enough for the interior to fit with a few small modifications:
The center transfer case will interfere with the center arm rest.
The driver side footwell will need some sanding on the bottom to clear the stock receiver box.
A hole will be needed in the passenger side footwell to clear a large battery.
The rear shock hoops will not clear the bed floor. Either cut holes for them and hide them with scale accessories or switch to a cantilever suspension.
A suggestion for print orientation is included as a slicer screenshot.
My build: https://scalebuildersguild.com/forum/threads/pizza-planet-delivery-shuttle.32550/
Tags
Model origin
The author marked this model as their own original creation.


