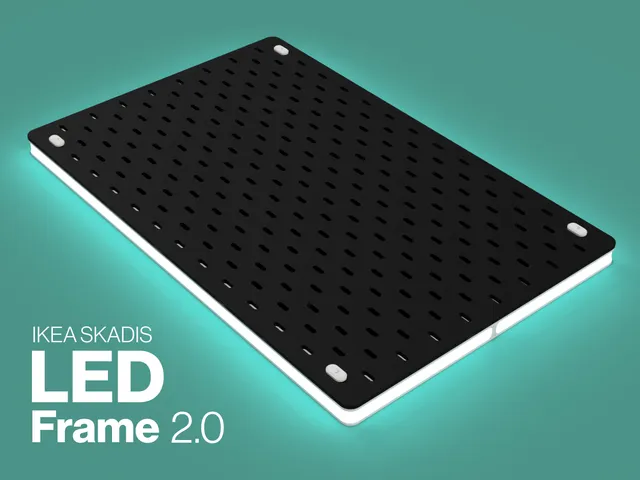
LED-Frame for IKEA SKADIS pegboards
Description
PDFLED-Frame for IKEA SKADIS pegboard 🚀
I'm sharing the design of this LED-Frame I made for my Skadis pegboards. This took a while for me to complete. ✨
It's controlled by an ESP32-Controller running WLED. The frame is divided in smaller segments, so it can be printed on my i3MKS+ and without supports. On the outside is a groove for some kind of diffusion material. The frame is assembled using M3 screws and square nuts. Securing it to the board is done with printed connectors. You can mount it to the wall with the original bracket that comes with the boards.
UPDATE:
- New Version 2.0 is out with support for multi-board setups
DISCLAIMERS ⚠: Since I'm not good at electronics, this project is only about the frame itself and not the wiring. I had a friend do the calculations, soldering and wiring for me.
… I'm sorry! 😉
Feedback 🚀
This project took way to long and I dumped loads of hours into it.
If you enjoy it, please leave a like. If you recreate it yourself, please share some images, I'd love to see some makes of this!
Materials 🔮
This is a list of the materials needed for this project:
| Small (36 x 56cm) | Medium (56 x 56cm) | Large (76 x 56cm) |
| Matte white filament (preferably white for better light reflection) | ||
| LED-Strip: WS2812B 60LED/m with: | ||
| 100 LEDs | 124 LEDs* | 148 LEDs* |
| ESP32 Controller with WLED installed | ||
| Diffusion Material** | ||
| 34 × M3 Square nut (DIN 562) | 54 × M3 Square nut (DIN 562) | |
| 16 × M3x8mm (DIN7984) | 24 x M3x8mm (DIN7984) | |
| 18 × M3x12mm (DIN7984) | 30 x M3x12mm (DIN7984) | |
* I designed the original small frame with 60LED/m strips in mind. It perfectly fits 100LEDs, with the first one of them being disabled in WLED. I don't know if less or more dense LED-Strips will fit nicely. Especially denser strips might not be flexible enough to work around the corners. Also the amount needed for the larger frames is a quick calculation. Didn't test these, you might need one or two LEDs more.
** I went with a diffusion filter for studio-/stage-lights I found online and cut it to size. You may as well use paper or any other material that will diffuse the LEDs. Or you can print these diffusor-parts by SteKu
Parts Overview 🧱
This is a list of the parts you need to print to assemble your frames.
For every part there will be a “Top” and a “Bottom”.
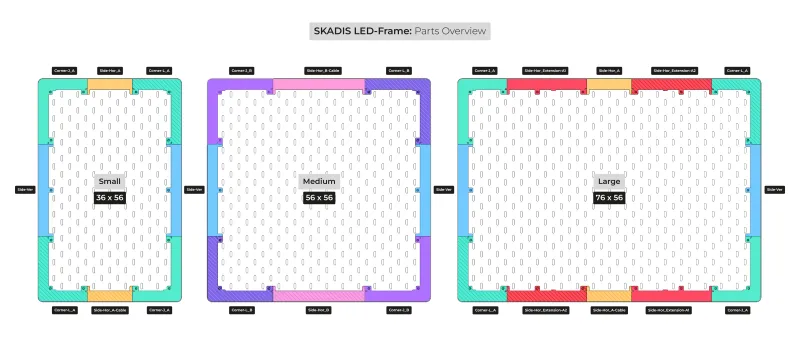
| Small (36 x 56cm) | Medium (56 x 56cm) | Large Extensions (76 x 56cm) |
| 2x Corner-J_A | 2x Corner-J_B | 2x Corner-J_A |
| 2x Corner-L_A | 2x Corner-L_B | 2x Corner-L_A |
| 2x Side-Ver | 2x Side-Ver | 2x Side-Ver |
| 1x Side-Hor_A | 1x Side-Hor_B | 1x Side-Hor_A |
| 1x Side-Hor_A-Cable | 1x Side-Hor_B-Cable | 1x Side-Hor_A-Cable |
| 4x Connector | 4x Connector | 8x Connector (or 4x Connector)* |
| 2x Side-Hor_Extension-A1* | ||
| 2x Side-Hor_Extension-A2* | ||
* The large version has two additional attachment points to mount it to the board. If you don't want that (It's cleaner on the front, but it might sag), you can replace the Side-Hor_Extensions with the versions B
Printing 🖨
I printed all the parts on my Prusa i3MKS+ with the following settings:
- Layer-heights: 0.3mm*
- Infill Pattern: Grid
- Infill Density: 32%
- Orientation: I printed the parts in the way the stl-files are oriented when importing into PrusaSlicer
*Some of the heights of the parts are adjusted to align perfectly with the 0.3mm layer height steps. I chose 0.3mm to keep printing times reasonably low for each part. I'm sure printing the parts in higher resolution works fine as well.
Assembly 🔨
- Frame:
Assembling the frame is pretty straight forward. Connect the individual parts using the square nuts and screws. Horizontal connections use 8mm, vertical connections 12mm screws (including the connection to the board itself). - LED-Strip:
Inserting/removing the LED-strip is possible while all parts are already assembled*. Use the intended cutout in the short side.
*I removed the double sided tape from the LED-strips before inserting. - Two Diffusion-Strips:
The only tricky part was fidling the diffusion strips inside the groves. For this I removed the top part of one of the short sides and inserted it from there.
Strip measurements:
➜ Height: 17mm
➜ Length for Small Frame: 900mm*
*At least according to the software. I cut the strips in pieces longer than 900mm and trimmed them accordingly after inserting. This way I got them to fit perfectly.
One side of each diffusion strip needs an angled cut, since the cable routing cutout is in the way. See drawing below. (measurements in mm)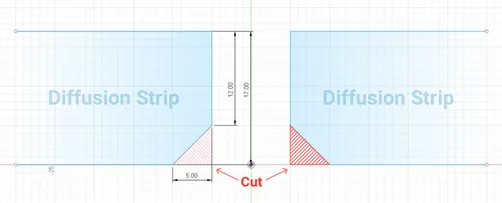
Good to know 🗒
Other stuff I'd like to mention:
- You may have to make the holes in the Ikea board a bit wider, so there won't be to much force on any of the parts. In the software, everything always fits super precisely^^. But I obviously can't control the production tolerances of the boards. Also your finished prints might vary slightly from mine :)
- Clean up your parts before assembling. If you remove all the tiny bits that are uneven after printing, you'll get a more flush fit and a nicer looking frame!
- I made a small thinking mistake in the design. I made the cutout for the cable routing in the bottom. When the frame is assembled, and the board mounted to the wall, the cable cutout is by the board, and not the wall. Whoops. Just flip the two short sides with the cable cutout and assemble them upside down. The overlaps inside won't be like all the others, but it won't be visible once the frame is assembled! 😉
Happy printing!
Changelog
- 2023.01.08: Fixed a design Error on parts, preventing them from joining together with the bottom counterparts:
- Side-Hor_Extension-A1-Top
- Side-Hor_Extension-A2-Top
Tags
Model origin
The author marked this model as their own original creation.