Open for Beta, Qidi Plus4 Articulating Door Hinge No Hands Seal

Description
PDFThis is an articulated double hinged door frame seal that I designed some time ago and have only gotten around to testing, it's been up on printables for a while but I minimized tagging it or sharing it to get it to a better releasable version.
I don't usually keep unfilled petg or nylon around so testing the live hinge hasn't been easy, I'll post a photo or video of my completed version soon, I'm away at the moment.
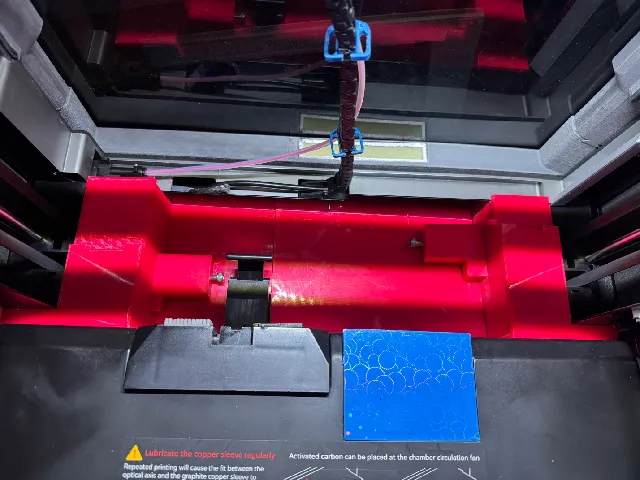
NOTE: this does NOT work with the original Qidi Monitor and the monitor needs to be raised. in doing so I made a model that puts the monitor on a hinge that works with this door seal. In fact it's the whole purpose of this model in the first place
Materials Needed:
- Filament for Live hinge(PCTG, Nylon) or even TPU, it doesn't absolutely need to be rigid (but it helps), so TPU can work, (but I would recommend some reinforcement on the articulating extensions if using TPU).
- (I don't recommend CF or GF filaments unless you've had luck with live hinges there, but I have not, I've heard FR-PC makes PC flexible, and would leave to hear if anyone tries this)
- CA glue
- Flexible Jewelry glue(flexible jewelry glue holds up to high temperatures really well and is also removable by rubbing/rolling it up, the link is an example, not an endorsement), or thin double sided sticky tape
Instructions
use Orca or Qidi Slicer to auto orient the printing face, it should orient all the sides to be printing Face-Down

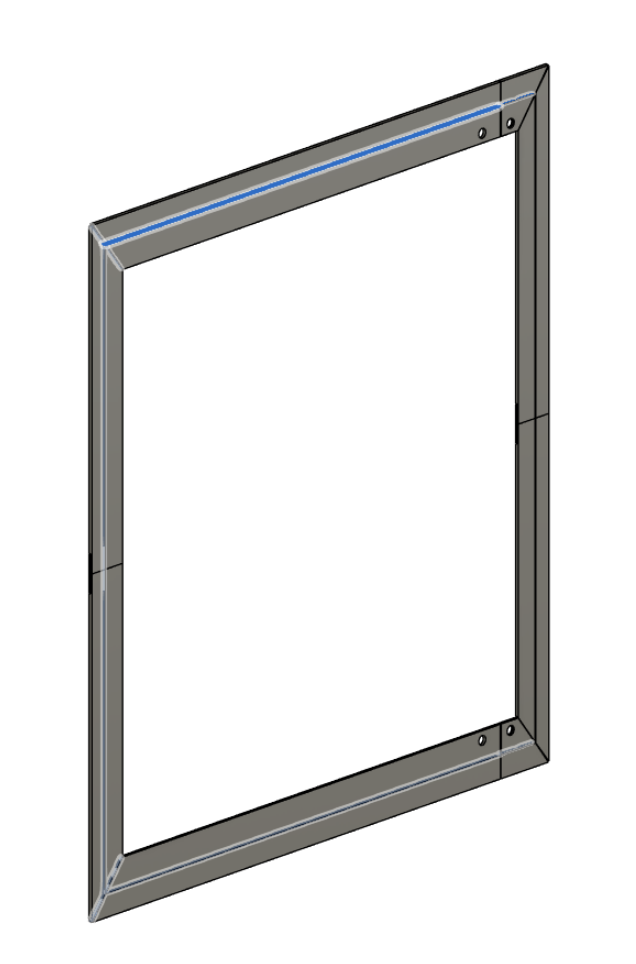
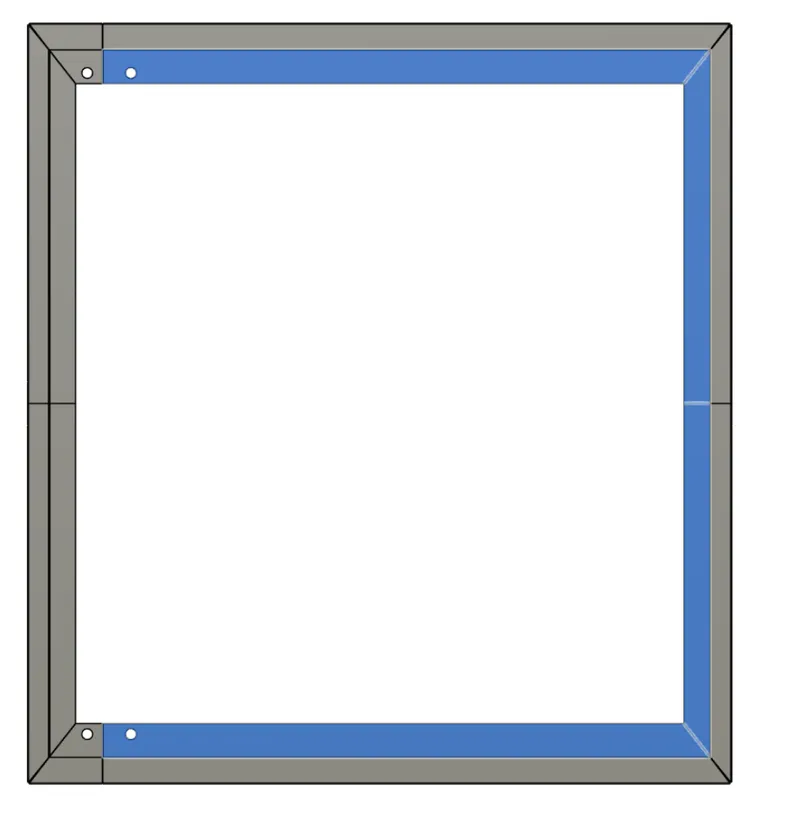
After printing us CA glue to glue together the frame/seal/hinge in the following order, Blue highlighted sections indicate glue areas
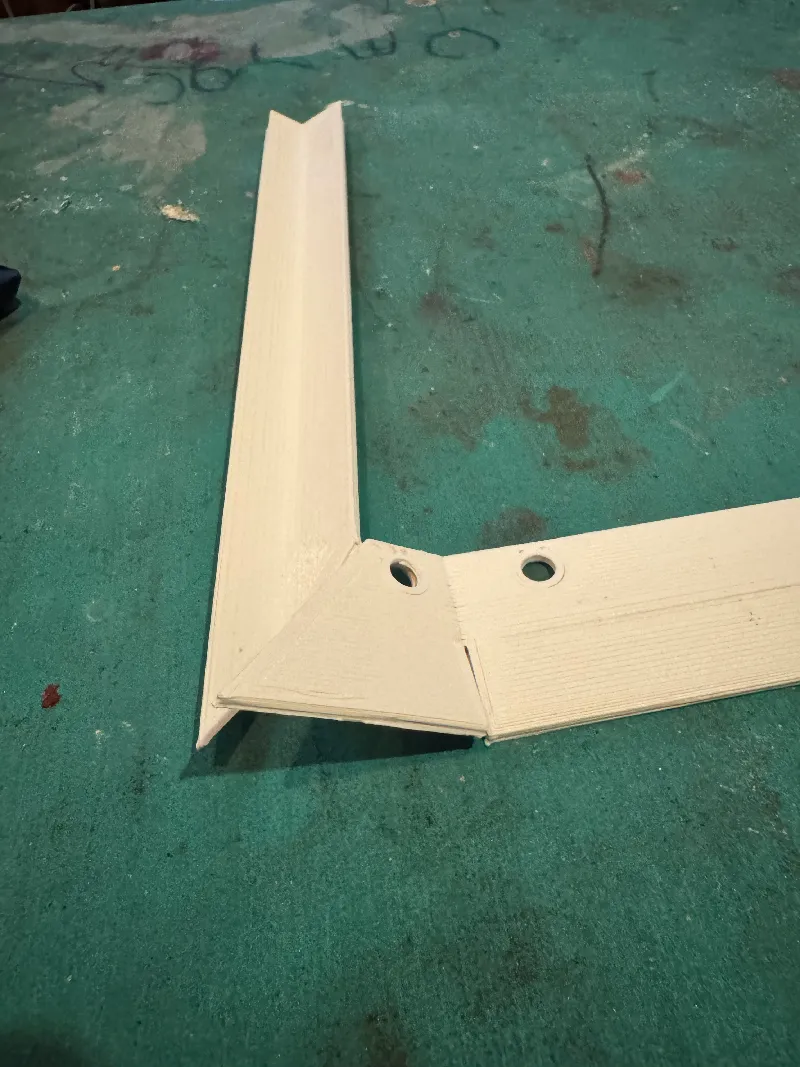
- First fold and glue together the printed individual frame pieces so it conforms to the shape of the angle from the door to the frame, the angles are correct, so you shouldn't need to make adjustments when gluing up. glue like so:
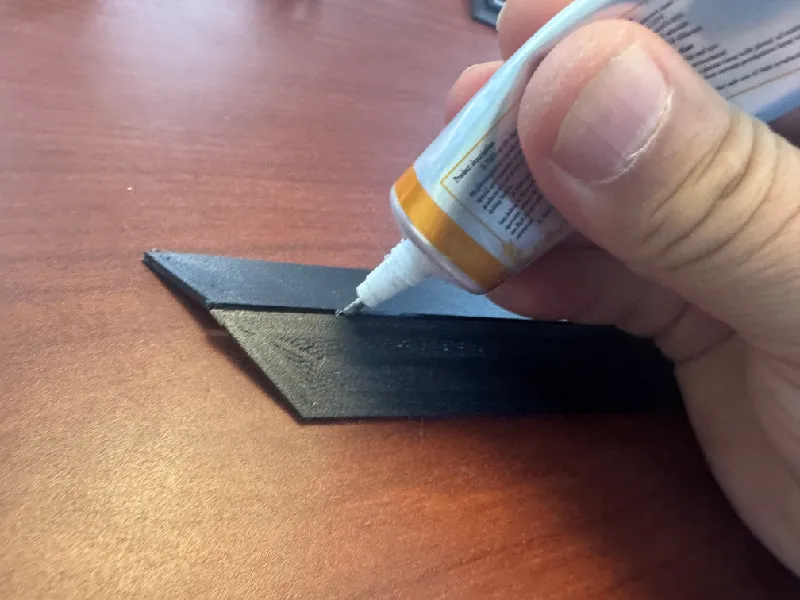 (even though I'm using flexible jewelry glue here, I went back and used CA glue
 You can hold it together with rubberbands. Hold it together firmly.
- DO NOT GLUE this part
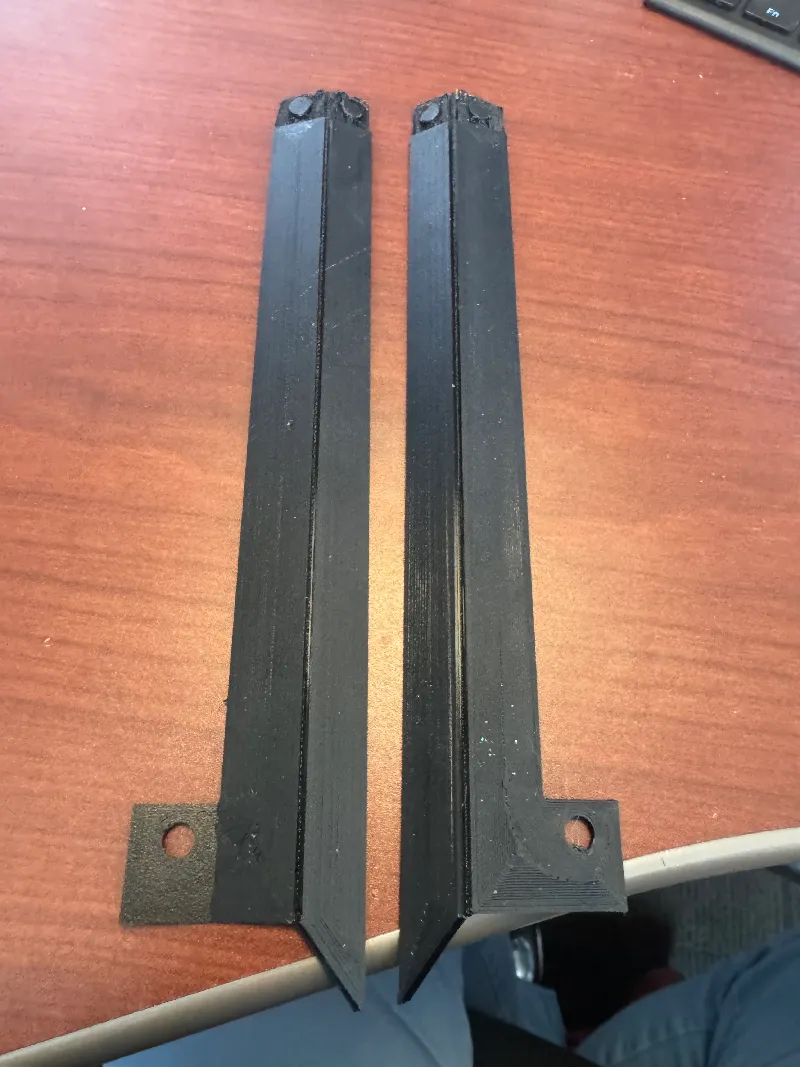 this print, is the hinge, it hinges where the door meets the frame, so you should NOT glue the center of this part.
- Next Glue the pieces together like so. the is the ONLY other section where you will use CA glue
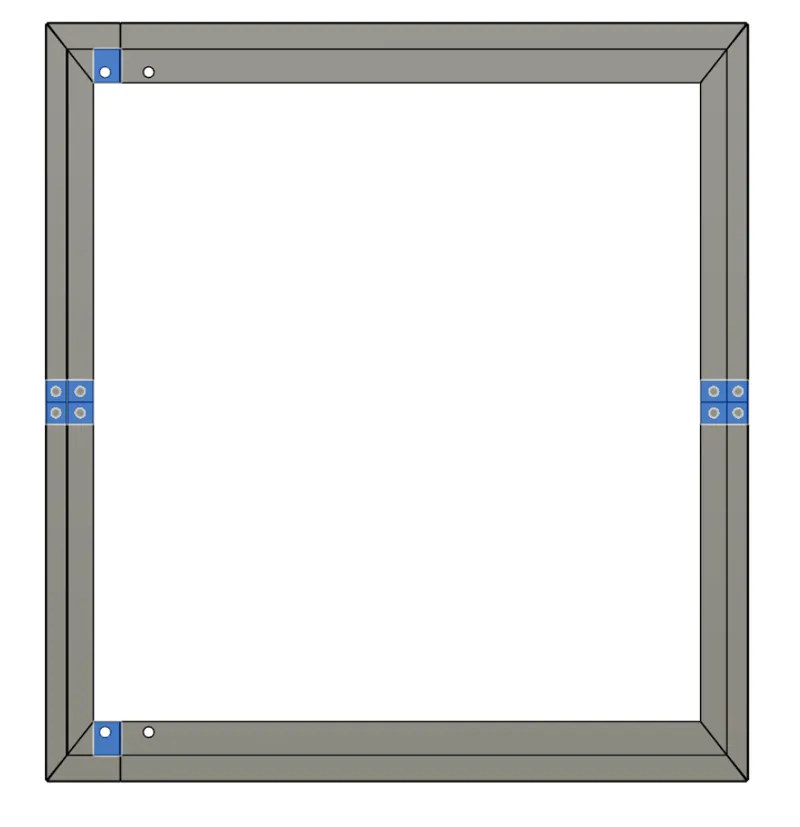
- the frame clips should be self explanatory, if your filament and printing isn't tuned, you'll need to do some sanding after gluing the frame clips, otherwise it should fit without any problems.
- the top and bottom are critical and must be done correctly. ONLY glue the sections shown together. It should look like this
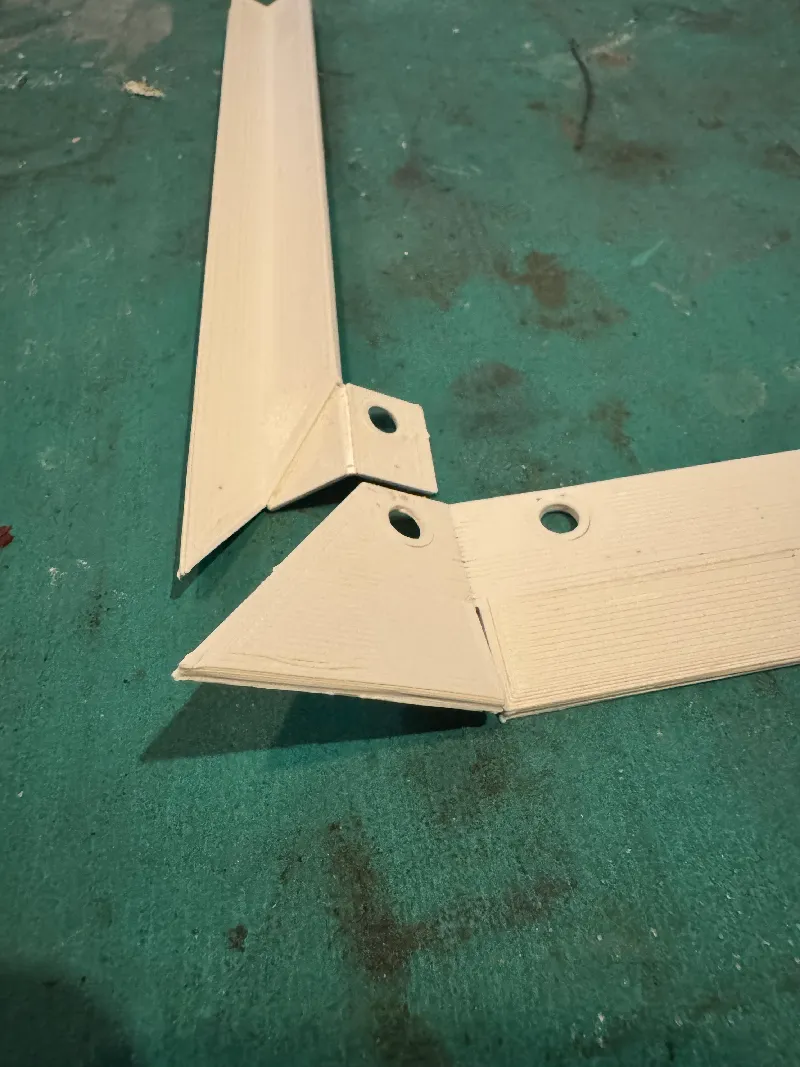
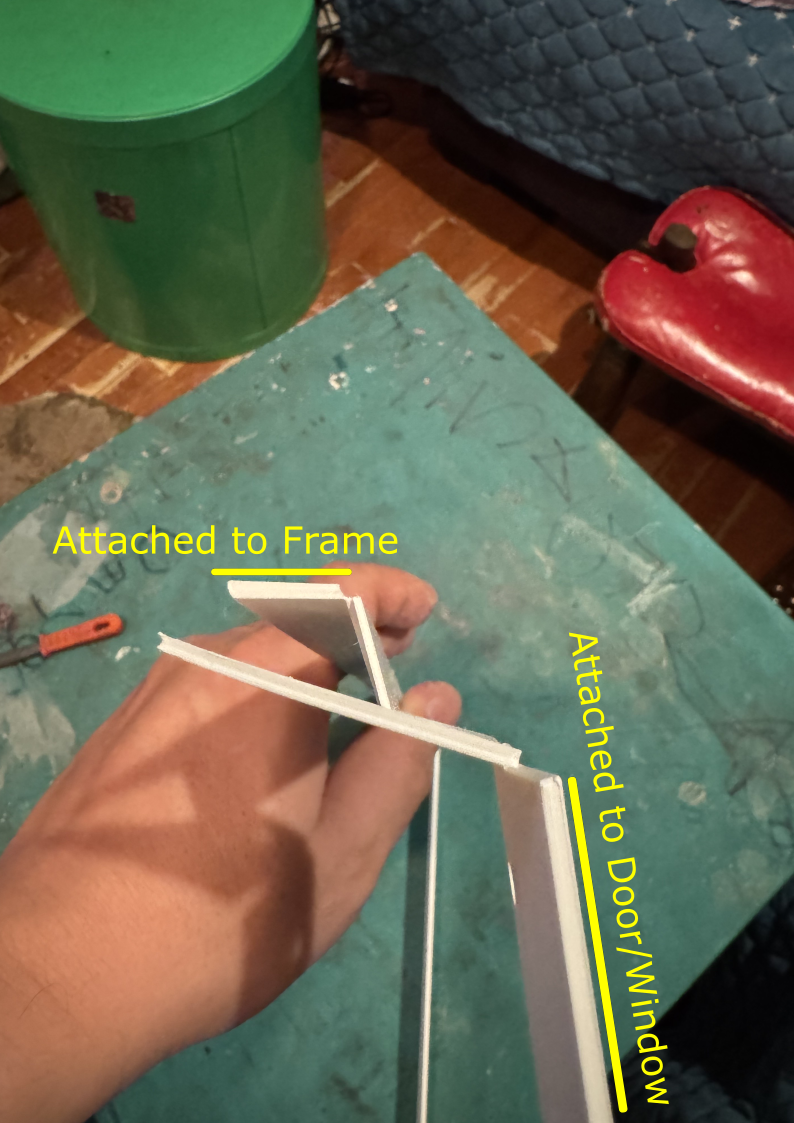
3. Next use double sided tape or flexible jewelry glue to attach the hinge/frame/seal to the door/window in these blue sections only.
4. Now attach with double sided tape or jewelry glue on this section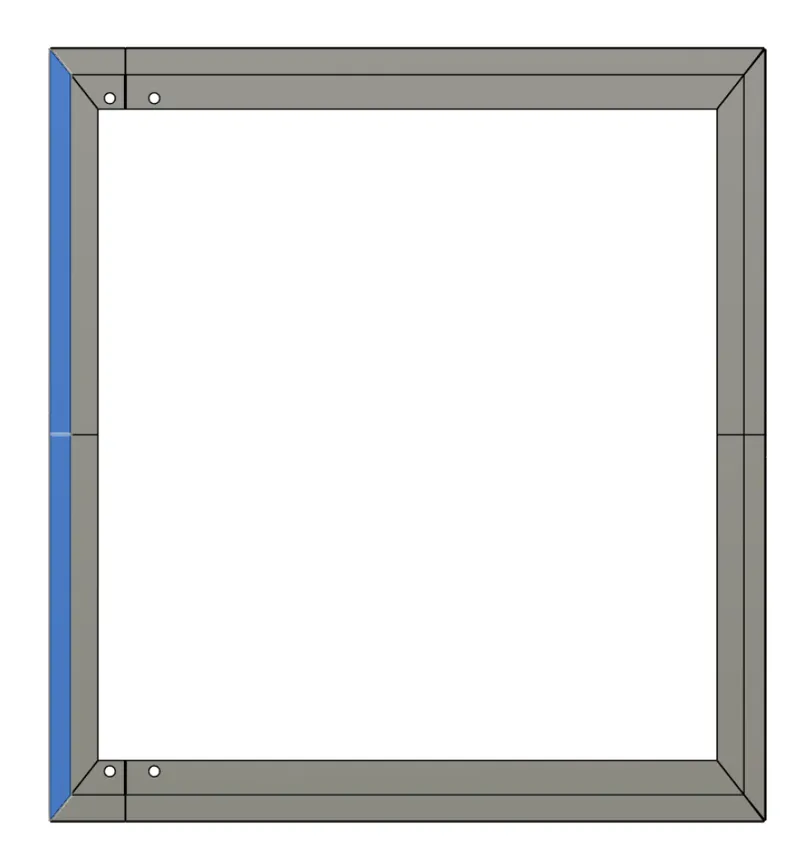
Once complete, the door should articulate like so
As always I've included the STEP file so you can make adjustments to your own needs, I'm not sure if I recommend printing from the step unless you seperate the objects BEFORE importing it into the slicer. there have been some cases, where it splits the model a bit too much, and where your fold and glue, becomes separate pieces.(but hey, that might work for some folks)
Tags
Model origin
The author marked this model as their own original creation.