Complete 3D Printer Test-Models

Description
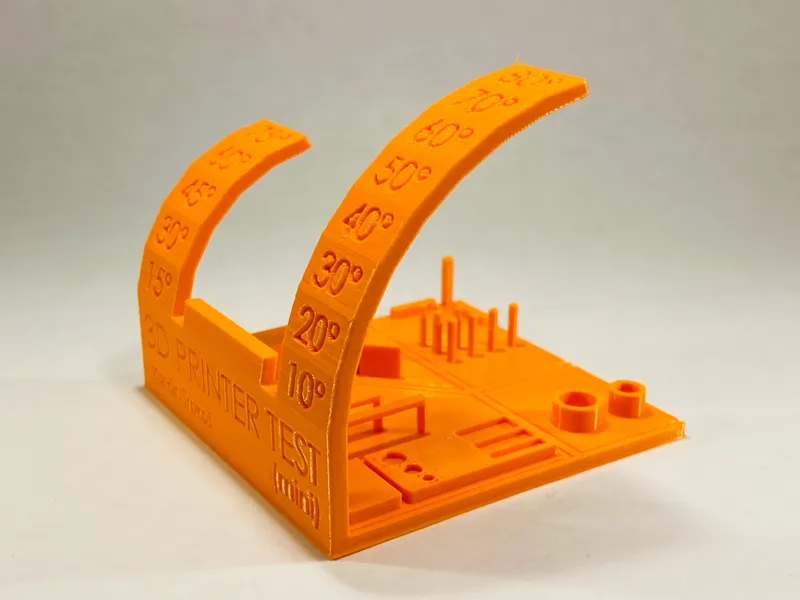
PDFThis Combination of Several Test Print Patterns Will Save a lot of Time Tuning your Printer.
You can choose between two variants:
1.) A slightly remixed version of the original model (e.g. now including a squasing test) I made for more intense testing.
or
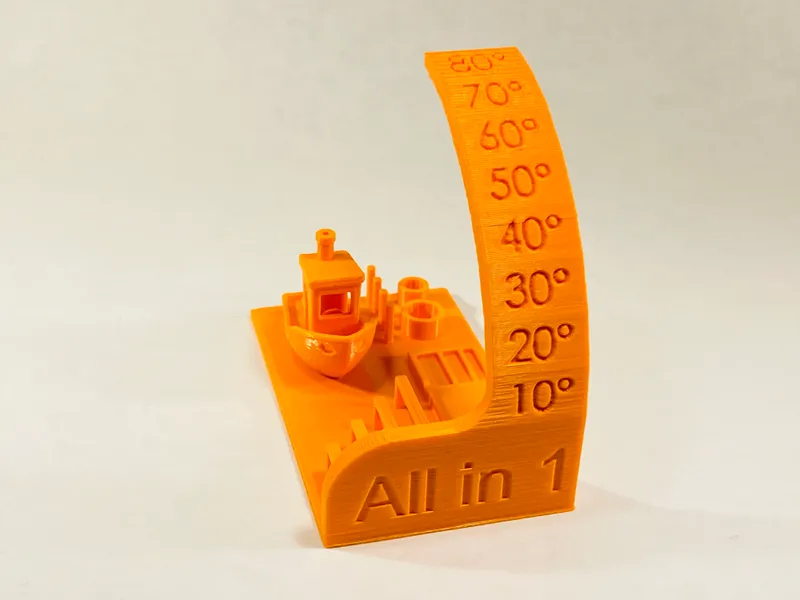
2.) A heavily modified variant of this model which I designed to better suit my needs and prints way quicker including a 50% benchy!
As for me I use these designs on a regular basis to test for
- bridging
- stringing
- dimensional accuracy
- overhang performance
- cooling performance
- general small feature, embossed letters and first layer performance
and so on.
Especially on new machines or after I carried out modifications / using new filaments these model are very useful and efficient to reveal existing issues.
Printing Recommendations: 0.2 mm layer hight, no supports needed,
100 % infill, 3 perimeters.
Tipp: Enable "Detect thin perimeters" in Prusa slicer for best results.
(“Print settings” -> "Layers and perimeters").
Tipp: This is by purpose a quite comprehensive test.
For a very quick test / overview you might want to print the 20mm XYZ-Cube instead.
Hope you enjoy using the models as much as I do.
Happy printing!
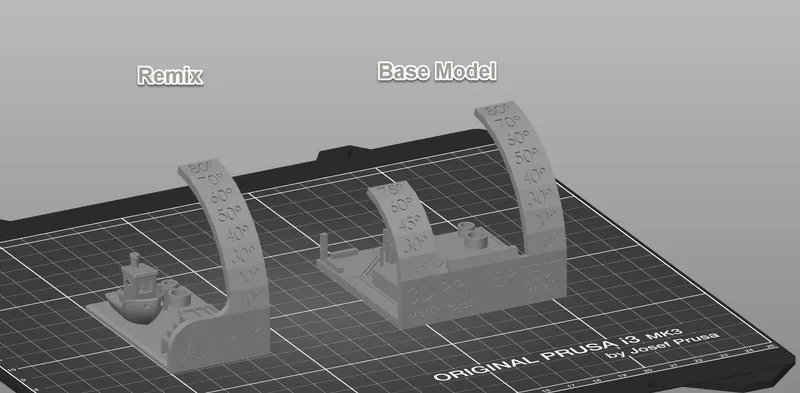
Remix Documentation:
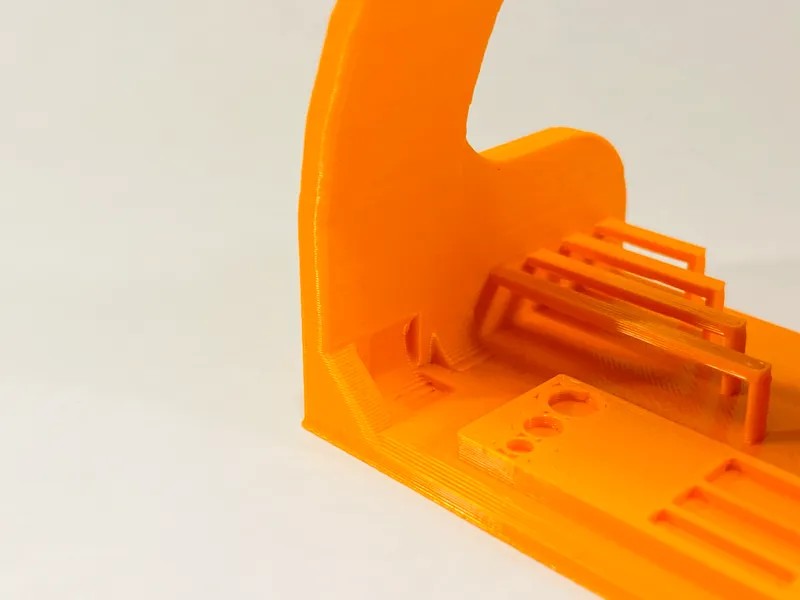
I've made significant changes to the base model like for example a complete realocation of test patterns and included a 50% Benchy boat. (https://www.3dbenchy.com/ by creative tools). Also new patterns like fillet and champfer tests were included.
See picture below for Remix Documenation:
Here're some examples for test-patterns included in these models and tipps for improving your printers performance by oberserving print results:
1.) Overhang-Performance:
Overhangs arise from the common layer-by-layer approach in 3D printing.
The higher this test model gets, the more steep the overhang-angle will get.


Overhang performance is for example influenced by:
Cooling-Performance → Better cooling = better overhang performance
Print speed → Slower speed = usually better overhang performance
(Especially for small features you might want to have a closer look at a variable called "minimum layer time")
Nozzle temperature → lower temperature = better overhang performance
2.) Stringing-Test:
Stringing (otherwise known as oozing, whiskers, or “hairy” prints) occurs when small strings of plastic are left behind on a 3D printed model.
With this test pattern of quite small towers side by side, your printer is forced to carry out a lot of filament retractions. Use this small features to check or tune these settings.


Stringing performance is for example influenced by:
Retraction settings → usually defined by retraction speed and distance you may vary these parameters. For Mk3S a viable starting point is 0.8mm @ 35mm/s retraction speed (PLA).
Movement speed → when moving around the build plate without extruding, most extruders show oozing as a root cause for stinging. Try to increase movement speed while lowering print temperature to reduce stringing. But be aware of the fact that higher movement speeds may intruduce side effecty like ringing/ghosting.
3.) Bridging-Performance:
Basically when bridging, your printer is extruding right into the air without any support material below! Here's when cooling and filament-flow settings are most important.
Use this bridging test to challenge your printers mid-air-printing performance.

Bridging performance is for example influenced by:
Cooling-Performance → better cooling = general better bridging performance
Print speed → Slower speed = usually better bridging performance
(as it helps with quick cooling)
Nozzle temperature → lower temperature = better bridging performance
Filament-Flow → slightly decreasing filament flow while bridging will help with quicker material cooling and better bridging-performance for this reason. Clearly when your general flow is tuned correctly you only want a lower flow while bridging. Therefore most slicers and also prusa slicer feature a parameter called “bridge flow ratio”. Try to lower this variable slightly to improve bridging performance if you face any issues.
Happy printing!
Tags
Model origin
The author remixed this model.