Bicycle Top tube bag magnetic clip

Description
PDFBicycle Top tube bag magnetic clip

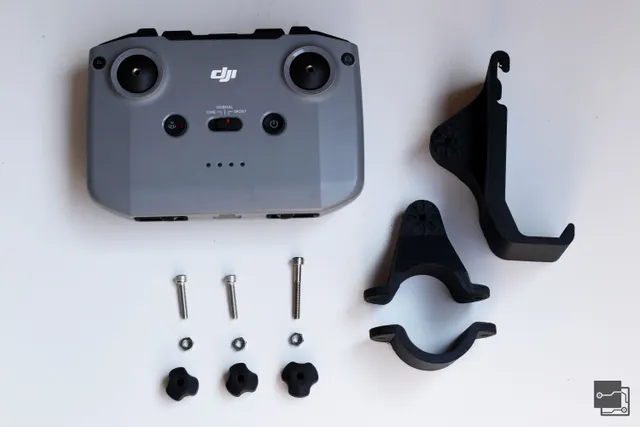
It's a 3 piece set to help mount bag on the top tube of a bicycle.

Why make it?
I wanted to be able to quickly remove the bag so I can use it as my wallet etc.
Bag came with many velcro strips but it takes too long to undo them.
These 3D printed pieces are to replace velcro strips for the bags bottom.


I printed two sets to mount around the alarm holder I have on the tube. One has 8 magnets per side while other has 6 magents. It's not very strong as it can fall off easily if touched or knocked down. But that only happens while carrying a bike or getting on/off it. It never fell off while cycling. I still use the velcro that attaches to the front.
Bag has a slot for hanging. 2 pieces are mounted on it and has some magents while other piece is mounted on the tube with a zip tie and also has some magnets.
Before printing measure your frame size and enter values into the spreadsheet.
Depending on the frame size it varies how many magnets you can fit in. Adjust the sketch if you want to have more magnets.
BOM

For single set
8x Magents 8x3
1x zip tie
3x 3D printed pieces
4x M2 x 6 Self-tapping screws
Assembly
Measure frame update values in the spreadsheet

Update Frame width and height. If the frame changes its shape then measure at the location where clip will be mounted. Front and back.

Then zip tie, and magnet size and length. Ensure length and scew clearance are larger than front/back width.

Update magnets sketch in both parts: frame_top, magnet_holder.

Slice it
Magnets are embedded with 3D printed pieces. Therefore stop needs to be inserted in the G-code.
In prusa slicer inserting stop it adds the stop at the beginning of the layer so it should be added at the instance where magnets are being covered.

Print and insert magnets. Make sure magnets polarity is right
Finish the prints.

Insert clip

Screw magnet holder

Insert zip tie


Mount on the frame

Install the bag


Latest files at Gitlab.
Tags
Model origin
The author marked this model as their own original creation.