E3D Revo Micro mount for Ultimaker Original - Return Of The Kraken
Description
PDFE3D Revo Micro mount for Ultimaker Original - Return Of The Kraken
Hardware required:
1. Up to 4x Revo Micro hotends (more than 2x will require board upgrade or additional MCU like RAMPS if using Klipper firmware)
2. Same ammount of 1.75mm filament extruders and mounts for the frame
3. M3 screws or M3 threaded rod cut to size and extra nuts to enable locking, if screws then you will need the folowing:
*2x M3 55mm or 60mm (max) in not tapping but drilling through and using nuts.
*2x M3 90mm if using original heatsink
*2x 6mm M3 spacers or stack of washers or nuts to achieve 6mm introduced difference.
How to upgrade:
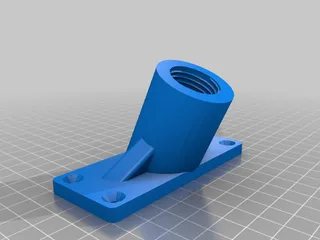
1. Print 2x instances of attached STL (could do only with the bottom one if installing up to 2x E3D Revo Micro hotends but challenging with cable path at the top and requires disassembly of the original harness)
2. To remove whole hotend+extruder harness undo 4x vertical thumb screws, remove 4x hex head "core locking" screws, pop 4x sides open to remove whole harness.
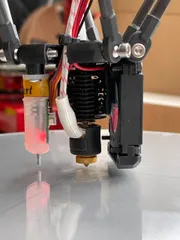
3. To install E3D Revo Micro's:
*screw in the heatsinks
*guide cables through the center
*screw back 4x hex "core locking" screws
*secure with 2x M3 55mm if tapping or M3 60mm max if drilled and nut at the end
*secure heatsink side with 2x M3 90mm screws with 6mm spacer or washers in between the base and the fan
*adjust Z endstop to accommodate increased 6mm Z height
Warnings:
1. Some Ultimakers (including my one) will require additional modification of the core panels to install 4x E3D Revo Micro's
2. 4x hotends require board upgrade or additional MCU like RAMPS if using Klipper Firmware
3. If pretapping M12 1.5 be gentle, don't take away too much of a plastic, stiff thread is essential for the leveling nozzle height if in multi hotend setup
To Do:
1. Redesign top part - same part as the bottom one works ok but might be too tight if 4x E3D Revo Micro's are installed, also I like to have strain relief post instead of relying on bowden tube.
2.
Tags
Model origin
The author marked this model as their own original creation.


