One-handed DualSense

Description
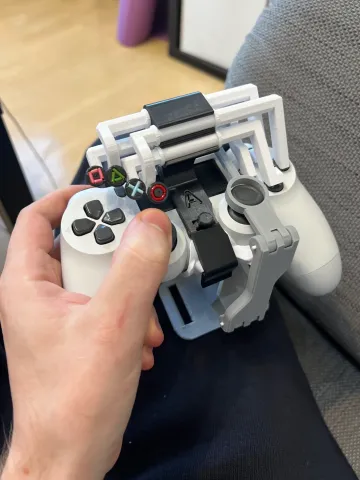
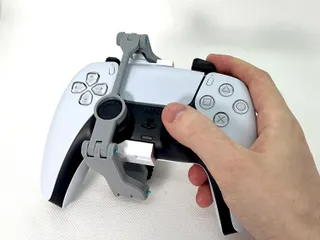
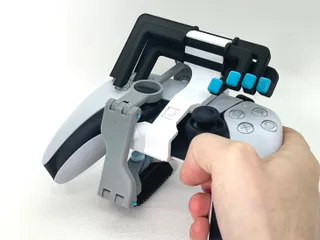
PDFSnap this onto your DualSense and you've got an all-right controller!
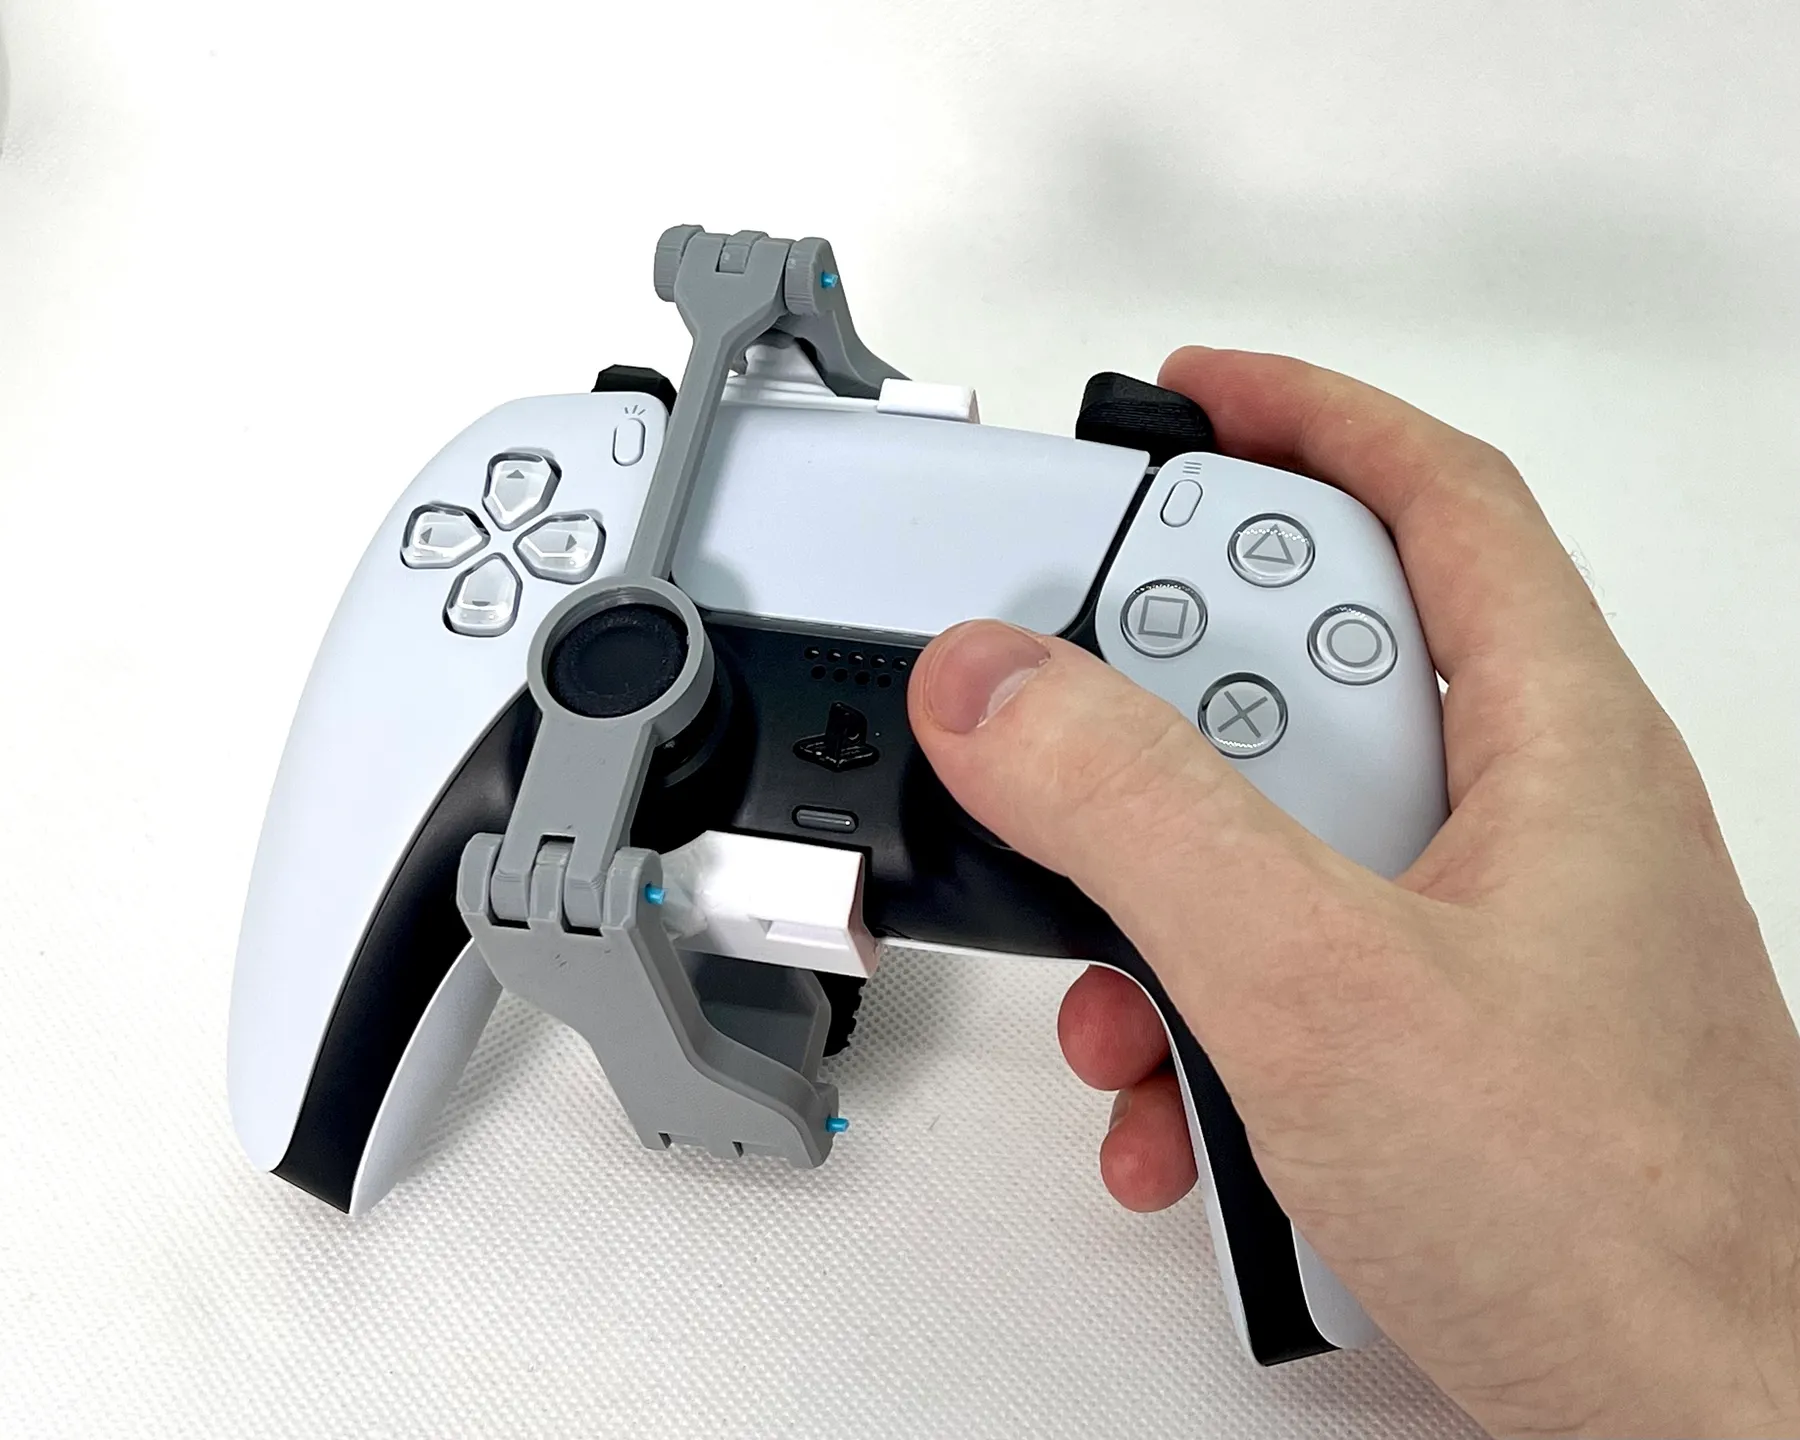
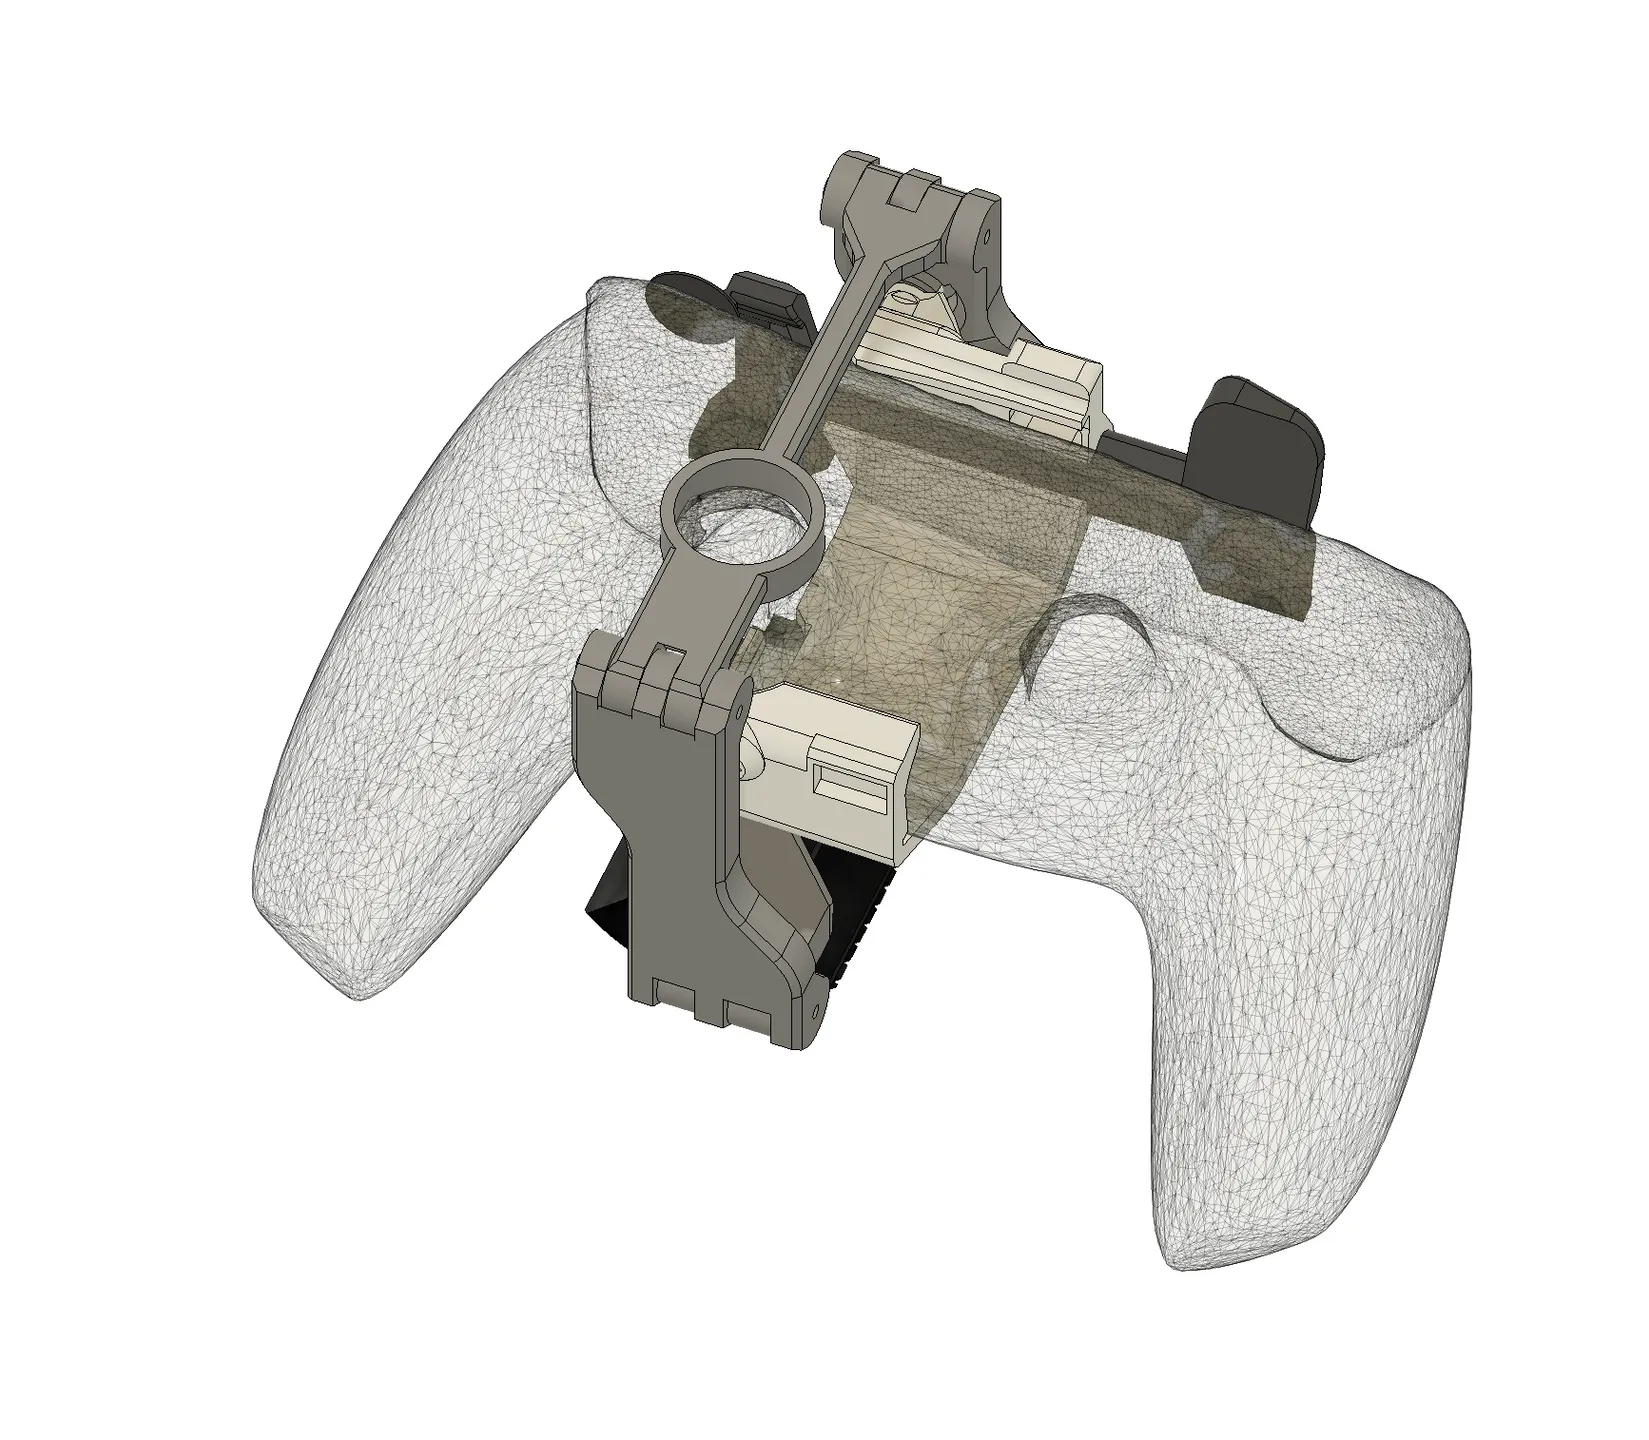
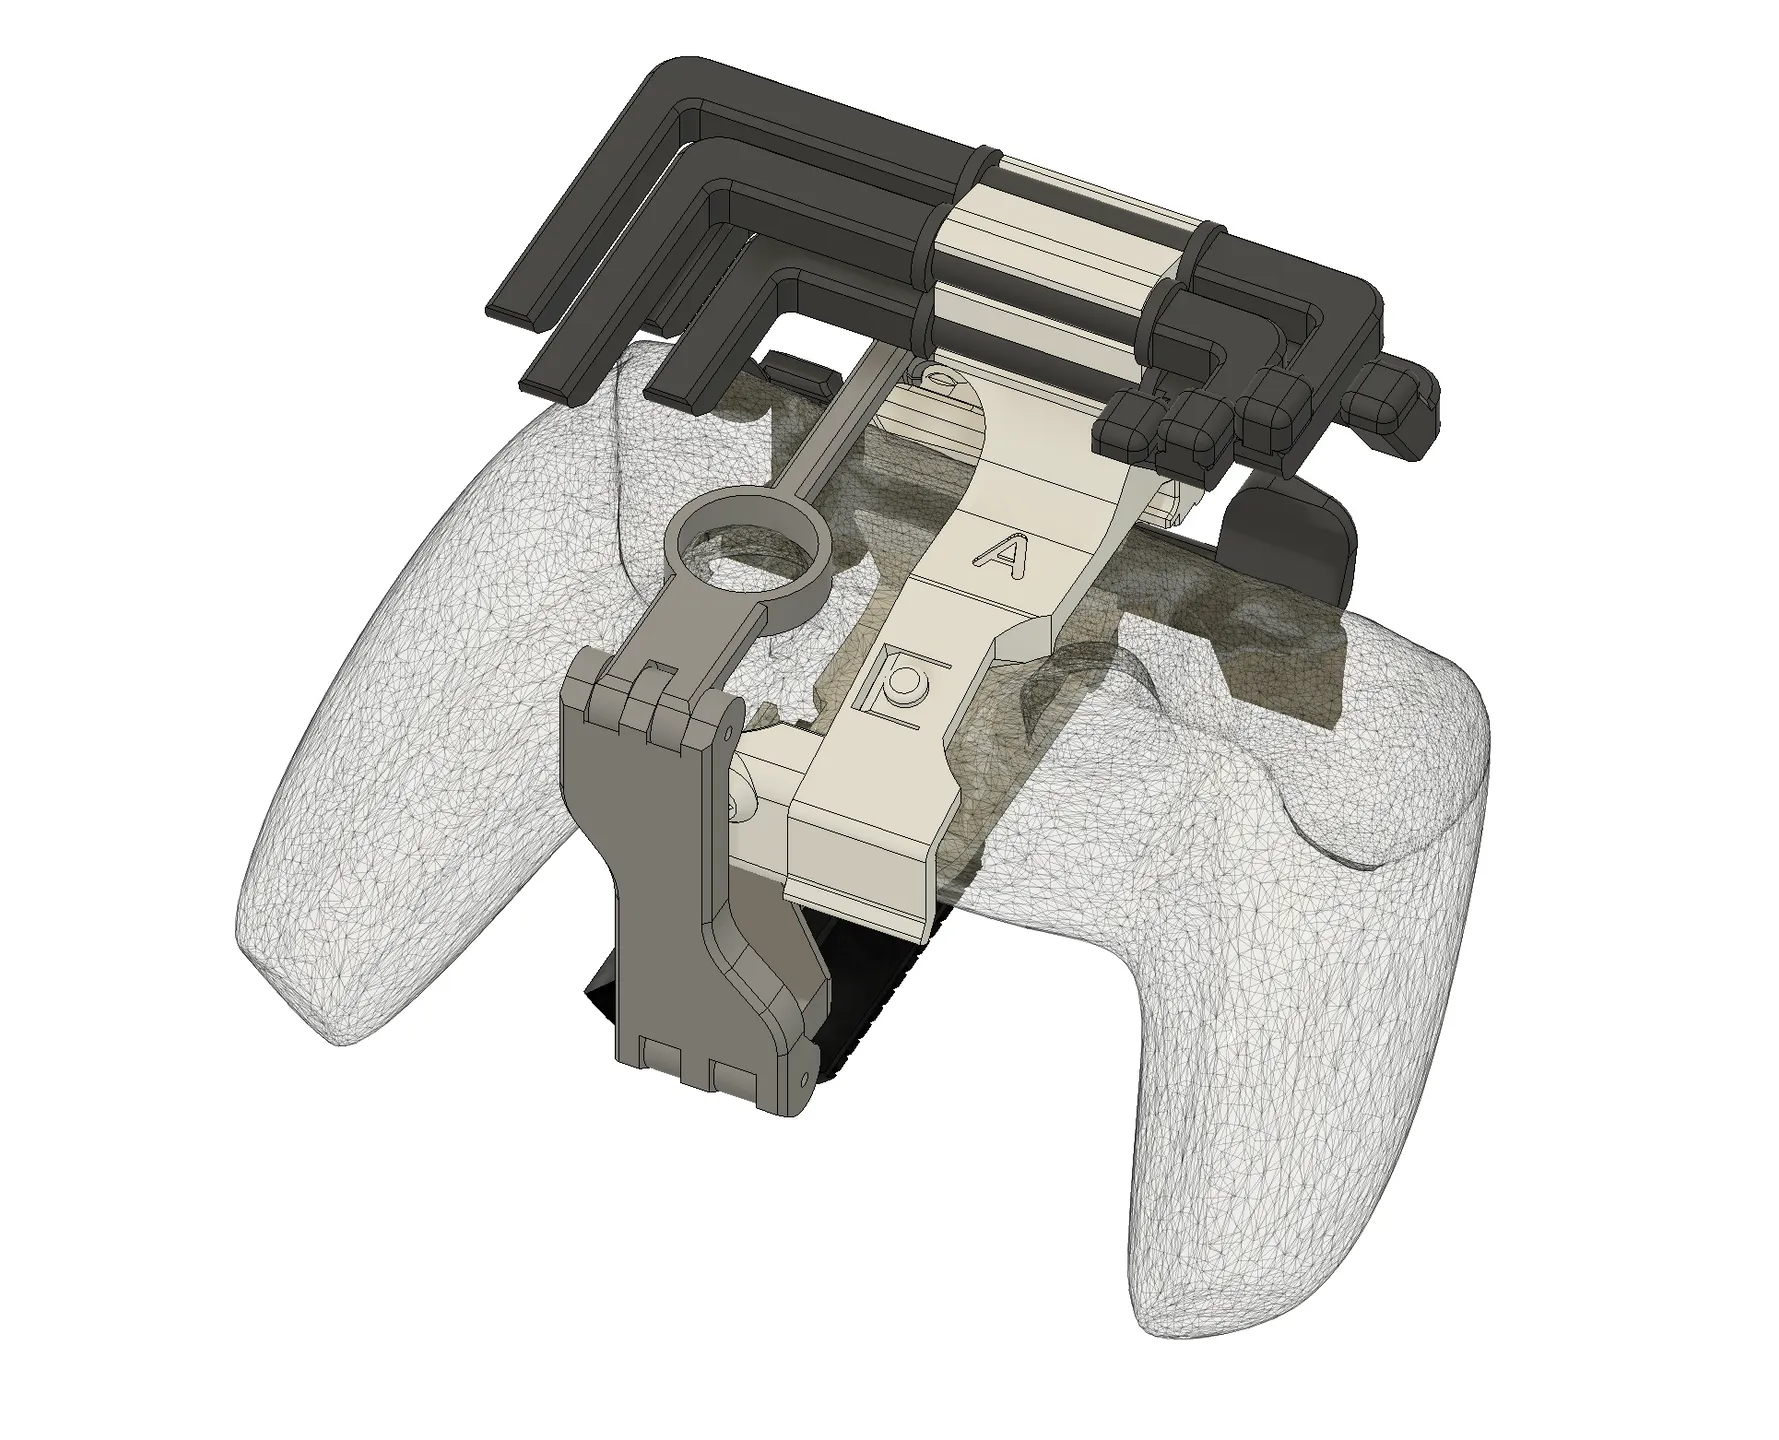
The thumbstick is controller by moving the whole controller. Rest the controller on your lap or the table, and move it around. Its motions are transmitted to the thumbstick. There is a 4-to-1 mechanical advantage going on, so you can get good precision even with rougher motions.
The rubber shoe that the device rests on is designed so you can balance the whole controller on top of it, so as not to tire your wrist. If you place it on your lap, you can feel side-to-side input as a rolling motion, and up-and-down input as a dragging motion, giving you good feedback as to where the two separate axes are.
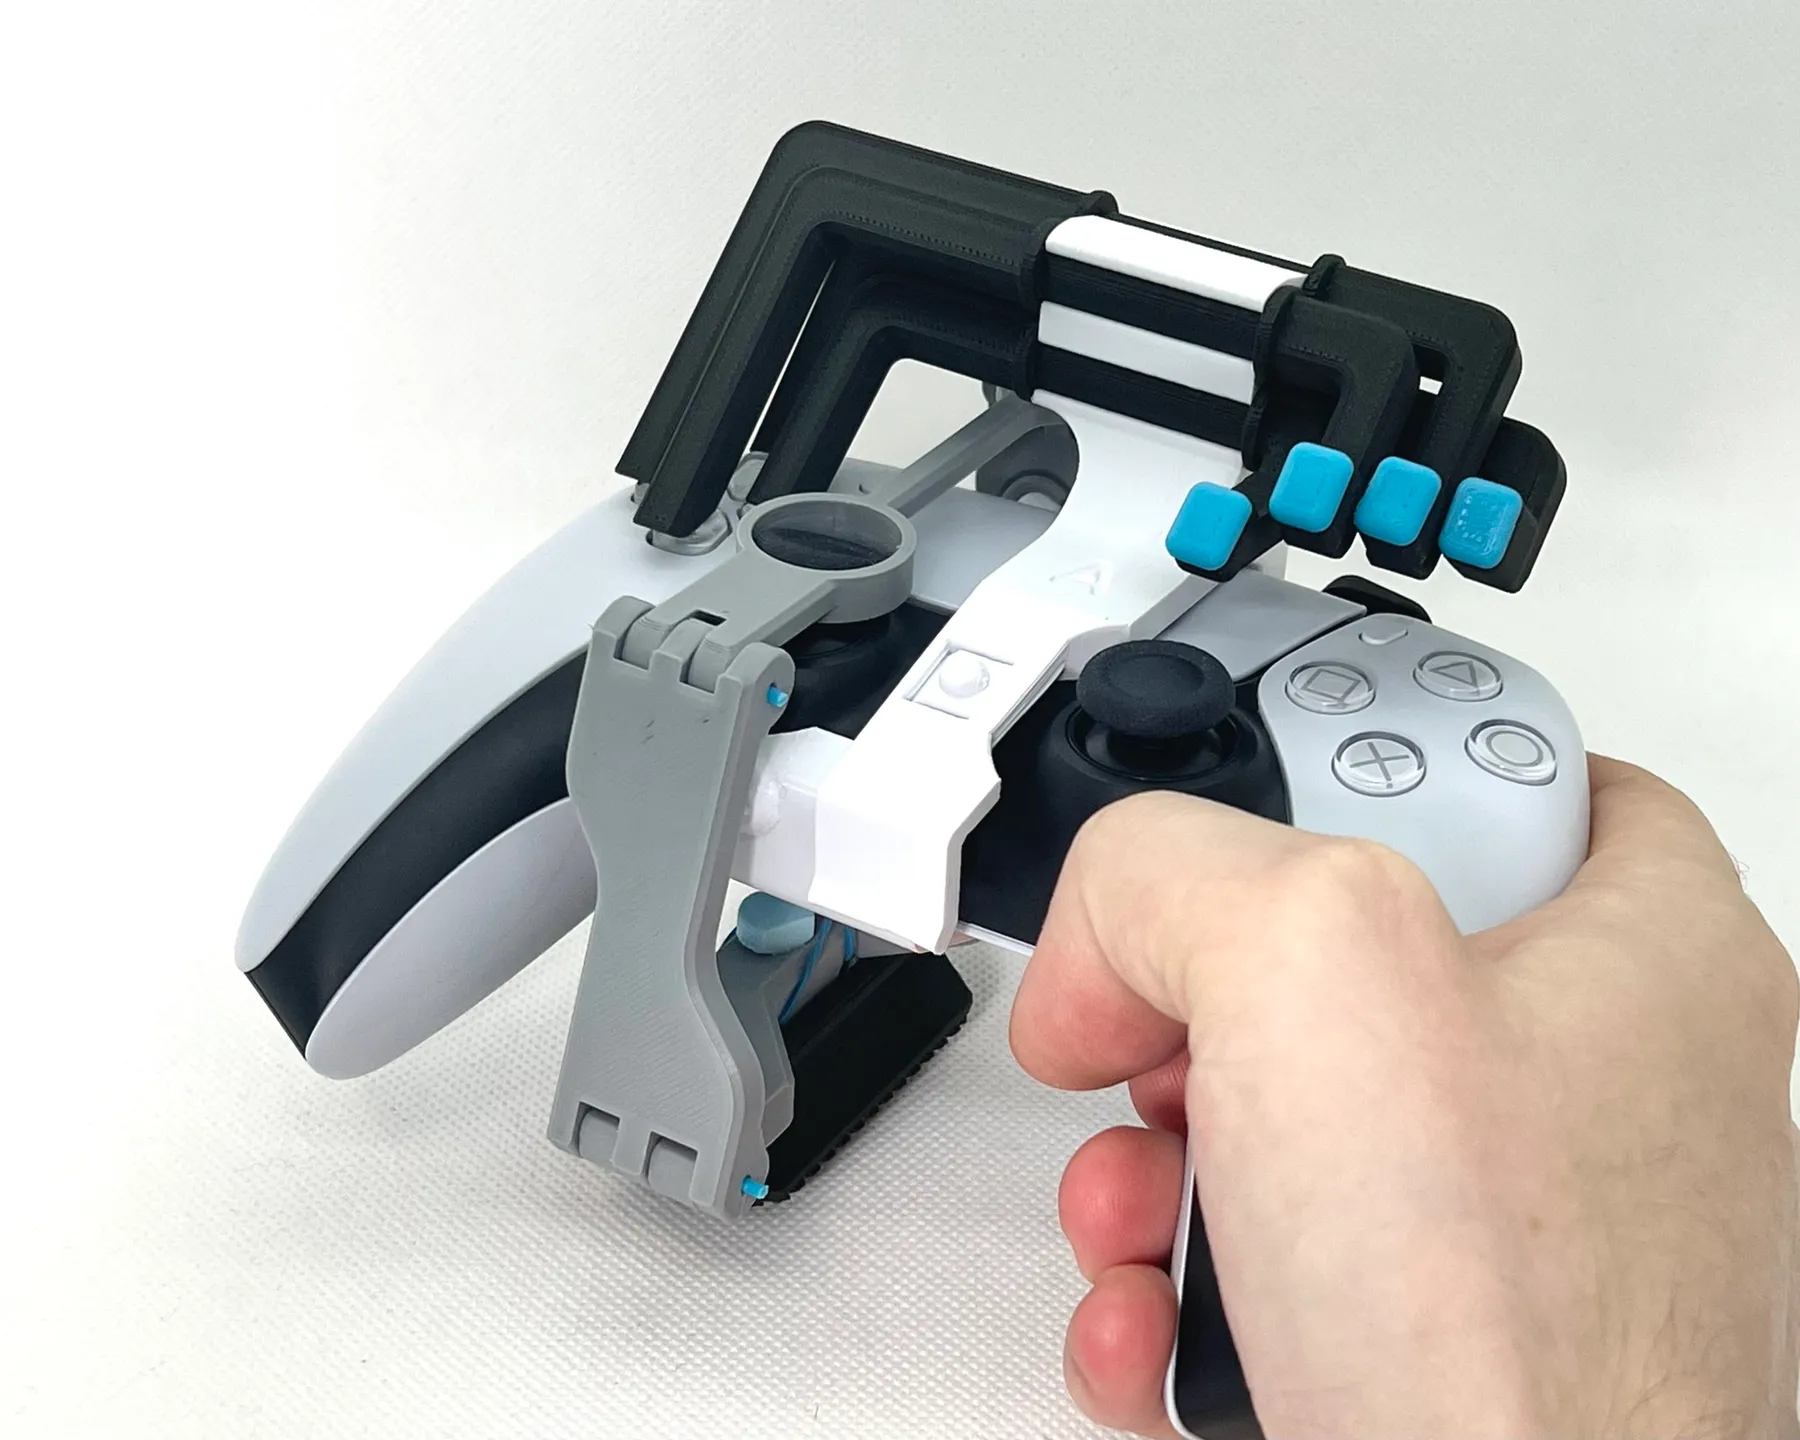
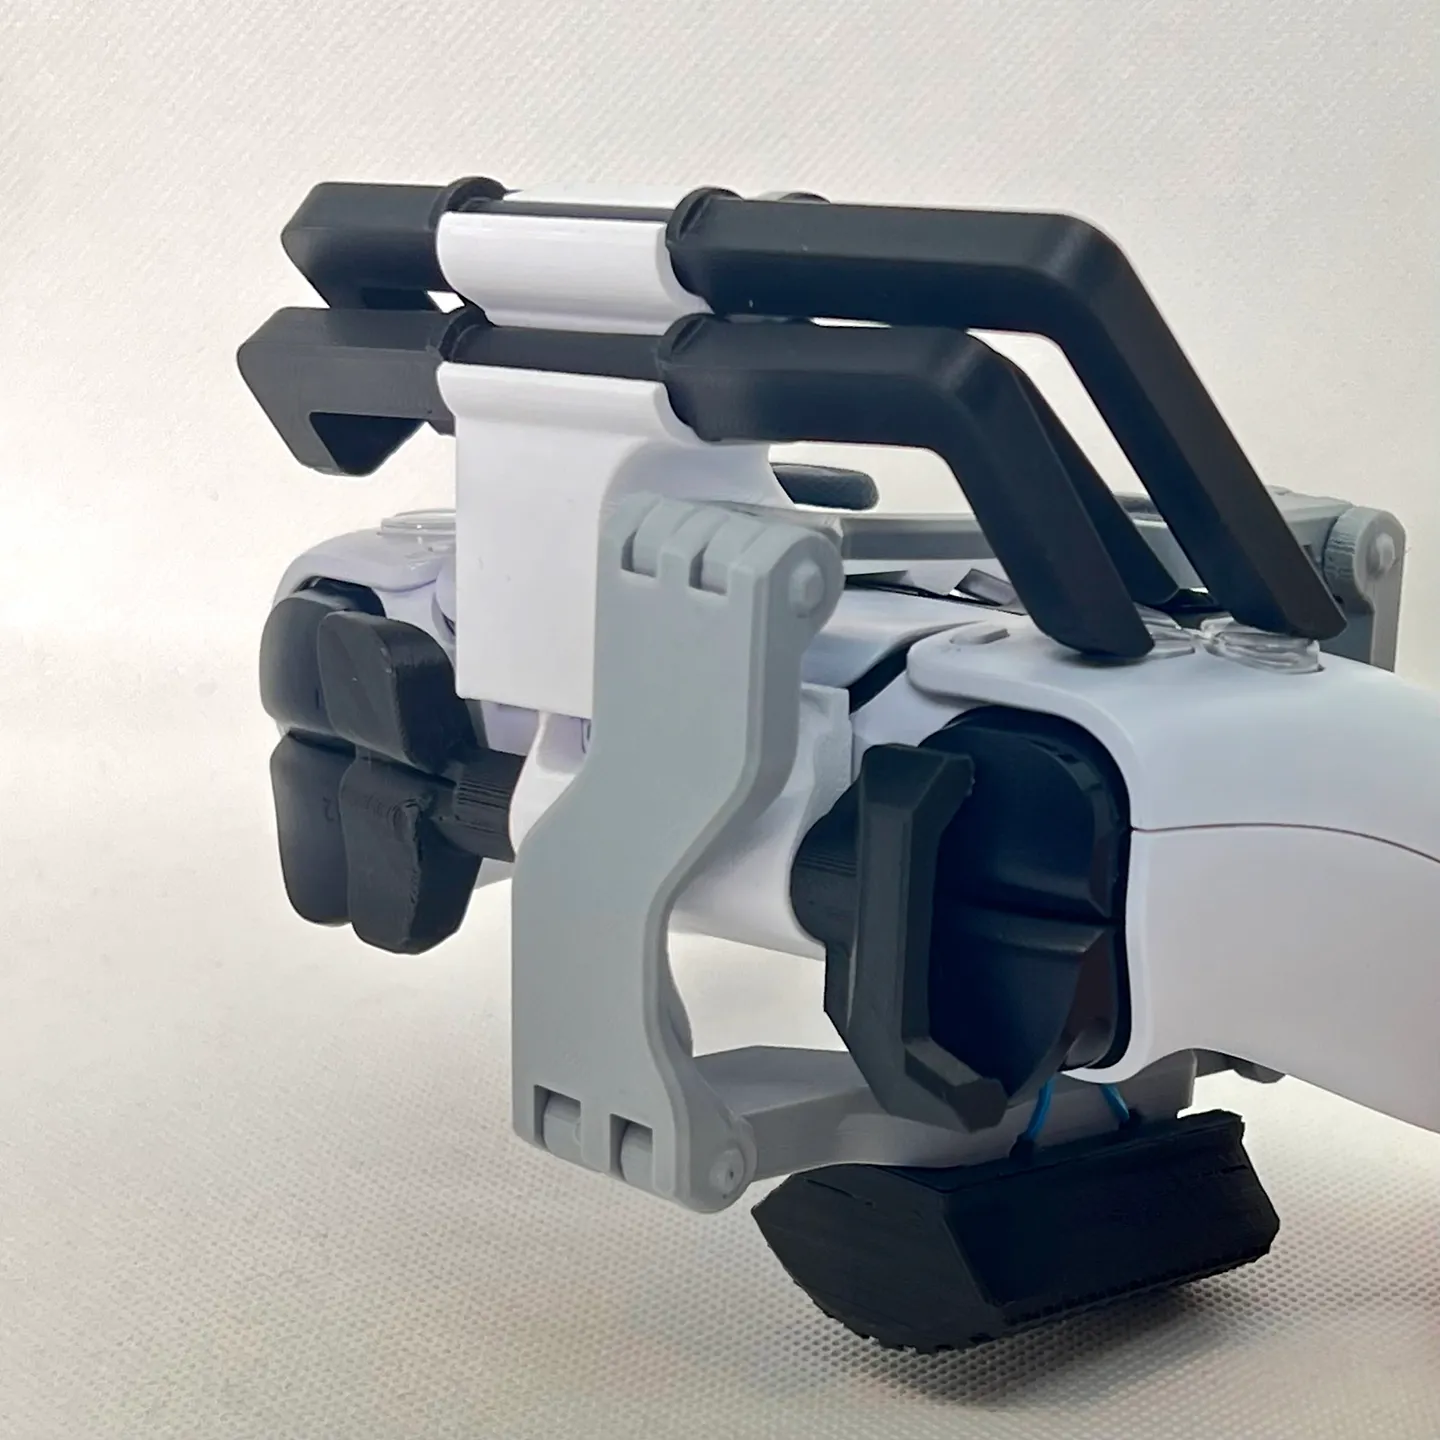
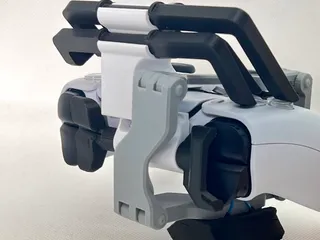
The shoulder buttons are migrated over to the other side, where you can use your index finger to push all four. They're placed so that pushing L2 and R2 simultaneously is possible (many games use L2 for aim + R2 to shoot, for instance).
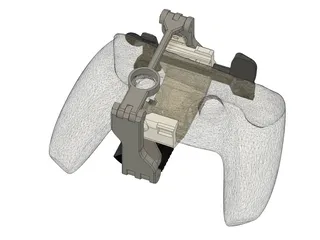
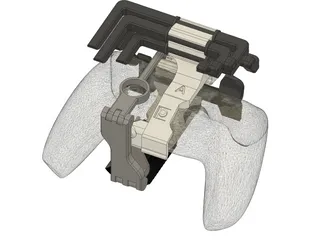
Four linkages push on the opposite face buttons. This piece is a bit unwieldy, so it is optional. You can leave it off if the game doesn't require pushing the face buttons regularly.
The DualSense is symmetric, so to make a left-hand controller, print the pieces mirrored.
All pieces print without supports. I used PLA for all pieces, except the shoe piece, where I used flexible TPU for more grip. If you print the shoe in PLA, add a bunch of rubber bands around it to add grip.
To assemble the device:
- Use short pieces of raw filament to create the four hinges for the stick-moving linkage. They tend to stay in, but you could add a drop of CA glue to the end of the filament piece to secure them in place.
- Snap the linkage onto the ball joints in the controller mount.
- Optionally, add a rubber band around the hooks at the bottom, to add centering to the stick motion.
- Slide the rubber shoe onto the bottom linkage, and secure it in place with raw filament.
- Snap the shoulder button pusher's shaft onto the mount piece. Confirm that the shaft turns freely.
- Slide the controller on. It goes in the best if you make sure the little nub fits in the headphone port on the front of the controller first, and then snap the back side on.
- Stretch the stick-mover linkage on the face of the controller, and hook it in with the rear link.
Optionally:
- Snap the four face button pushers into their corresponding slots in the mount, according to the photos.
- Snap the face button pusher mount onto the device.
- Use another piece of filament to form the hinge in the leg mount. Attach it to the device with yet another piece of filament, in place of the rubber shoe.
- To decorate the buttons, add colored pieces of filament into the slots in the XO口Δ button faces. Cut the away from the runners and CA glue them onto the button pusher sticks. Make sure the buttons don't interfere with each other when positioning them.
Version history:
1.0 Original version, as shown in the photos and the YouTube video
1.1 2022/01/30 Added optional button face decorations. Added leg strap. Rubber shoe and leg strap attaches with a piece of filament instead of the peg. Better fit for all pieces. Labels for button pushers. Better Home button pusher. Larger hole for charging cable.
1.2 2022/04/15 Added a button for L3/R3
Leave a tip if you find this helpful: https://paypal.me/akakikuumeri
You can buy one assembled here https://www.etsy.com/listing/1169870655/one-handed-dualsense-attachment
Tags
Model origin
The author marked this model as their own original creation.