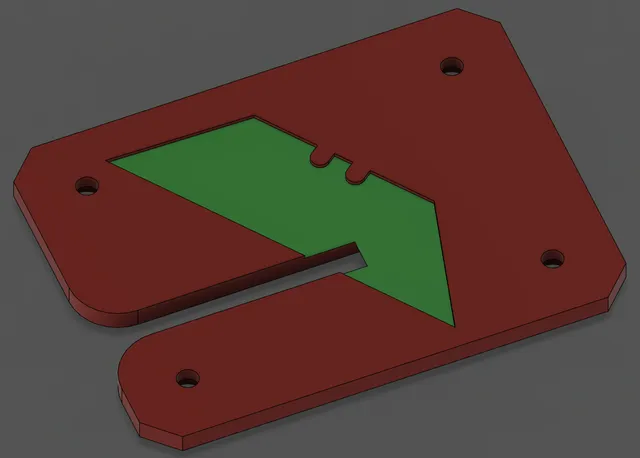
Anycubic Kobra Go motherboard enclosure

Popis
PDFEDIT 4/14/2023: Added 40mm and 60mm fan covers upon request.
EDIT 3/16/2022: Added printer.cfg for klipper with skr mini e3v3 for the Kobra Go.
- Change the MCU ID
- Change x/y probe offsets, mine are for the frankenstein duct remix (available on my page)
- Change bed mesh info, again mine are for the frankenstein duct.
- Change gcode storage location
This config is a neutered version of mine with a few small changes. I have not messed a whole lot with the velocity/accel for getting quick yet quality print as I don't use this printer a lot. I downed the max_velocity from 275 to 250 for this copy, as well as max_accel from 2500 to 2200. Feel free to adjust these when messing around with it. I removed my input shaper settings, a few test options I was using, firmware retraction, and some temp sensors.
I personally am using Fluidd while others like Mainsail. Whatever you go with should be fine.
I would recommend grabbing a fresh image for your pi/knock-off pi instead of using something such as fluiddpi or mainsailos and use Kiauh to install klipper, moonraker, and fluidd/mainsail. This would result in a potentially more up to date and more stable OS.
**Please do a PID tune on the hotend and bed, a bed mesh, and a probe calibration before attempting to start a print!! Also don't forget to modify your start gcode to include “BED_MESH_PROFILE LOAD=default”**
Feel free to shoot me a PM if you need some assistance with any of this and I can hopefully help or point you in the right direction.
__________________________________________
Made this enclosure to throw an skr mini e3 v3 into the Kobra Go. It's not a straight forward swap as you'll need to re-pin some connectors and add a BAT85 diode on the probe sensor wire. I will work on making a guide for this if there's interest.
Mounts via 4 m5x8 bolts and 4 m5 t-nuts.
I have not printed this updated revision, however it should work with the changes from the pictured one.
Tutorial:
*This is for an SKR mini e3 v3*
*I do not, and do not plan on making a Marlin firmware file for this*
*This is for using as much of the stock hardware as possible. If using a bltouch, you can eliminate the ABL sensor and Optical Z endstop to avoid a lot of this*
*I have not tried the stock Kobra Go screen with Klipper, I highly doubt it will work. You should be able to use a normal ender3 style screen which can be had cheap, run klipper screen on a nicer bigger touch screen, or run headless, which is what I do.*
Tip: The holes for mounting the motherboard and enclosure lid are tight. I used a lighter to heat up a screw and thread the holes individually before mounting anything.
Put ferrules on PSU to motherboard wires, hot end heater wire
Put ferrules on psu to motherboard wires.
Put ferrules on hotend heater wires. (cut off stock connector)
Put ferrules on bed heater wires.
These were all different sized ferrules, but your kit should have all the necessary ones.
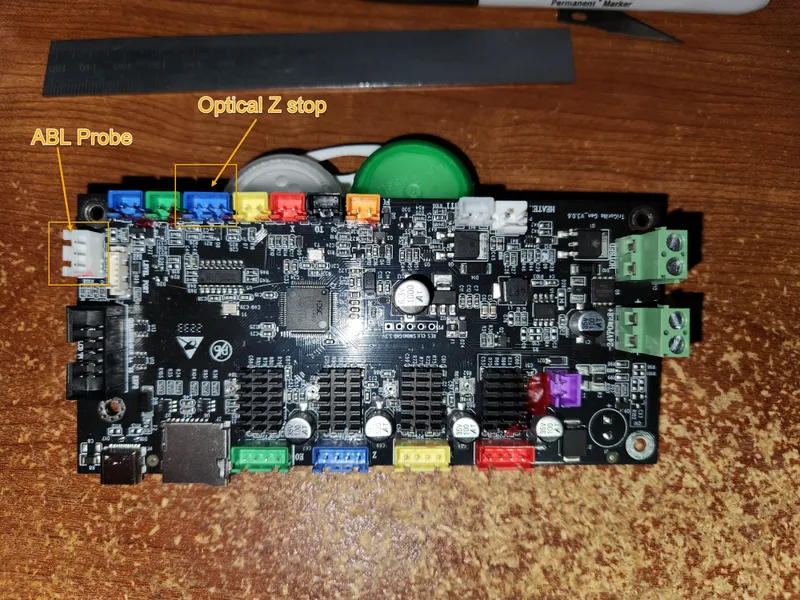
Identify ABL sensor/probe wiring
Identify optical end stop wiring
using a 5 pin JST-XH connector, follow the picture diagrams making sure you use the correct wires (mark them how you'd like using the bottom of the stock motherbaord for reference)
1 being closest to the stepper motor wires & heatsink, 5 is closest to the end stop wiring for this guide
1 - Optical Z stop S/signal wire (PC14)
2 - Optical Z stop GND
3 - ABL Sensor wire (PA1) WITH BAT85 diode. If you do not use this, you will most likely fry the MCU
4 - empty
5 - ABL Sensor GND
Use a dupont style connector for the 3.3v wire for the Optical Z sensor. This will go to the SPI1 header 3.3v pin. I would highly recommend a dab of hot glue on this one as it's very easy to come loose.
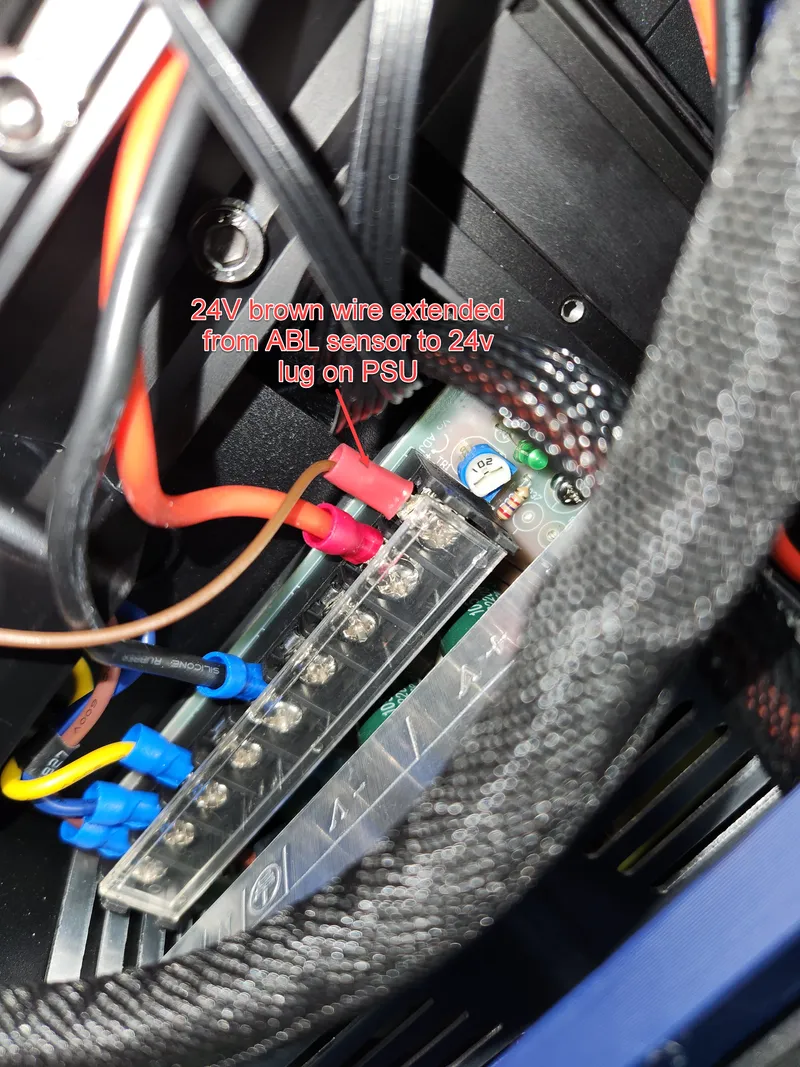
Lastly, the brown 24v wire to the probe, extend that and put a ring or fork connector on it, and run it directly to the PSU's 24v spare lug
I do have a very short extension on the bed thermistor, I don't know if this is still necessary or not. I think you should be able to make it work without extending it.
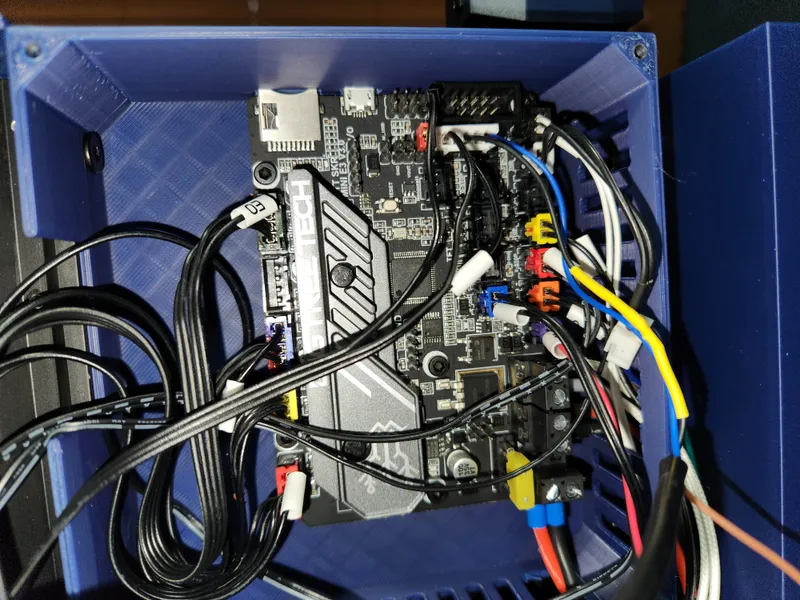
Once the wiring is complete, connect up your pi or pi alternative, build the firmware for the SKR mini e3 v3 (or whatever board you're using) and flash the board. I will be including my klipper printer.cfg shortly. I just need to clean it up a little bit first.
Below are some pictures of the points you'll be needing to pay attention to.
Stock board Optical Z stop and ABL ports
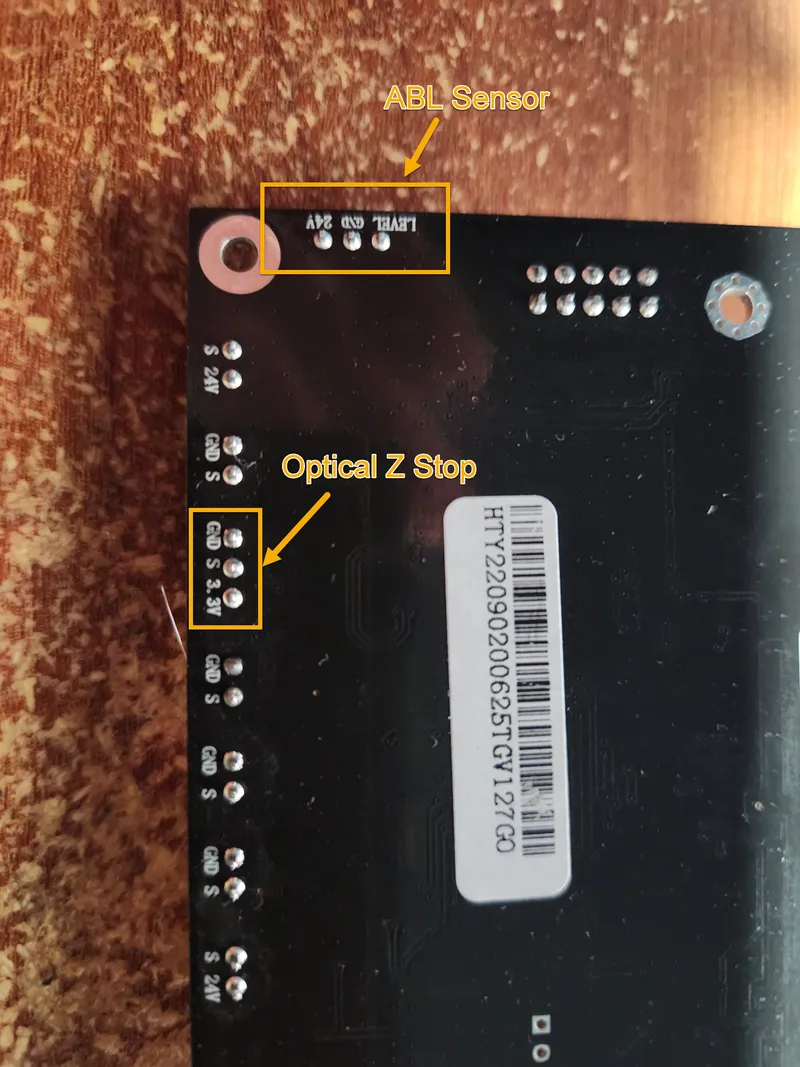
Back of stock motherboard showing the stock pinouts
Modified Z probe port wiring.

General view of the wiring.
Extended wire from ABL probe to PSU power lug.
Štítky
Původ modelu
Uživatel se označil za původního autora tohoto modelu.